For many, growing cannabis from seeds indoors starts as a practical project but quickly becomes a deeply engaging passion. It's a hobby that connects you to the natural rhythm of a plant's life, offering a rewarding sense of accomplishment at every stage. From the initial excitement of designing your perfect grow space to the daily ritual of tending to your plants and watching them flourish, the process itself is just as satisfying as the final harvest. This guide embraces that journey. We'll provide all the technical know-how you need, but we'll also celebrate the craft of cultivation. Let's get you set up with a foundation of knowledge so you can relax and enjoy the simple, profound pleasure of growing your own.
Key Takeaways
- Your Setup Determines Your Success: Getting your environment right before you plant is the most important step. A stable grow space with proper lighting, consistent temperature and humidity, and good airflow prevents the majority of common growing problems from ever starting.
- Follow the Plant's Lead Through Each Growth Stage: A plant's needs change dramatically from seedling to harvest. Learn to recognize each phase so you can provide the right light schedule, water, and nutrients at the right time, like switching to a 12/12 light cycle to initiate flowering.
- Patience Is the Key to Quality: Rushing is the enemy of a great harvest. This applies to everything from letting the soil dry out between waterings to taking the time to properly dry and cure your buds—this final step is what truly develops their flavor, potency, and smoothness.
Your Indoor Grow Room Checklist
Before you pop your first seed, let's get your grow space dialed in. Creating the right environment is the single most important thing you can do to ensure a healthy, heavy harvest. Think of it as building a perfect little home for your plants where they have everything they need to thrive. You don't need a massive budget or a dedicated room to get started, but you do need a few key pieces of equipment. Getting your setup right from the beginning saves you a ton of headaches later on.
This checklist covers the absolute essentials for your indoor grow room. We’ll walk through the four pillars of a great setup: lights, climate control, containers, and nutrients. With these items in place, you’ll be ready to provide a stable and nurturing environment for your plants, from tiny seedlings to full, flowering beauties. Let’s get your shopping list sorted out so you can move on to the fun part—growing.
Lights
Light is your plant's food. Without enough of it, your plants will be weak and your yields will be disappointing. For beginners, I always recommend starting with LED grow lights. They’re incredibly energy-efficient, they don’t produce a lot of heat (which helps with climate control), and they are simple to set up. As a general rule, you should aim for around 100 watts per plant to give them the energy they need for vigorous growth. Choosing the right indoor cannabis seeds is the first step, but giving them high-quality light is what will truly make them flourish. Your lights are your garden's sun, so it's one area where you don't want to cut corners.
Climate Control
Your grow space is a self-contained ecosystem, and you're in charge of the weather. Optimizing temperature, humidity, and airflow is crucial to maximize yields and maintain plant health. At a minimum, you’ll need a thermometer/hygrometer to monitor the conditions and a small oscillating fan to keep air moving. Good air circulation prevents stale, humid pockets where mold and pests can thrive, and it also helps strengthen your plants' stems. Keeping your climate stable means your plants can focus all their energy on growing big and strong, rather than just trying to survive. It’s a simple step that makes a huge difference in the final product.
Pots and Grow Medium
Your plants need a home for their roots, and that starts with the right pot and growing medium. For first-time growers, I suggest using a high-quality commercial potting soil. Please, do not use dirt from your backyard—it’s often too dense, can contain pests, and lacks the right nutrients. For a personal grow, a 5-gallon fabric pot is a great starting point, as it allows for excellent drainage and aeration for the roots. If you're growing autoflower seeds, which tend to stay more compact, this size is often perfect. The medium is the foundation of your plant’s life, providing support, water, and nutrients.
Nutrients and pH Testers
While your seeds contain a small amount of food to get started, they’ll need more once their first true leaves appear. This is when you’ll start feeding them a complete cannabis fertilizer. Look for a nutrient line designed for cannabis and follow the feeding schedule, starting with a diluted solution to avoid burning your young plants. Just as important as the nutrients themselves is the pH of your water. If the pH is off, your plants can’t absorb the food you’re giving them, leading to deficiencies. A simple pH testing kit is an inexpensive and essential tool for any grower. Getting your feeding strategy right is key to growing any of our premium cannabis seeds.
Set Up Your Grow Space
This is where the fun really begins! Creating the perfect environment for your plants is one of the most satisfying parts of the process. Think of yourself as an architect designing a five-star resort for your future cannabis plants. A little planning now will save you a ton of trouble later and set you up for a successful harvest. Getting your space dialed in means controlling the climate, ensuring fresh air is moving, placing your lights correctly, and, most importantly, keeping everything safe and secure. Whether you’re using a closet, a tent, or a dedicated room, these core principles are the same.
Optimizing your grow space is the foundation for everything that follows. It’s how you maximize yields, maintain plant health, and ensure a consistent, high-quality product. Before you even think about popping a seed, take the time to get your setup right. This means having your lights, fans, and climate control tools in place and running a test to make sure everything works as it should. We'll walk through the big four—climate, air, light, and safety—to help you transform your empty space into a thriving indoor garden. Nailing these elements is the key to growing healthy, potent plants from your chosen indoor cannabis seeds.
Dial in Temperature and Humidity
Your cannabis plants are a bit like Goldilocks—they need conditions to be just right. Temperature and humidity are two of the most critical factors in your grow room. During the vegetative stage, your plants will thrive in warmer, more humid conditions, around 70-85°F with 40-60% humidity. As they move into the flowering stage, you’ll want to drop the temperature slightly to 65-80°F and lower the humidity to 40-50% to prevent mold on your developing buds. A simple digital thermometer/hygrometer will be your best friend here. It lets you monitor your environment at a glance so you can make adjustments with a humidifier, dehumidifier, or AC unit as needed.
Get the Air Flowing
Stagnant, still air is a recipe for disaster in a grow room. Proper air circulation is essential for strengthening your plants’ stems and preventing problems like mold, mildew, and pests from taking hold. You want to create a gentle breeze that rustles the leaves, not a windstorm that batters them. An oscillating fan or two placed strategically in your grow space will do the trick. You’ll also need an exhaust fan, ideally connected to a carbon filter, to pull hot, stale air out of the space and manage any odors. This constant exchange of air ensures your plants always have fresh CO2 to breathe, which is vital for photosynthesis and healthy growth.
Position Your Lights
Light is your plant’s primary food source, so getting your lighting setup right is non-negotiable. A common mistake for new growers is placing lights too close or too far from the canopy. As a general rule, you should hang your lights about 18-24 inches above your plants. However, this can vary widely depending on the type and wattage of your light, so always check the manufacturer's recommendation first. As your plants grow taller, you’ll need to raise the lights to maintain that optimal distance. This prevents light burn on the top leaves while ensuring the lower branches get enough energy to produce dense buds. It’s a simple adjustment that makes a huge difference in your final yield.
Grow Safely
This might be the least glamorous part of setting up, but it’s arguably the most important. First and foremost, understand your local laws. Before you start, always check your local city and county rules regarding home cultivation. Many areas have specific plant count limits or require growing to be done indoors in a locked, secure space. Beyond legality, think about physical safety. Keep your electrical setup clean and organized—avoid overloaded circuits and keep all wiring away from water. Use high-quality, certified equipment to reduce fire risk. A little bit of caution and common sense goes a long way in protecting you, your home, and your beautiful plants.
Start Your Cannabis Seeds
With your grow space ready, it's time for the most exciting part: bringing your plants to life. Starting from seed gives you complete control over your plant's journey from the very beginning. It all starts with germination, the process of waking up your seeds so they can sprout into healthy seedlings. Let's walk through the simple steps to get your seeds started on the right foot and set the stage for a thriving indoor garden.
Choose the Right Seeds
Before you even think about germination, you need to pick the right genetics for your indoor setup. The seeds you choose will determine everything from your plant's size and flowering time to its final potency and flavor. If you’re just starting out, autoflower seeds are a solid choice. They’re pretty low-maintenance because they don’t need specific light cycles to start flowering—they just grow and bloom based on their age. For more control, feminized seeds are a must for indoor growers, as they guarantee you’ll get bud-producing female plants instead of pollen-producing males. Taking a moment to select the right seeds sets you up for a successful harvest.
How to Germinate Your Seeds
Ready to get those seeds sprouting? The paper towel method is a classic for a reason—it’s simple and effective. First, lightly dampen a paper towel with distilled water, making sure it’s not soaking wet. Place your seeds on one half of the towel, leaving some space between them. Fold the other half over the seeds and place the entire thing inside a plastic bag or between two plates to lock in moisture. Find a warm, dark spot for them, like on top of your refrigerator. Check on them daily, and within 24 to 72 hours, you should see a tiny white taproot emerge. That’s your signal that they’re ready for soil!
Avoid Common Germination Mistakes
Germination is straightforward, but a few common slip-ups can stop your seeds before they even start. The biggest mistake is overwatering. While seeds need moisture to sprout, soaking them or keeping the paper towel dripping wet can actually drown them and prevent germination. Think damp, not drenched. Another thing to watch out for is temperature—too cold, and they won’t sprout; too hot, and you risk damaging them. Aim for a consistently warm environment. Finally, be gentle. That little taproot is extremely delicate, so handle your sprouted seeds with care when you move them to their new home. Avoiding these simple errors will give your seeds the best chance to thrive.
Transplant Your Seedlings
Once you see that little taproot, it’s time to move your seedling into its first pot. Using tweezers, gently place the sprouted seed about a half-inch deep in your grow medium, with the taproot pointing down. Lightly cover it and give it a gentle mist of water. Your seedling will be happy in a small starter pot for a week or two, but don’t leave it there for too long. If a seedling stays in a cramped container, its roots can become tangled and its growth will stall. Plan to transplant it into its final, larger pot once it has developed a few sets of true leaves. This gives it the space it needs to build a strong root system for healthy growth.
The Cannabis Growth Stages, Week by Week
Watching your cannabis plant grow from a tiny seed into a full-fledged, bud-producing wonder is one of the most rewarding parts of cultivation. Each stage of its life cycle has unique needs, and understanding them is the key to a healthy plant and a heavy harvest. Think of this section as your week-by-week roadmap. Knowing what to expect helps you provide the right care at the right time, so you can anticipate your plant’s needs instead of just reacting to problems.
From the delicate first days as a seedling to the explosive growth of the vegetative stage and the final, fragrant flowering phase, we’ll walk through it all. We'll cover how your plant's requirements for light, water, and nutrients will change as it matures. This knowledge empowers you to spot signs of trouble early and make adjustments before small issues become big headaches. A happy plant is a productive plant, and mastering these growth stages is the most direct path to achieving the results you're looking for. Whether you're growing potent THCA seeds or therapeutic CBD varieties, this timeline will set you up for a successful and satisfying grow from start to finish.
Seedling Stage (Weeks 0-2)
Welcome to the nursery! For the first couple of weeks, your plant is a delicate seedling, focused on developing its first true leaves and a strong root system. During this fragile stage, your main job is to provide a stable and gentle environment. Keep your lights on for 18 to 20 hours a day. Your seedlings don’t need intense light yet, so you can position your lamps a bit further away. Water sparingly—misting the soil to keep it damp is often better than a full watering, which can overwhelm the tiny roots. Aim for a warm, humid space with temperatures between 70-75°F and humidity around 60-70% to help your little ones thrive.
Vegetative Stage (Weeks 2-8)
This is where the magic really starts to happen. During the vegetative stage, your plant will experience an explosion of growth, developing the strong stems and lush leaves needed to support future buds. Stick with an 18/6 light cycle (18 hours on, 6 hours off) to fuel this rapid development. Now is the time to introduce nutrients, but start slow—a quarter of the recommended strength is plenty to avoid nutrient burn. The golden rule for watering is to wait until the top inch of soil feels dry to the touch. Overwatering is a common mistake, so let the soil dry out a bit between waterings to encourage strong root growth.
Flowering Stage (Weeks 8-12+)
Get ready for the grand finale! The flowering stage is when your plant shifts its energy from growing leaves to producing dense, resinous buds. For photoperiod strains, you’ll trigger this stage by switching to a 12/12 light cycle. If you're growing autoflower seeds, they'll start flowering on their own without any light changes. You’ll also want to switch to a nutrient blend designed for flowering, which is higher in phosphorus and potassium. It's also a good idea to lower the humidity in your grow space to 40-50% to prevent mold from forming on your developing buds.
Adjust Your Light Cycles
Your light schedule is one of the most critical factors for a successful indoor grow, especially for photoperiod strains. These plants rely on light cues to know when to grow and when to flower. During the vegetative stage, an 18/6 light cycle mimics the long days of summer, encouraging your plant to grow big and strong. When you’re ready for buds to form, switching to a 12/12 cycle signals that fall is coming, triggering the flowering response. That 12-hour dark period needs to be completely uninterrupted, so make sure no light leaks into your grow space. This is a key difference from autoflowers, which will flower regardless of the light schedule.
Try These Advanced Growing Techniques
Once you have a few grows under your belt, you might be ready to try some techniques that can seriously increase your final yield. These training methods are all about manipulating your plant’s shape to make the most of your indoor light source. By encouraging more horizontal growth and creating an even canopy, you ensure that more bud sites get the light they need to develop fully. This means you can get bigger, denser flowers from the same space and the same number of plants. It’s all about working smarter, not harder, to help your plants reach their maximum potential.
Low-Stress Training (LST)
Low-Stress Training, or LST, is a fantastic technique for beginners looking to get more from their plants without causing too much stress. The idea is to gently bend and tie down the main stem and branches as the plant grows. This breaks the plant's natural tendency to grow one main cola and encourages it to develop a flatter, wider canopy. With more branches receiving direct light, you'll see multiple colas develop instead of just one dominant one. This method is perfect for growers using autoflower seeds since it avoids the recovery time needed from more aggressive training. All you need is some soft plant ties and a little patience to guide your plant’s growth.
Screen of Green (SCROG)
The Screen of Green (SCROG) method takes LST a step further by using a screen or net. You’ll place a screen above your plants and, as they grow, you’ll gently weave the branches through the openings. This creates a perfectly even, horizontal canopy where every bud site gets an equal amount of intense light. SCROG is an excellent way to maximize your yield in a small space and works especially well with strains that like to stretch. It requires a bit more setup, but the results are often worth it, producing a uniform sea of dense, frosty buds. It’s a go-to for many commercial and home growers alike.
Topping and FIMing
Topping and FIMing are high-stress training (HST) techniques that involve strategically cutting your plant to promote bushier growth. When you top a plant, you cut off the very top of the main stem, which signals the plant to redirect its energy into the two nodes just below the cut. This results in two main colas instead of one. FIMing is a slight variation where you pinch off a newer shoot, which can result in four or more new tops. Both methods create a wider, fuller plant with more bud sites, but they do cause some stress, so give your plants time to recover. These techniques are best for robust photoperiod plants like our feminized seeds.
Perfect Your Feeding Strategy
While not a physical training technique, dialing in your plant’s nutrition is an advanced strategy that separates good growers from great ones. Understanding what your plants need at each stage of growth is key. During the vegetative stage, they crave nitrogen, but their needs shift to phosphorus and potassium during flowering. Using a quality nutrient line and carefully monitoring pH and PPM (parts per million) will prevent deficiencies and lockouts. A well-fed plant is a strong plant, better equipped to handle training and produce the high-quality buds you’re after. Pairing premium genetics like our THCA seeds with a perfect feeding strategy is the ultimate recipe for a successful harvest.
Keep Your Plants Healthy and Happy
Once your plants are growing, your job shifts from setup to maintenance. Think of yourself as a plant parent—your main goal is to provide a stable, nurturing environment. Keeping your plants healthy is all about consistency and paying attention to the little details. A happy plant is a productive plant, and by creating the right conditions, you’re setting yourself up for a successful harvest. Being proactive is always better than being reactive. Catching small issues before they become big problems will save you a ton of stress and effort. Let’s walk through the key areas to monitor to keep your cannabis plants thriving.
Optimize Temperature and Humidity
Your cannabis plants are sensitive to their surroundings, so creating the perfect climate is essential. For the best results, you’ll want to maintain a consistent environment. During the vegetative stage, aim for temperatures between 70-85°F with humidity around 40-60%. When your plants enter the flowering stage, it’s best to lower the temperature slightly to 65-80°F and drop the humidity to 40-50% to prevent mold. Precise climate control helps you grow healthy, robust plants and maximize your final yield. Using a simple thermometer and hygrometer will help you keep these conditions stable.
Balance Water Quality and pH
Water is life for your plants, but its quality is just as important as its quantity. One of the most critical factors is the pH level, which affects your plant's ability to absorb nutrients from the soil. Cannabis plants grown in soil prefer a pH between 6.0 and 7.0. If the pH is too high or too low, your plants can experience "nutrient lockout," meaning they can't eat the food you're giving them. You can easily check this with a simple pH testing kit. Keeping the pH in the right range is a fundamental step in any guide on how to grow cannabis and prevents a lot of common plant health issues.
Spot Nutrient Deficiencies
Feeding your plants can feel tricky, but the key is to start slow and pay attention. A common mistake is overfeeding, especially if you’re using a soil mix that already contains fertilizer. Wait until your seedlings have developed their first set of true leaves before introducing any extra nutrients. As they grow, watch for signs of deficiencies, like yellowing leaves or slow growth. These are your plant's way of telling you what they need. Learning to read these signals will help you adjust your feeding schedule and avoid many common growing errors that can harm your plants.
Prevent Pests and Diseases
The best way to deal with pests and diseases is to stop them from showing up in the first place. Make it a habit to check your plants daily. Look closely at the undersides of the leaves, where pests like spider mites love to hide. A small pocket microscope can be a huge help here. To prevent mold and mildew, make sure your grow space has plenty of airflow and that your plants aren't staying wet for too long. A clean growing environment is your best defense. This proactive approach is a core part of any solid first-time grower guide and will keep your garden healthy from seed to harvest.
How to Solve Common Growing Problems
Even the most seasoned growers encounter a few bumps in the road. The good news is that most common cannabis growing problems are easy to spot and fix once you know what to look for. Your plants are great at communicating their needs through their leaves, stems, and overall posture. Paying close attention and acting quickly can turn a potential disaster into a minor learning experience. From giving your plants too much love with the watering can to dialing in the perfect light intensity, let’s walk through how to troubleshoot the most frequent issues you might face in your indoor grow.
Fixing Overwatering and Root Rot
It’s so easy to do and comes from a good place, but overwatering is one of the most common mistakes in cannabis cultivation. Giving your plants water too frequently or in large doses can suffocate the roots, leading to droopy, sad-looking plants. This is especially critical during germination, as soaked seeds often fail to sprout. The best way to avoid this is to check the soil. Stick your finger about an inch deep; if it feels dry, it’s time to water. If it’s still damp, give it another day. Consistently soggy soil can lead to root rot, a serious condition that’s difficult to reverse. Proper drainage in your pots is also essential for letting excess water escape and allowing roots to breathe.
Dealing with Light Stress
While light is essential for photosynthesis, too much of a good thing can cause problems. If your grow lights are too intense or too close to your plants, they can experience light stress. You’ll notice the top leaves starting to curl upwards at the edges, a phenomenon sometimes called "tacoing." The leaves might also look bleached or yellow while the veins remain green. If you see these signs, the fix is simple: increase the distance between your lights and the plant canopy. If your light has a dimmer, you can also reduce its intensity. Finding that perfect balance ensures your autoflower seeds get all the energy they need for dense bud production without getting burned.
Correcting Environmental Issues
Your grow room’s environment is a delicate ecosystem. If the temperature or humidity is off, your plants will feel it. High humidity can invite mold and mildew, while low humidity can stress your plants and slow growth. Ideally, seedlings and clones prefer higher humidity (around 70%), which you can gradually decrease as they enter the vegetative and flowering stages (down to 40-50%). Temperature is just as important; aim for a comfortable 70-85°F (20-30°C) when the lights are on. A simple thermometer and hygrometer will help you monitor these conditions so you can make adjustments and keep your indoor cannabis seeds thriving.
Balancing Nutrients
Feeding your plants is a science, and it’s easy to overdo it. Nutrient burn is a common issue caused by overfeeding, resulting in dark green leaves with burnt-looking, crispy yellow or brown tips. To avoid this, always start with a lower dose of nutrients than what’s recommended on the bottle—about 1/4 to 1/2 strength is a safe starting point. You can always add more later if needed. Also, be mindful of your growing medium; some soils come pre-loaded with fertilizers, so you may not need to add any extra nutrients for the first few weeks. Listening to your plants and feeding them only when they’re hungry is the key to lush, healthy growth.
Harvest, Dry, and Cure Like a Pro
You’ve nurtured your plants from tiny seedlings to full, flowering beauties. Now comes the most rewarding part. These final steps—harvesting, drying, and curing—are what transform your hard work into a top-shelf product. Rushing this stage is a common mistake, but with a little patience, you can ensure your buds are potent, flavorful, and smooth. Let’s walk through how to finish your grow with confidence.
Know When to Harvest
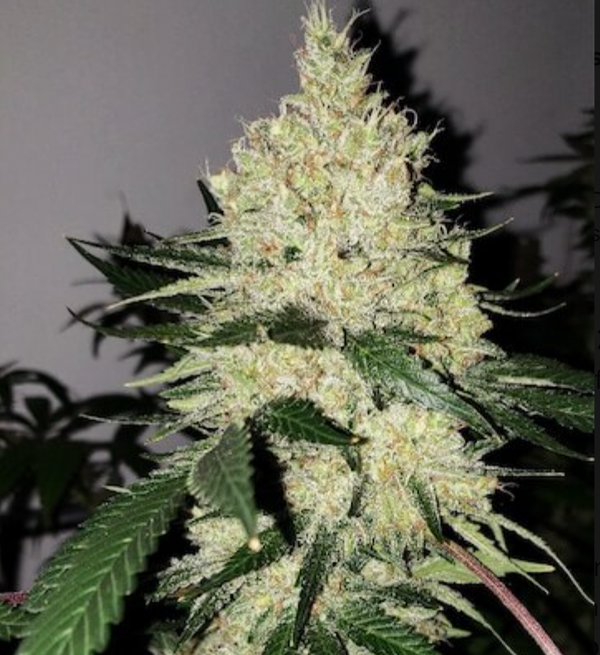
Timing your harvest is more art than science, but there are a few key visual cues to watch for. Get a small magnifying glass or a jeweler's loupe to get a close look at the trichomes—the tiny, crystal-like glands on your buds. You’ll want to harvest when most of these trichomes have turned from clear to a milky or cloudy white. If you wait until some turn amber, the final effect will be more relaxing and sedative. Another sign is that about 70-90% of the pistils (the small "hairs" on the buds) have darkened and curled inward. Harvesting at the right moment is crucial for getting the potency and effects you want from your chosen indoor cannabis seeds.
Trim Your Buds
Trimming removes the excess sugar leaves from your buds, which makes for a smoother smoke and a more appealing look. You can trim your plants either right after harvesting when they're wet or after they've dried. Wet trimming is a bit easier and can help prevent mold in very humid environments. Dry trimming is more delicate but can help preserve terpenes by slowing down the drying process. Don’t toss the clippings! The sugar-coated trim is perfect for making edibles, teas, or hash. It’s a great way to make sure none of your hard work goes to waste, especially when you start with high-quality autoflower seeds.
Dry Your Harvest
Proper drying is essential for preserving the flavor and aroma of your cannabis. After trimming (or before, if you’re dry trimming), cut your branches into manageable sizes and hang them upside down in a dark, cool space with gentle air circulation. Aim for a temperature of about 60-70°F and humidity between 45-55%. Drying too quickly can make your buds harsh and crumbly, while drying too slowly risks mold. The process usually takes 7 to 14 days. You’ll know your buds are ready for the next step when the smaller stems snap instead of bend. This careful process ensures the genetics from your feminized seeds can fully shine.
Cure and Store for Quality
Curing is the final, critical step that develops the true character of your buds. Once dry, place your trimmed buds into airtight glass jars, filling them about three-quarters full. Store the jars in a cool, dark place. For the first week or two, open the jars for a few minutes each day—a process called "burping"—to release moisture and let in fresh air. This prevents mold and breaks down chlorophyll, which gets rid of any grassy taste. A proper cure can take anywhere from two weeks to a few months, but you’ll notice a huge improvement in smoothness, flavor, and aroma. Once you master this process, you’ll be ready to shop all seeds for your next grow cycle.
Related Articles
- How to Grow a Weed Plant: 10 Simple Steps
- Auto Feminized Seeds Indoor: The Ultimate Guide
- Auto Feminized Weed Seeds: A Complete Grower's Guide
- How to Grow a Cannabis Seed Indoors: Step-by-Step
- How to Grow Cannabis at Home: A Simple Guide
Frequently Asked Questions
How long does the entire growing process take, from seed to harvest? The total time can vary quite a bit depending on the specific strain you choose, but a good general estimate is about 3 to 5 months. This includes a couple of weeks for the seedling stage, anywhere from one to two months for vegetative growth, and another two to three months for the flowering stage. Autoflowers tend to be on the quicker side of that range since their life cycle is predetermined.
What's the single most common mistake new growers make? Without a doubt, the most common mistake is overwatering. It comes from a good place—you want to care for your plants!—but giving them too much water suffocates the roots and prevents them from absorbing oxygen and nutrients. Always check your soil before watering. Stick your finger an inch deep; if it feels dry, it's time to water. If it's still damp, give your plant another day.
My plant's leaves are turning yellow. What does that mean? Yellowing leaves are your plant's way of telling you something is off, but it can point to a few different issues. The most common causes are an incorrect pH level at the roots, overwatering, or a nutrient deficiency. Before adding more fertilizer, first check your watering habits and test the pH of your water and soil runoff. Often, fixing one of those two things will solve the problem without you having to guess which nutrient is missing.
Can I just use regular tap water for my plants? Yes, you can typically use tap water, but you shouldn't use it straight from the tap without checking it first. The most important step is to test the pH of your water and adjust it to the 6.0-7.0 range for soil grows. If your water is treated with chlorine, it's also a good practice to let it sit out in an open container for 24 hours before using it, which allows the chlorine to evaporate.
What's the real difference between autoflower and feminized seeds for a beginner? Think of it as automatic versus manual transmission. Autoflower seeds are simpler because they will automatically switch from vegetative growth to the flowering stage based on their age, regardless of the light schedule. Feminized seeds are photoperiod, meaning you have to manually trigger the flowering stage by switching your lights to a 12-hour on, 12-hour off schedule. This gives you more control over how big your plant gets before it starts budding, but it requires more hands-on management.