Let's be honest, autoflowers used to have a bit of a bad rap. They were often seen as less potent with smaller yields. But that was then. Thanks to some serious breeding magic, today’s premium autoflower cannabis seeds are a total game-changer. We're talking dense, resin-drenched buds packed with flavor and potency that easily rival the best photoperiod strains. You get a top-shelf harvest on an accelerated timeline, all without ever fussing over light schedules. This guide will walk you through everything you need to succeed with these next-generation plants.
Key Takeaways
- Embrace the Automatic Timeline: Autoflowers operate on their own schedule, flowering based on age instead of light changes. This removes the guesswork from your grow and allows for a fast harvest in as little as 8-10 weeks, making them perfect for beginners or anyone wanting a quick turnaround.
- Less is More with Autoflowers: These plants thrive on a gentle approach. Avoid transplanting by planting directly into the final container, start with half-strength nutrients to prevent burn, and skip aggressive training methods to avoid stunting their rapid growth.
- Set Yourself Up for Success from the Start: Your final harvest quality is determined before you even plant a seed. Invest in stable, high-quality genetics and choose a strain that is specifically suited to your growing environment, whether it's a compact indoor tent or a sunny spot in your backyard.
What Are Autoflower Cannabis Seeds?
If you're looking for a straightforward path to a successful harvest, autoflower cannabis seeds are your new best friend. Think of them as the low-maintenance superstars of the cannabis world. Unlike traditional cannabis plants that require specific light schedules to start producing buds, autoflowers operate on their own timeline. They are genetically programmed to switch from the vegetative stage to the flowering stage automatically, based on their age.
This unique trait comes from a type of cannabis called Cannabis ruderalis, which evolved in the harsh climates of Central Asia and Eastern Europe. By crossbreeding ruderalis with popular indica and sativa strains, breeders created plants that are not only resilient and fast-growing but also produce the high-quality buds growers want. This makes them an excellent choice for everyone from first-time cultivators to seasoned pros looking for a quick and reliable crop.
What Makes Autoflower Seeds Different?
The magic of autoflowers is right in the name—they flower automatically. These plants don't wait for you to change the light cycle from long days to short days to trigger their flowering phase. Instead, they have an internal clock that tells them when it's time to start producing buds, usually just a few weeks after germination. This makes growing much simpler because you can keep them under a consistent light schedule (like 18 hours on, 6 hours off) from seedling to harvest. This hands-off approach removes a lot of the guesswork, making autoflower seeds a forgiving option for those still learning the ropes.
The Perks of Growing Autoflowers
One of the biggest draws of autoflowers is their speed. Most strains go from seed to harvest in just 8 to 10 weeks, allowing for multiple harvests in a single season. Their compact size also makes them ideal for growers with limited space, whether you're using a small indoor tent or a discreet corner of your balcony. Because they grow so quickly, they are generally less susceptible to pests and diseases. This combination of speed, size, and resilience makes them incredibly easy to manage. For anyone looking to get a high-quality harvest without a long wait, autoflowers are a fantastic choice.
Faster Growth and Multiple Harvests
The rapid growth cycle is the main attraction for many growers. Instead of waiting months for a photoperiod plant to mature, you can go from seed to a full harvest in as little as 8 to 10 weeks. This accelerated timeline completely changes how you can plan your year. For outdoor growers, it means you can easily fit in two, sometimes even three, full harvests during a single sunny season. Imagine planting your first crop in the spring and having it ready by early summer, leaving you plenty of time to start another round. This efficiency makes growing autoflowers an incredibly productive way to use your space and time.
This speed isn't just about impatience; it's a strategic advantage. A shorter life cycle means your plants spend less time exposed to potential threats like pests, mold, or unpredictable weather. This inherent resilience simplifies the cultivation process, especially for new growers or those in climates with short summers. The quick turnaround also allows you to experiment with different strains throughout the year without a long-term commitment. If you're looking to maximize your garden's output and minimize the wait, the fast-paced nature of autoflowers is a huge benefit. Choosing high-quality genetics ensures that this rapid growth results in a potent and flavorful final product.
Autoflower vs. Photoperiod: What's the Difference?
The main difference between autoflower and photoperiod plants is how they initiate flowering. Photoperiod strains, like many of our feminized seeds, depend on changes in the light cycle. To trigger flowering indoors, you have to switch your lights to a 12-hour on, 12-hour off schedule. Outdoors, they naturally start to flower as the days get shorter in late summer. Autoflowers, on the other hand, couldn't care less about how much light they get. Their transition to flowering is determined by age, not light. This gives you more flexibility and control, especially if you want to grow year-round without worrying about seasonal light changes.
Are There Any Downsides to Autoflowers?
While autoflowers are fantastic, it's good to know about their trade-offs so you can decide if they're right for your setup. Because they're on a fast track to harvest, they generally don't grow as large as photoperiod plants, which can mean a smaller final yield. Their rapid growth also leaves a very short window for plant training. Aggressive techniques can easily stress them, and unlike photoperiods, they don't have extra time in the vegetative stage to recover. This rapid timeline also means you can't take clones. Any cutting you take will be the same age as the mother plant and will flower on the same fixed schedule, leaving you with a tiny, unproductive plant. They're all about speed and simplicity, which sometimes comes at the cost of size and flexibility.
How to Choose the Best Autoflower Seeds
With so many options out there, picking the right autoflower seeds can feel a little overwhelming. But here’s the good news: making a smart choice from the start is the single best thing you can do to set yourself up for a fantastic harvest. Think of it as building a strong foundation. The quality of your seeds will influence everything from how easily your plants grow to the potency and flavor of your final buds.
So, what should you look for? It comes down to a few key factors. First and foremost is the quality of the genetics—this is the plant’s DNA, and it determines its potential. You’ll also want to consider which specific strains will give you the effects and flavors you’re after. Of course, price is a factor, but it’s important to understand what you’re paying for. Finally, knowing what to expect in terms of your harvest timeline and yield will help you plan your grow with confidence. Let’s walk through each of these points so you can find the perfect autoflower seeds for your garden.
Planning Your Grow: How Many Seeds to Plant
Once you've picked out your seeds, the next step is figuring out how many to plant. It’s always a good idea to start with a few more seeds than the number of plants you actually want to end up with. Even with the best genetics, not every seed is guaranteed to sprout, and some seedlings might not make it through their fragile early days. A good rule of thumb is to plant one or two extra seeds for every five plants you plan to grow. The small cost of a couple of extra autoflower seeds is a smart investment that acts as an insurance policy, ensuring you hit your target plant count for a full and successful harvest.
How to Properly Store Your Seeds
If you have leftover seeds or you’re buying them for a future grow, storing them correctly is essential to keep them viable. The key is to protect them from their three biggest enemies: light, heat, and moisture. The best way to do this is to place your seeds in a sealed, airtight container and keep them in the back of your refrigerator. This cool, dark, and dry environment will preserve their germination potential for years. One common mistake to avoid is putting them in the freezer. The moisture fluctuations in a typical home freezer can damage the seeds, so stick with the fridge for the most reliable long-term storage.
What to Look For in Quality Genetics
Genetics are the blueprint for your plant. When you start with premium, stable genetics, you get predictable results: consistent growth, reliable flowering times, and the potency you’re looking for. Reputable breeders invest a lot of time and effort into developing stable seeds that grow into healthy, resilient plants. This commitment is what separates a great harvest from a disappointing one. Look for seed banks with a proven track record and a focus on genetic quality. When you shop for seeds from a trusted source, you’re investing in a plant’s potential to thrive.
Understanding Potency and THC Levels
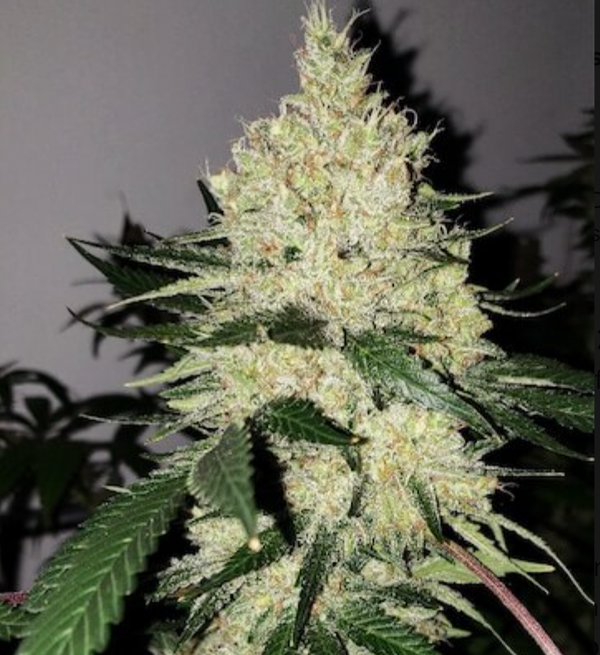
Let's clear up a common myth: autoflowers are not less potent than their photoperiod cousins. While this might have been true a decade ago, modern breeding has completely changed the landscape. Today’s autoflowers are powerhouses, with many strains boasting high THC levels that can easily reach 25% or more. The key is in the genetics. Expert breeders have successfully combined the automatic flowering trait of ruderalis with the high cannabinoid production of elite indica and sativa strains. This means you no longer have to sacrifice potency for speed. When you select seeds from a reputable source, you can find high-THCA strains that deliver the powerful effects you’re looking for, all on an accelerated timeline.
Shopping for Specific Traits
Beyond potency, you can shop for autoflower seeds that match your specific needs and preferences. Are you looking for a lightning-fast harvest? Some strains can go from seed to bud in as little as 45 days. Need something that fits in a small tent? You can find compact varieties that stay short and manageable. Modern seed banks allow you to filter for all sorts of traits, including high yields, specific aromas from unique terpene profiles, disease resistance, and even vibrant, colorful buds. This is where starting with premium genetics really pays off. When you choose your seeds carefully, you get predictable results and a plant that is perfectly suited to your environment and goals.
Top Autoflower Strains to Try
Once you’ve found a reliable seed bank, it’s time for the fun part: choosing a strain. Think about what you want from your final product. Are you looking for high-THCA flowers, a specific flavor profile, or a plant that’s particularly easy to grow? Each strain has its own unique characteristics. For example, a classic like GG Autoflowering is known for reaching maximum potency and producing dense, resin-covered buds. Take some time to read the descriptions for different THCA seeds and find one that matches your goals and growing conditions.
How Much Do Autoflower Seeds Cost?
You’ll notice that seed prices can vary quite a bit, and it’s tempting to just go for the cheapest option. However, price is often a reflection of quality. The cost of a seed is tied to the breeder’s reputation, the stability of the genetics, and the rarity of the strain. Investing a little more in seeds from a trusted company can save you a lot of headaches down the road. A great way to gauge a company's reliability is to check customer reviews. Seeing consistently high ratings from other growers is a strong indicator that you’re buying a quality product. You can also keep an eye out for sale seeds from reputable suppliers to get a great deal without sacrificing quality.
What Kind of Harvest Can You Expect?
One of the biggest draws of autoflowers is their speed. On average, these plants go from seed to harvest in about 70 days. This quick turnaround means you can potentially fit multiple harvests into a single season. When you’re browsing seeds, the breeder should provide an estimated timeline, along with information about potential yield and potency. Keep in mind that while genetics set the potential, your growing environment and care will ultimately determine the final result. Checking out the details on new releases can give you a good idea of what’s possible with the latest genetics.
Typical Yields for Indoor and Outdoor Grows
So, how much can you actually harvest from these speedy plants? It's one of the most common questions we get. While the genetics in your seed set the upper limit, your growing environment plays a huge role in what you'll actually get. If you're growing indoors, you have the advantage of a controlled environment. A good target to aim for is between 300 to 400 grams per square meter (gr/m²). With a little experience and the right strain, some growers can even push that to 500-600 gr/m². We measure it this way for indoor grows because it’s all about making the most of your dedicated space. Choosing seeds specifically bred for indoor cultivation can help you hit those higher numbers.
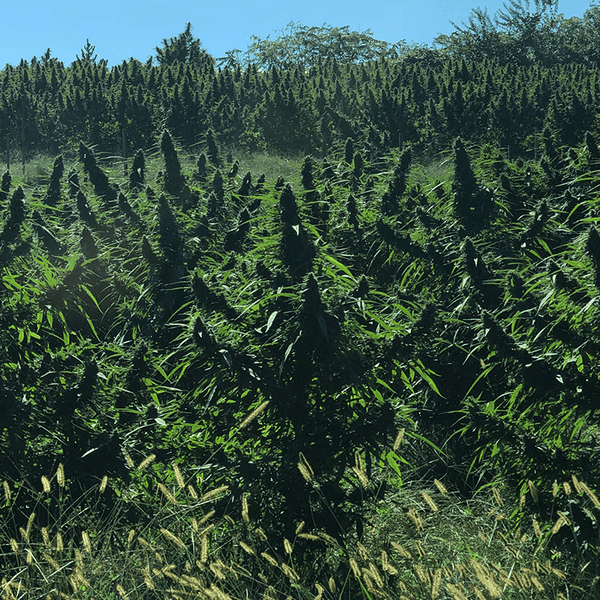
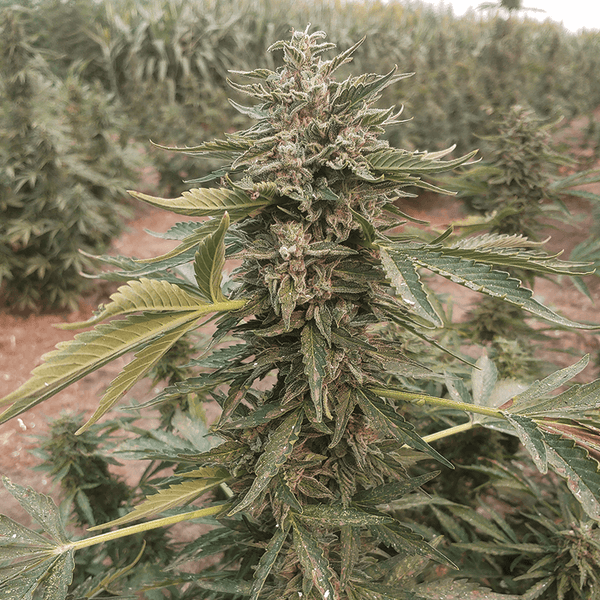
If you're growing outdoors, the potential can be even greater, but the results are more variable. A single outdoor autoflower can yield anywhere from 50 to 350 grams, depending on the strain, the amount of direct sunlight it gets, and your climate. Because you're working with Mother Nature, things are a bit less predictable, but the rewards can be massive. One of the best parts about growing autoflowers outdoors, especially in warmer regions, is the ability to get multiple harvests in one year. Since they aren't tied to the seasons, you can plant a new crop as soon as you harvest the last one. We have some fantastic outdoor marijuana seeds that are bred to be resilient and productive in a natural environment.
Remember, these numbers are just a guide to help you plan. The final weight of your harvest comes down to a partnership between you and the plant. Starting with high-quality genetics gives your plant the best possible start, but your care, attention, and growing conditions are what will help it reach its full potential. Don't get too hung up on hitting a specific number on your first try. Focus on learning what your plants need, and with each grow, you'll get closer to achieving those impressive yields. By optimizing your setup and choosing the right strain for your environment, you can look forward to a rewarding harvest from your autoflower garden.
What Your Autoflowers Need to Thrive
While autoflowers are known for their resilience and speed, giving them the right environment is the secret to a truly impressive harvest. Think of it this way: starting with high-quality genetics is step one, but creating the perfect home for your plants is what allows them to reach their full potential. Nailing down the basics of light, soil, and space will make a world of difference in your final yield and quality. Let’s walk through the key elements your autoflowers need to flourish, whether you’re growing in a closet or a dedicated greenhouse. By focusing on these fundamentals, you set the stage for healthy, happy plants that produce amazing results.
Getting Your Light and Temperature Just Right
Autoflowers aren't picky about light schedules, which is one of their biggest perks. For an indoor grow, you can leave your lights on for 18 to 24 hours a day. An 18/6 schedule (18 hours on, 6 hours off) is a popular choice that saves on electricity while still giving your plants plenty of energy. If you’re aiming for the biggest possible harvest, a 20/4 or even a 24/0 schedule can encourage more vigorous growth. The key is consistency. For temperature, aim to keep your grow space around a comfortable 21°C (70°F). Stable temps prevent stress, helping your plants focus on growing strong.
Ideal Temperature and Humidity by Growth Stage
To really help your autoflowers flourish, you'll want to dial in the temperature and humidity for each growth phase, especially if you're growing indoor cannabis seeds. Think of it as creating the perfect climate for them to do their thing. During the seedling stage, your baby plants love a warm and moist environment, so aim for temperatures between 75-85°F (21-29°C) with humidity around 50-60%. As they move into the vegetative stage, you can keep things pretty consistent with the same temperature and humidity levels to encourage strong, leafy growth. Once you see those first flowers appear, it's time to make a change. Lower the temperature slightly to 70-80°F (21-26°C) and drop the humidity to 40-50%. This adjustment helps prevent issues like bud rot and encourages your plants to focus on producing dense, resinous buds. It's a simple tweak that makes a huge difference in your final harvest.
Soil and Nutrients: What Your Plants Need
When it comes to feeding your autoflowers, less is definitely more. These plants are efficient and don't require the heavy nutrient loads that photoperiod strains often do. Start with a light, airy soil mix that allows roots to breathe and grow freely. A great DIY blend is three parts peat moss, three parts compost, two parts perlite, and one part vermiculite. This creates a perfect foundation. When you introduce nutrients, begin with half the recommended dose and watch how your plants respond. Overfeeding is a common mistake that can burn your plants, so it’s always better to start slow and increase as needed.
Choosing the Right Soil Composition
Your autoflowers have a short and busy life, so they need a growing medium that supports their rapid development from day one. The best soil is light and airy, which allows their roots to expand quickly without resistance. A dense, heavy soil can slow down root growth, and with an autoflower's fixed timeline, there's no time to recover from a slow start. You can create an excellent DIY mix with three parts peat moss, three parts compost, two parts perlite, and one part vermiculite. This blend provides a perfect balance of moisture retention, drainage, and aeration, giving your plants a strong foundation to build upon.
Maintaining the Ideal Soil pH
Think of soil pH as the gatekeeper for nutrients. If the pH is off, your plants can't absorb the food they need to grow, even if it's plentiful in the soil. For autoflowers, you'll want to keep the soil pH in a range between 6.0 and 7.0. This sweet spot ensures that all the essential nutrients are available for your plant to use. You can easily check your soil's pH with a simple testing kit. Maintaining this balance is crucial, so be careful not to over-fertilize, as this can cause a sudden drop or spike in pH and lead to nutrient lockout, effectively starving your plant.
Nutrient Ratios for Different Growth Stages
Because autoflowers grow so quickly, they are more sensitive to nutrients than their photoperiod cousins. The golden rule is to start low and go slow. During the first couple of weeks, your seedling will get everything it needs from the soil. Once you start feeding, begin with just a quarter or half of the manufacturer's recommended dose. For the vegetative stage, your plant will appreciate a bit more nitrogen (N) to support leaf and stem growth. As it transitions into flowering, you’ll want to switch to a fertilizer higher in phosphorus (P) and potassium (K) to help it develop dense, resinous buds. All of our autoflower seeds respond best to this gentle feeding approach.
Choosing the Right Containers for Your Plants
The pot you choose is your plant's home for its entire, short life. Because you want to avoid the stress of transplanting, it’s best to plant your germinated seed directly into its final container. For growing indoor cannabis seeds, a 3- to 5-gallon (11-19 liter) pot is usually the perfect size. It gives the roots enough room to expand without staying waterlogged. If you’re growing outdoors, opt for a larger 5- to 10-gallon (20-40 liter) container. This will accommodate a more extensive root system and support a bigger plant, helping you make the most of the natural sunlight.
How to Plan Your Grow Space
A well-planned grow space is a successful one. Beyond light and temperature, you need to consider airflow and humidity. Good air circulation helps strengthen stems and prevents stale, moist air from settling around your plants, which can invite mold and pests. Maintaining a consistent humidity level is also crucial for healthy development. Ultimately, the success of your grow comes down to combining a great environment with even better genetics. When you start with premium autoflower seeds, you’re already halfway to a fantastic harvest. A little planning goes a long way in helping those top-tier genetics shine.
Growing Indoors vs. Outdoors
One of the best things about autoflowers is their versatility—they can thrive just about anywhere. The choice between growing indoors or outdoors really comes down to your space, budget, and what you want to achieve with your harvest. Neither option is better than the other; they just offer different benefits and challenges.
Growing indoors gives you complete authority over your plant's world. You control the light, temperature, humidity, and airflow, creating the perfect environment from seed to harvest. This level of control often leads to very consistent results. On the other hand, growing outdoors lets you harness the power of the sun, which is hard to beat. It’s a more hands-off approach that can produce incredible plants with minimal equipment. Many growers find that a mix of both, starting seeds indoors before moving them outside, gives them the best of both worlds. We’ll walk through the specifics of each method so you can decide which path is right for your autoflower seeds.
Tips for Your Indoor Environment
When you grow indoors, you become the master of your plant’s universe. This is your chance to dial in every single variable to create the ideal conditions for growth. You can set up fans for perfect airflow, use a humidifier or dehumidifier to manage moisture, and maintain a consistent temperature day and night. This stability helps reduce stress on your plants. Plus, a consistent nutrient supply throughout the cultivation cycle means indoor-grown cannabis plants typically produce denser buds. If you love precision and want to replicate your success with every grow, cultivating indoor cannabis seeds gives you the control to do just that. It’s a fantastic way to protect your plants from pests and unpredictable weather.
How to Choose Your Indoor Lighting
Since autoflowers don't rely on light cycles to start flowering, you have a lot of flexibility with your indoor lighting schedule. For indoor growing, you can keep your lights on for 18-24 hours a day. An 18/6 schedule (18 hours on, 6 hours off) is a popular choice because it saves on electricity while still giving your plants plenty of light to flourish. However, some growers prefer a 20/4 or even a 24/0 schedule, believing the extra light might lead to bigger harvests. The best approach depends on your specific strain, your electricity budget, and how your plants respond. Start with an 18/6 cycle and observe your plants. You can always adjust from there to find what works best for your setup.
Positioning Your Grow Lights Correctly
Getting the light schedule right is half the battle; the other half is placing your lights at the perfect distance. If they're too close, you risk burning the delicate leaves. If they're too far away, your plants will stretch toward the light, becoming tall and spindly instead of strong and bushy. A great rule of thumb is to position your grow lights about 18-24 inches above your seedlings. As your plants grow, you’ll need to raise the lights to maintain that ideal distance from the top of the canopy. This consistent attention is key to helping your autoflower seeds reach their full potential, ensuring they get all the energy they need without any stress.
How to Prep for an Outdoor Grow
Taking your grow outdoors connects your plants with the elements in a way that’s impossible to replicate inside. While you give up some control, you gain the unmatched power of the sun. To give your plants a head start, you can germinate your autoflower seeds and let them grow indoors for the first couple of weeks under controlled conditions. This helps them develop a strong root system before they face the great outdoors. Once they’re ready, choose a spot that gets at least 6-8 hours of direct sunlight daily. Good drainage is also key, so consider using raised beds or large pots if your garden soil is heavy clay. With some simple prep, you can set your outdoor plants up for a successful season.
When to Plant Your Autoflowers Outdoors
Timing is everything when growing outdoors. The beauty of autoflowers is their quick turnaround, which allows for multiple harvests in a single season. As long as there’s no frost, you can plant them outdoors from late spring through late summer in most climates. A great strategy is to stagger your planting. By starting new seeds every few weeks, you can create a continuous harvest, ensuring you have fresh buds ready throughout the season. Before you plant your first seed, check your local last frost date to make sure your young plants are safe. This simple planning lets you make the most of the long, sunny days and enjoy a rolling harvest all summer long.
Make the Most of Natural Light
You can invest in the best grow lights on the market, but nothing quite compares to the power of the sun. It’s free, full-spectrum, and provides an intensity that’s difficult and expensive to match indoors. As many outdoor growers can testify, the sun helps produce beautiful, robust harvests. Natural sunlight encourages strong stem development and vigorous growth, and some cultivators believe it leads to a more complex and rich terpene profile in the final buds. When you choose to grow outdoor marijuana seeds, you’re not just saving on your electricity bill—you’re giving your plants the powerful, natural energy source they were meant to grow under. It’s a simple, effective, and rewarding way to cultivate cannabis.
Advanced Techniques for a Better Harvest
Once your autoflowers are settled in their environment, you can use a few key techniques to guide them toward a successful harvest. Unlike photoperiod plants, autoflowers are on a tight schedule, so every action you take has a significant impact. This means being gentle and precise is the name of the game. From getting germination right to knowing the perfect moment to harvest, these steps will help you fine-tune your process. We'll cover the essentials for watering, feeding, and training your plants, giving you the confidence to handle your crop like a pro. These methods are straightforward but can make a real difference in the health of your plants and the quality of your final yield.
How to Germinate Your Seeds Successfully
Getting a strong start is everything. The most reliable way to germinate your autoflower seeds is the paper towel method. Just place your seeds between two damp—not soaking wet—paper towels and put them between two plates to create a dark, humid dome. Keep them in a warm spot, ideally between 70-80°F (21-26°C), with humidity around 60-70%. Check on them daily, and within 72 hours, you should see a tiny white taproot emerge from the seed. Once that root is about a quarter-inch long, your seed is ready to be carefully planted. This simple step ensures your plant has the best possible chance to develop a healthy root system from day one.
How to Plant Sprouted Seeds
Once your seed has sprouted a small white taproot, it’s time to move it to its permanent home. Handle it with care—this is a delicate stage. Make a hole about one inch deep in your soil and gently place the sprouted seed inside, making sure the taproot is pointing down. This orientation helps the plant establish a strong root system right away. Lightly cover the seed with soil and give it a small amount of water right around the main stem. The key is to keep the soil moist but not waterlogged, as overwatering is a common pitfall for new seedlings. Since you’ve already planted in the final container, you’ve given your autoflower seeds a stress-free start, setting them up for the rapid growth they’re known for.
Create a Simple Watering and Feeding Schedule
Autoflowers are efficient, but they can be sensitive to overwatering and overfeeding. The golden rule for watering is to let the soil dry out. Stick your finger about an inch into the soil; if it feels dry, it’s time to water. When your plant is a seedling, water a small circle around the stem, expanding the circle as it grows. When it comes to nutrients, less is more. Autoflowers have a shorter life and require fewer nutrients than their photoperiod cousins. A good starting point is to use half the recommended dose of your chosen nutrients. You can always add more if you see signs of deficiency, but it’s much harder to fix nutrient burn from overfeeding.
Simple Training Methods for Bigger Yields
With autoflowers, the clock is always ticking. Their rapid life cycle means they don’t have much time to recover from stress, so aggressive training techniques are off the table. You should avoid high-stress methods like topping or heavy pruning, as the recovery time can stunt their growth and reduce your final yield. If you’re an experienced grower, you might try some light Low-Stress Training (LST), which involves gently bending and tying down branches to expose more bud sites to light. However, even this should be done with extreme care and only during the vegetative stage. For most growers, the best approach is to let your autoflowers grow naturally and focus on providing an optimal environment.
Gentle Pruning Guidelines for Autoflowers
When it comes to pruning your autoflowers, the best advice is often the simplest: don't. Think of their life cycle as a sprint, not a marathon. They are on a fixed schedule and don't have the extra time to recover from the stress of heavy pruning or topping. Any significant stress can shock the plant, pausing its growth and ultimately shrinking your final harvest. If you feel you absolutely must prune, keep it extremely minimal. You might consider removing a few of the lowest fan leaves that are yellowing or completely shaded from the light, but this should be done sparingly and with great care. For the vast majority of growers, focusing on providing a stable environment for your autoflower seeds will yield far better results than trying to shape them with aggressive techniques.
How Do You Know When It's Time to Harvest?
Timing your harvest is crucial for getting the effects and flavors you want. The best way to know when your buds are ready is by looking at the trichomes—the tiny, crystal-like glands on the flowers. You’ll need a magnifying glass or a jeweler’s loupe to see them clearly. You’re looking for the moment when about 80% of the trichomes have turned from clear to a milky or cloudy white. This is the point of peak THC production. If you wait longer until more trichomes turn amber, the effect will be more sedative and relaxing. Harvesting too early when they are still clear will result in a less potent product. Once you've perfected your harvest, you can start planning your next grow with some of our newest strains.
How to Maximize Your Yield and Quality
Once your autoflowers are growing, your focus shifts to getting the most out of each plant. It’s not just about keeping them alive; it’s about helping them reach their full genetic potential for a heavy, high-quality harvest. The right techniques can make a huge difference in your final yield, bud density, and potency. It all comes down to giving your plants exactly what they need at the right time, which is especially critical given their short, predetermined lifespan. Unlike photoperiod plants, you don't have weeks to correct mistakes.
From the soil you use to the air in your grow room, every detail matters. We’ll cover the key strategies for pushing your plants to produce their best. This includes creating the perfect growing medium, managing plant stress effectively, fine-tuning your environment, and nailing the harvest timing. Think of it as setting your plants up for success from the very beginning and guiding them through their rapid life cycle. By paying close attention to these areas, you can ensure the autoflower seeds you started with turn into a harvest you can be proud of, packed with the aroma and effects you're looking for.
Choose the Best Growing Medium
Autoflowers thrive in a light, airy soil that allows their roots to grow quickly and without restriction. A dense, heavy soil can slow them down, and since their lifespan is so short, there’s no time to recover. You want a medium that drains well and doesn’t come packed with too many nutrients, which can burn young seedlings. A great DIY mix is 3 parts peat moss, 3 parts compost, 2 parts perlite, and 1 part vermiculite. This combination provides the perfect balance of moisture retention, aeration, and a gentle supply of organic matter. This setup gives your plants a strong foundation from day one.
How to Prevent and Manage Plant Stress
With autoflowers, managing stress is a delicate balance. Early in their life, you want to avoid stress at all costs. Things like transplanting, overwatering, or extreme temperature swings can permanently stunt their growth because they don't have time to recover before their internal clock flips them into the flowering stage. Once flowering begins, however, you can introduce certain "good" stressors to encourage better bud production. Techniques like low-stress training (LST) can expose more bud sites to light, and some growers even slightly drop temperatures late in flowering to promote resin production. The key is to give them a smooth, stress-free start.
Creating the Ideal Grow Environment
Your growing environment directly impacts the final quality of your buds. If you’re growing indoors, you have a major advantage in controlling every variable. This control is why indoor cannabis seeds often produce denser, more resinous buds—they receive a consistent supply of light and nutrients. A crucial factor to monitor is humidity. Keep relative humidity around 50-60% during the vegetative phase to support lush growth. Once your plants start flowering, lower it to around 40% to help prevent mold and encourage trichome development. While growing with outdoor marijuana seeds can produce amazing results, the variable conditions can lead to a more open bud structure.
Perfect Your Harvest Technique
Knowing exactly when to harvest is an art, but you can learn it with a little practice and a good magnifying glass. Don’t rely on the breeder’s timeline alone; watch your plants for the real signs. The best indicator is the color of the trichomes—the tiny, mushroom-shaped resin glands on the buds. You’re looking for the moment when about 80% of them have turned from clear to a milky white color. This is the point of peak THC. Once you hit that window, cut the plant at its base and hang it upside down in a dark, cool room with good air circulation for about 14 days to dry properly.
The Ideal Drying Environment
You’ve made it to the finish line, but the work isn’t over just yet. The drying process is where you lock in the flavor and potency of your harvest. Think of your drying space as a preservation chamber. You want to aim for a slow, even dry, which means keeping the environment dark, cool, and stable. The ideal temperature is between 60-70°F (15-21°C) with a relative humidity of 50-60%. This sweet spot is crucial because it allows the buds to dry gradually without losing their precious terpenes to evaporation. A small fan can help circulate the air and prevent mold, but never point it directly at your hanging plants, as this can cause them to dry out too quickly and unevenly.
The Curing Process for Better Flavor and Potency
Curing is the final, patient step that transforms a good harvest into a truly exceptional one. Once the smaller stems on your buds snap instead of bend, they’re ready to be trimmed and placed into airtight glass jars. Pack them loosely, filling the jars about three-quarters full. For the first week or two, open the jars for 5-10 minutes once or twice a day. This process, known as "burping," releases moisture and replenishes the oxygen. This slow cure is essential for enhancing the flavor by breaking down chlorophyll, which gets rid of any grassy taste. It’s during this time that the unique terpene profiles of the genetics you chose, like our potent THCA seeds, will fully mature, resulting in a smoother, more flavorful final product.
How to Troubleshoot Common Grow Problems
Even with the best seeds and setup, you might run into a few bumps along the road. Don’t worry—every grower deals with challenges. The key is to spot them early and know how to respond. Think of it as your plants telling you what they need. From nutrient imbalances to pesky insects, most common issues have straightforward fixes. Learning to read the signs is one of the most rewarding parts of the cultivation journey. Let’s walk through some of the most frequent problems and how you can get your grow back on track.
Fixing Common Nutrient Problems
One of the most common mistakes with autoflowers is overfeeding. These plants are efficient and generally require fewer nutrients than their photoperiod cousins. If you notice the tips of your leaves turning yellow or brown, you might be looking at nutrient burn. The fix is simple: scale back on the feeding. Start with a light nutrient solution, about half of what’s recommended, and only increase it if your plants show signs of deficiency, like pale or yellowing leaves. Choosing high-quality autoflower seeds from the start gives you a resilient genetic base that can better handle minor fluctuations.
What to Do About Environmental Stress
Autoflowers thrive in stable conditions. Sudden changes in temperature or humidity can stress them out, which might slow down growth or even reduce your final yield. Your goal is to create a consistent environment. Keep the temperature steady and the humidity in the right range for each growth stage. For example, seedlings like higher humidity, while flowering plants prefer it a bit drier to prevent mold. Using a simple oscillating fan does wonders for air circulation, keeping the air fresh and strengthening your plant’s stems. This is especially important when growing indoor cannabis seeds where you have total control over the climate.
Keeping Pests and Infestations Away
The best way to deal with pests is to make sure they never feel welcome in the first place. A clean grow space is your first line of defense. Good airflow from fans helps keep common nuisances like spider mites and fungus gnats at bay. Make it a habit to inspect your plants daily, paying close attention to the undersides of leaves where pests love to hide. If you do spot any unwanted guests, act quickly with organic pest control solutions. Starting with healthy, pest-free cannabis clones can also give you a clean slate and a major head start.
How to Identify and Treat Plant Diseases
The good news is that autoflowers are naturally hardy. Many strains are bred to be resilient against common diseases and pests. However, issues like powdery mildew or root rot can still pop up, usually due to environmental factors. Powdery mildew often appears when humidity is too high and airflow is poor. Root rot is almost always a result of overwatering. By maintaining proper humidity levels and letting your soil dry out between waterings, you can prevent these problems before they start. For an extra layer of security, consider growing innovative triploid cannabis strains known for their exceptional vigor.
Quick Fixes for Your Grow
Sometimes, the simplest adjustments make the biggest difference. Overwatering is a classic rookie mistake. Before you water, stick your finger an inch or two into the soil. If it feels dry, it’s time to water. If it’s still damp, wait another day. Is the top of your plant looking bleached or yellow? Your light might be too close. Try raising it a few inches. The most powerful tool you have is daily observation. Spend a few minutes with your plants each day, and you’ll learn to spot the subtle signs that tell you exactly what they need to thrive.
How to Match Your Seeds to Your Environment
Choosing the right autoflower seed is a lot like picking a plant for your garden—what thrives in one spot might struggle in another. Your growing environment is one of the biggest factors that will determine your success, so it’s worth putting some thought into it before you buy. Whether you’re working with a dedicated indoor tent, a greenhouse, or a sunny patch in your backyard, the conditions you can provide will point you toward the perfect strain. Think about it: a plant bred for the cool, damp climate of the Pacific Northwest will have different needs than one developed for the hot, arid Southwest. Before you shop for seeds, take a moment to assess your light availability, temperature fluctuations, humidity levels, and physical space. Matching your genetics to your environment from the very start saves you a ton of headaches later and sets your plants up for a healthy, productive life. It’s the foundational step to avoiding common issues like mold, pests, and stunted growth. This isn’t about creating a perfect, lab-grade environment; it’s about working with what you’ve got to select a strain that is genetically predisposed to thrive there. This simple decision can be the difference between a disappointing harvest and a canopy of beautiful, healthy buds.
Best Autoflower Seeds for Indoor Grows
Growing indoors gives you ultimate control. You get to play Mother Nature, dialing in the perfect light, temperature, and humidity. This controlled setting allows you to provide a consistent supply of nutrients, which often results in denser, more resinous buds. When selecting indoor cannabis seeds, look for strains that are known for their compact structure to make the most of your limited space. Indica-dominant autoflowers are often a great fit for tents and smaller grow rooms. Since you control the light cycle, you can optimize it for vegetative growth and flowering without worrying about the changing seasons, making for a predictable and repeatable harvest every time.
Best Autoflower Seeds for Outdoor Grows
There’s nothing quite like the power of the sun, and it’s free! Growing outdoors lets your plants reach their full potential, often resulting in larger plants and impressive yields. A single outdoor autoflower can produce anywhere from one to ten ounces, depending on the strain and conditions. When you browse for outdoor marijuana seeds, consider genetics that are known for their resilience and vigor. Autoflowers are fantastic for outdoor cultivation because their quick seed-to-harvest time allows you to fit in multiple harvests in a single season in many climates. They’ll do their thing without you needing to worry about changing light schedules to trigger flowering.
Choosing the Right Strain for Your Climate
Your local climate plays a huge role in an outdoor grow. If you live in a hot, dry region, you’ll want to find strains with a high tolerance for heat and drought. For those in cooler, more humid areas, mold resistance is your top priority to prevent issues like bud rot. Take a close look at the descriptions for different autoflower seeds to find clues about their ideal growing conditions. Some strains are bred specifically to handle the challenges of certain climates. Doing this homework upfront helps you choose a plant that won’t just survive but will actually thrive in your specific corner of the world.
Finding the Right Seeds for Your Space
Whether you’re indoors or out, the amount of space you have is a key factor. A small grow tent has different requirements than a sprawling backyard. Before you buy, check the estimated final height and width of the plant. You don’t want a strain that will outgrow your tent or crowd out its neighbors in the garden. Many autoflower seeds are bred for compact size, but it's always good to check. Remember that autoflowers can be sensitive to humidity, and an overcrowded space can trap moisture, which could decrease your yield or invite pests and mold. By choosing a strain that fits your footprint, you ensure your plants have the airflow and room they need to flourish.
A Quick Note on Legality and Responsibility
Before you get started, it’s important to touch on the legal side of things. The world of cannabis is changing quickly, and while it’s an exciting time, it also means you need to be informed. The rules around buying and growing can be a bit of a patchwork, varying from one place to another. Understanding your local laws isn’t just a good idea—it’s a crucial step for any responsible grower. This isn’t meant to be intimidating, but rather to empower you with the right information so you can cultivate with confidence and peace of mind. Let’s quickly cover what you need to know about the legality of seeds versus the act of growing them.
The Legal Side of Buying Seeds
Here’s the good news: thanks to the 2018 Farm Bill, cannabis seeds containing less than 0.3% THC are considered hemp products, making them federally legal to buy and possess in the United States. This is why you can legally shop for seeds online from reputable seed banks. They are often sold as adult novelty souvenirs or for genetic preservation purposes. This federal protection makes it possible for growers across the country to access elite genetics that were once much harder to find. It’s a huge step forward that has opened the door for countless cultivators to explore new and exciting strains from the comfort of their homes.
Know Your Local Cultivation Laws
This is where your personal responsibility comes in. While the seeds themselves are legal to buy, the laws around germinating and growing them vary dramatically from state to state, and even by county or city. It is entirely up to you to research and understand the specific regulations in your area. Some states have fully legalized home cultivation, others allow it only for medical patients, and some still prohibit it entirely. These laws are constantly evolving, so be sure to check your local government websites for the most current information before you plant your autoflower seeds. Being a responsible grower means respecting the rules of your community.
Our Commitment and Your Role
Our passion is providing you with stable, high-quality genetics, from innovative triploid cannabis to reliable autoflowers. We stand behind the quality and viability of every seed we sell. However, once those seeds are in your hands, the responsibility for how you use them is yours. We provide these seeds for novelty and preservation purposes, and we trust that you will adhere to all local, state, and federal laws regarding their cultivation. By doing your homework and growing responsibly, you help ensure that the home cultivation community continues to grow in a positive and sustainable way. Happy and legal growing!
Related Articles
- Autoflower Seeds for Beginners: Grow Fast & Easy
- Autoflower Cannabis Seed 101: Your Complete Guide
- Autoflower Seed 101: A Complete Beginner's Guide
- Auto Cannabis Seeds: The Ultimate Beginner's Guide
- Best Autoflower Seeds: A Buyer's Guide for 2025
Frequently Asked Questions
What's the biggest mistake new growers make with autoflowers? By far, the most common mistake is trying to do too much. Growers often overwater and overfeed their plants out of a desire to help them, but autoflowers are incredibly efficient. Because their lifespan is so short, they don't have time to recover from the stress of having waterlogged roots or nutrient burn. The best approach is to start with a light hand, letting the soil dry out between waterings and using half the recommended dose of nutrients until you see what your plant really needs.
Can I transplant my autoflower seedling into a bigger pot later? It's best to plant your germinated seed directly into its final container. Autoflowers have a very short vegetative stage before they automatically begin to flower, and any shock during this critical window can permanently stunt their growth. Transplanting is a stressful event for any plant, and an autoflower simply doesn't have the time to recover before its internal clock tells it to start producing buds. Starting in the final pot ensures a smooth, stress-free start.
How much can I really expect to harvest from a single autoflower plant? The final yield depends on many factors, including the specific strain's genetics, your lighting, and your skill as a grower. Generally, you can expect anywhere from one to five ounces from a single plant. An indoor plant in a controlled environment might produce dense, heavy buds, while an outdoor plant with plenty of sun can grow much larger. The key is to manage your expectations and focus on providing a great environment to help the plant reach its full genetic potential.
Is it true that autoflowers are less potent than photoperiod plants? That used to be the case years ago, but modern autoflower genetics have completely changed the game. Breeders have successfully crossed potent, high-quality photoperiod strains with ruderalis genetics without sacrificing potency or flavor. Today's premium autoflower seeds produce buds that are just as rich in cannabinoids and terpenes as their photoperiod counterparts. It all comes down to choosing high-quality genetics from a reputable source.
Since they flower so fast, can I just use any soil? The soil you choose is actually one of the most important factors for a successful autoflower harvest. Because these plants grow so quickly, they need to establish a strong root system right away. A light, airy soil mix allows the roots to expand easily without resistance. Heavy, dense soil can slow down root development, which in turn limits the final size and yield of your plant. Starting with the right medium gives your plant the foundation it needs to thrive from day one.