The best part of growing indoors is having total control. You get to be the master of your plant's universe, dialing in the perfect light, temperature, and nutrients. So why leave the most important variable to chance? A single male plant can pop up and pollinate your entire crop, undoing weeks of careful work. Starting your cannabis plant grow with feminized seeds takes that risk completely off the table. It puts control firmly back in your hands, so you can focus on growing amazing, potent buds. This guide will show you exactly how.
Key Takeaways
- A Stable Environment is Your Best Defense: Instead of reacting to problems like pests and mold, prevent them by maintaining consistent temperature, humidity, and airflow. A controlled climate creates strong plants that are naturally more resilient to stress.
- Learn to Read Your Plants: The most successful growers respond to their plants' needs. Check the soil before watering and watch the leaves for signs of nutrient issues. This attentive approach is more effective than a rigid, one-size-fits-all schedule.
- The Grow Isn't Over at Harvest: The final steps of drying and curing are what develop the true quality of your buds. Rushing this stage can ruin weeks of hard work, so be patient to lock in the best flavor, aroma, and potency.
Before You Start: Legal and Practical Considerations
Before you even think about popping your first seed, it’s essential to get familiar with the rules of the road. Cannabis laws can feel like a tangled web, varying wildly from one state to the next, and even between cities. Taking the time to understand the specific regulations in your area isn't just about following the law—it's about setting yourself up for a stress-free and successful grow. Think of it as building a solid foundation. A little research now protects your investment of time, money, and energy later, ensuring your indoor garden can flourish without any unwelcome surprises. This step is your responsibility as a grower, but it’s also an empowering one that puts you in control.
Understanding Local and State Laws
The first thing to know is that cannabis legalization is not a one-size-fits-all situation. While many states have given the green light for personal cultivation, the details are what matter. These laws are created to keep cultivation safe and responsible for everyone in the community. Before you start, you absolutely must look up the most current cannabis regulations for your specific state and municipality. Official government websites are the best source for this information. This isn't legal advice, but rather a strong recommendation to do your homework so you can grow with confidence and peace of mind from the very beginning.
Plant Limits and Location Rules
Most states that permit home cultivation set clear limits on how many plants you can grow at one time. For example, a state might allow up to six plants per adult, but with a cap of twelve per household, regardless of how many adults live there. Often, these rules also distinguish between plants in the vegetative stage and those that are mature and flowering. Beyond plant counts, the law almost always dictates *where* you can grow. The most common requirement is that your plants must be in a closed, locked space that is not visible to the public. This makes choosing the right indoor cannabis seeds a perfect fit for meeting these legal standards.
Federal vs. State Law
Here’s a crucial point that can be confusing: cannabis is still classified as an illegal substance under federal law. This creates a direct conflict with state laws that have legalized it. What does this mean for you? First, you cannot grow or possess cannabis on federal property, like national parks or military bases. Second, it is illegal to transport cannabis across state lines, even if you are traveling between two states where it is legal. This is why it's so important to purchase seeds from a reputable American seed bank, which helps you stay compliant and avoid the legal risks associated with international shipping and customs.
Privacy and Security for Home Growers
The legal requirement to grow in a concealed, locked space is about more than just following a rule—it’s about ensuring privacy and security for you and those around you. A discreet setup protects your plants from theft and keeps you from attracting unwanted attention from neighbors or law enforcement. Your grow space should be secure from anyone who shouldn't have access, especially children and pets. This might mean dedicating a spare room, a closet, or a grow tent that can be properly locked and secured. Keeping your hobby private is a sign of a responsible and respectful cultivator.
Beyond physical security, consider the other ways your grow could be discovered. The distinct smell of flowering cannabis is a major giveaway. Investing in a good carbon filter and ventilation system is non-negotiable for an indoor setup. This not only keeps odors contained but also contributes to a healthier environment for your plants. Choosing the right genetics can also help manage your space. For instance, compact autoflower seeds are often a great choice for smaller, more discreet grow areas where you need to make the most of every square inch while keeping your operation under wraps.
Why Grow Indoors with Feminized Seeds?
If you're setting up an indoor garden, your goal is simple: to grow healthy, productive plants that deliver a high-quality harvest. Choosing the right seeds is the first and most critical step in making that happen. For indoor growers, especially those just starting out, feminized seeds are a game-changer. They remove a huge amount of guesswork and potential disappointment from the cultivation process, letting you focus on what matters—nurturing your plants from sprout to flower. Let's break down why they are the go-to choice for a successful indoor grow.
What Exactly Are Feminized Seeds?
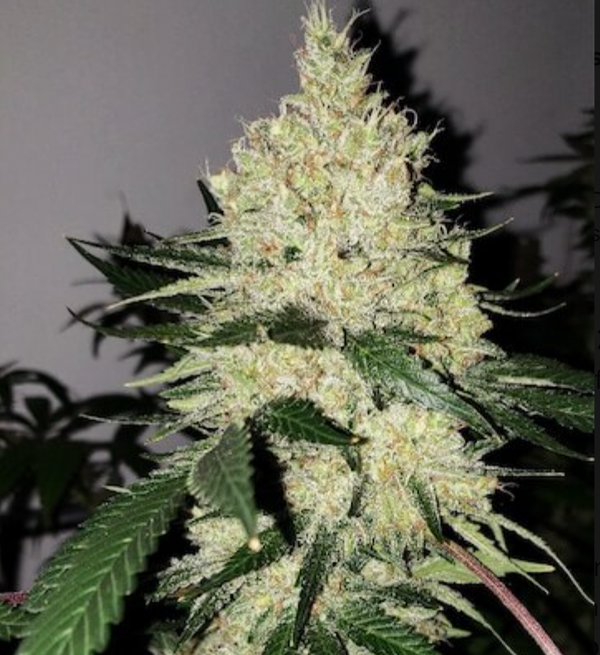
Feminized seeds are exactly what they sound like: cannabis seeds that are specially bred to produce only female plants. In the world of cannabis cultivation, it’s the female plants that produce the dense, cannabinoid-rich flowers, or buds, that you want to harvest. Male plants, on the other hand, produce pollen sacs and don't develop buds. By starting with feminized seeds, you get a near-100% guarantee that every seed you plant will grow into a bud-producing female. This eliminates the 50/50 gamble you take with regular seeds, where roughly half of your crop could end up being male.
Major Perks for Your Indoor Garden
The biggest advantage of using feminized seeds indoors is that you don't have to worry about male plants. A single male plant can pollinate your entire crop, causing your female plants to focus their energy on producing seeds instead of potent, resinous buds. This results in a seedy, lower-quality harvest. By using feminized seeds, you ensure a crop of sinsemilla (seedless) cannabis. This makes the growing process much more straightforward, as you won’t need to constantly monitor your plants to identify and remove males before they can cause problems. For anyone with a limited amount of space, this means every plant you grow is a productive one, maximizing the potential of your collection of indoor cannabis seeds.
How They Save You Time, Space, and Money
Efficiency is key in any indoor grow, and feminized seeds help you optimize all of your resources. Think about the time and effort you invest in your plants—weeks of watering, feeding, and providing light. With regular seeds, you could spend all that energy on a plant only to discover it’s a male that needs to be discarded. Feminized seeds save you that time. They also save precious space, which is often at a premium in an indoor setup. Every square foot of your grow tent is dedicated to a flower-producing plant. This efficiency translates directly into saving money on soil, nutrients, and electricity. Plus, many high-potency strains are available as feminized seeds, so you’re also investing in a bigger, better return at harvest time.
What Kind of Yield Can You Expect?
This is the big question, isn't it? While there's no single answer, using feminized seeds sets you up for the best possible outcome. Your final yield will depend on factors like your specific strain, your lighting setup, and your skill as a grower. However, the main advantage here is efficiency. Since you know every plant is a female, you can be confident that all your resources—light, water, and nutrients—are going directly toward producing buds. You aren't wasting a single square foot of your grow space on a non-productive male plant. This focus on only female plants is what allows you to maximize your harvest potential. Many growers can expect to harvest a few ounces per plant, but the genetic potential of your seeds is the true starting point for a heavy yield. Choosing a strain known for its productivity from a reliable source of feminized seeds gives you a strong foundation for a successful and bountiful harvest.
Your Indoor Grow Room Checklist
Before you even think about popping a seed, let's talk about setting up your space. Creating the perfect environment is the single most important thing you can do to ensure a successful indoor grow. Think of it as building a cozy, high-tech home for your future plants where you control everything from the lights to the breeze. Getting your gear sorted out from the start will save you a ton of stress and help your plants thrive. A well-planned grow room is the foundation for a healthy harvest, allowing your indoor cannabis seeds to reach their full genetic potential.
Your checklist doesn't have to be complicated or break the bank. The goal is to create a stable, controlled environment that mimics the best conditions nature has to offer. You’ll need a dedicated space, a light source, a way to manage temperature and humidity, a growing medium, and tools to keep the air moving and the water balanced. We’ll walk through each of these key components so you can feel confident you have everything you need to get started on the right foot.
Choosing the Right Strain for Beginners
Walking into the world of cannabis cultivation can feel like standing in front of a giant wall of options. With thousands of strains available, how do you pick the right one? For your first indoor grow, the best choice is a strain known for its resilience and forgiving nature. You want a plant that can bounce back if you make a few common beginner mistakes, like overwatering or slight temperature shifts. Look for strains described as hardy, easy to grow, or low-maintenance. These varieties are genetically predisposed to handle a bit of stress, giving you a much wider margin for error as you learn the ropes of indoor gardening.
Autoflowering vs. Photoperiod Seeds
One of the first big decisions you'll make is whether to grow autoflowering or photoperiod plants. Photoperiod strains are the traditional choice; they require a change in the light cycle to begin flowering. This means you must switch your lights to a 12-hours-on, 12-hours-off schedule to trigger budding. This gives you more control over the plant's size, but it adds a step to the process. On the other hand, autoflower seeds are often recommended for beginners because they flip to the flowering stage based on age, not light. They are typically smaller, faster, and simpler to manage in a confined indoor space, making them an excellent starting point for new growers.
Budgeting for Your First Grow
Growing your own cannabis is a rewarding hobby that can definitely save you money in the long run, but it does require an initial investment. The good news is that you have complete control over how much you spend. You can piece together a simple, budget-friendly setup or invest in a more advanced, automated system. Your primary goal is to create a stable environment, and that can be achieved at various price points. Before you buy anything, it's helpful to map out your potential expenses, which can be broken down into two categories: one-time startup costs and recurring ongoing expenses.
Startup Costs
Your initial investment will cover the essential equipment for your grow space. This includes a grow tent to contain the environment, a quality light source (LEDs are a popular and efficient choice), a ventilation system with an exhaust fan and carbon filter to manage heat and odor, and containers for your plants. You'll also need a growing medium like soil or coco coir. Choosing high-quality seeds is a critical part of this initial spend. Starting with feminized seeds ensures every plant you nurture is a productive female, which makes your entire investment in equipment and supplies more efficient from day one.
Ongoing Expenses
After your initial setup, your recurring costs will be much lower. These ongoing expenses primarily include electricity to run your lights and fans, water, and nutrients to feed your plants throughout their life cycle. A well-controlled climate helps create strong, healthy plants that are naturally more resilient, which can reduce the need for extra spending on things like pest control. This is another area where using feminized seeds pays off. You won't waste weeks of electricity and nutrients on a plant only to discover it's a male that has to be removed, ensuring your resources go directly toward producing a successful harvest.
Choosing the Best Grow Lights
Your indoor lights are your plants' sun, so this is one of the most critical pieces of your setup. For growing cannabis, specialized LED grow lights are a fantastic choice because they're energy-efficient and run cooler than older lighting systems. During the vegetative stage (the main growth phase before flowering), your plants will need about 18 hours of light and 6 hours of complete darkness each day. This long "day" encourages strong, leafy growth. Using a simple timer will make this process automatic, giving your feminized seeds the consistent schedule they need to flourish.
Creating the Perfect Climate
Cannabis plants are a bit like Goldilocks—they don't like it too hot or too cold. Your goal is to keep the temperature in your grow room stable, ideally between 72-82°F (22-28°C). You'll also want to manage the relative humidity, keeping it between 40-70%. A simple digital thermometer/hygrometer will help you monitor these levels. Avoid placing your grow space near drafty windows or vents that cause big temperature swings. A consistent climate helps prevent stress on your plants, which is especially important for sensitive autoflower seeds that have a set life cycle.
Picking Your Growing Medium
Your growing medium is what your plants will call home. For beginners, starting with a high-quality potting soil is the most straightforward path. Look for a soil that is light, lets air in, and is pre-loaded with some nutrients to give your young plants a good start. Soil is forgiving and provides a natural buffer for the roots. While other options like coco coir or full hydroponic systems exist, soil is the traditional and most accessible way to learn the fundamentals of cultivation. It provides a solid foundation for a healthy root system, which is the engine of the entire plant.
Why Good Airflow is a Must
Stagnant, humid air is a recipe for problems like mold and mildew. That's why air circulation is so important in an indoor garden. A small, oscillating fan is all you need to keep the air moving gently around your plants. This constant breeze helps strengthen their stems, making them more robust as they grow. It also helps regulate temperature and humidity pockets within your grow space. Think of it as creating a fresh, gentle wind that keeps your plants healthy and breathing easy, whether you're starting from seed or nurturing established cannabis clones.
Managing Odor with Carbon Filters
While that gentle breeze from an oscillating fan is great for your plants, it won't do much to contain the powerful aroma they'll produce during the flowering stage. For a discreet and neighbor-friendly setup, a carbon filter is non-negotiable. This simple device works with an exhaust fan to pull air out of your grow space. As the air passes through the filter, the activated carbon inside effectively scrubs and neutralizes the distinct cannabis smell, so only fresh, odor-free air is vented outside your tent. It’s an incredibly effective system that ensures the only one who knows about your beautiful crop of indoor cannabis seeds is you. Just be sure to match the size of your filter and fan to your grow space to ensure it can handle the volume of air properly.
Getting Your Water and Nutrients Right
You can give your plants the best nutrients in the world, but if your water's pH is off, they won't be able to absorb them. The pH level tells you how acidic or alkaline your water is. For most cannabis plants growing in soil, the sweet spot for water is a pH between 5.8 and 6.5. This specific range allows the roots to take up all the essential nutrients they need to grow. You can get an affordable pH testing kit or digital pen to check your water before you give it to your plants. Keeping the pH balanced is a simple step that ensures your premium THCA seeds can access all the food they need.
Let's Get Growing: From Seed to Sprout
This is where the magic begins. Turning a tiny seed into a thriving plant is one of the most rewarding parts of growing. It might seem intimidating at first, but with a little patience and the right technique, you’ll see that first green sprout push through the soil in no time. The key is to create a gentle, stable environment that mimics what a seed needs in nature to come to life.
Think of this early stage as building the foundation for your entire grow. A healthy start leads to a strong plant, and a strong plant leads to a successful harvest. We’ll walk through everything you need to do, from waking up your seeds to caring for your delicate new seedlings. Let’s get your hands dirty and bring those feminized seeds to life.
Is Growing Cannabis Hard? (Hint: Think Tomatoes)
Let's clear the air on a common question: is growing cannabis actually difficult? The short answer is no, not really. If you've ever tried your hand at growing tomatoes or even just kept a houseplant alive, you already have the basic skills you need. Cannabis plants, much like tomatoes, require a few fundamental things to thrive: good soil, plenty of light, and consistent watering. The process isn't some complicated science experiment reserved for experts; it's gardening, plain and simple. While cannabis has its own unique preferences that you'll learn along the way, the core principles are the same. So, take a deep breath and let go of any intimidation. You've got this, and starting with high-quality feminized seeds makes the learning curve that much smoother.
How to Germinate Your Seeds
Germination is simply the process of encouraging your seed to sprout. The most popular and reliable method is the paper towel technique. Start by soaking your seeds in a glass of lukewarm water for about 24 hours. Next, place them between two damp—not soaking wet—paper towels. Put the paper towels inside a plastic bag or between two plates to create a dark, humid space. Keep them in a warm spot, like on top of your refrigerator. In a few days, you’ll see a tiny white taproot emerge.
Once the taproot is about a quarter-inch long, it’s time to plant. You can also sow seeds directly into your growing medium, planting them about a quarter-inch deep. This method avoids the risk of damaging the delicate taproot during transfer.
Nurturing Your New Seedlings
Your brand-new seedling is delicate and needs a nurturing environment to thrive. Plant it in a quality soil mix that allows for good aeration and contains some initial nutrients. For lighting, young plants do best with gentle fluorescent or LED lights placed about 24 inches above them.
The golden rule for watering is to not overdo it. Wait until the top inch of soil feels dry to the touch before giving your seedling more water. You’ll want to keep the temperature stable, somewhere between 70–85°F (21–29°C). Humidity should be relatively high at this stage, around 60–70%, to help your little plant get established. You can find great genetics for your first grow in our collection of indoor cannabis seeds.
When and How Should You Transplant?
If you started your seed in a small germination cube or starter pot, you’ll eventually need to move it to a larger home. Transplanting gives the roots more room to expand, which is essential for developing a large, healthy plant and a bountiful harvest. A good rule of thumb is to transplant once your seedling has developed three to four sets of true leaves and a solid root structure.
When you’re ready to transplant, be as gentle as possible. Water the seedling an hour or two beforehand to help the soil hold together. Carefully move the entire plant, along with the soil around its roots, into its new, bigger pot. Avoid touching the roots directly to prevent shock.
Choosing the Right Pot Size
The size of your pot has a huge impact on the final size and health of your plant. Think of a strong root system as the engine for growth—it needs enough room to stretch out. For most indoor setups, a 3- to 5-gallon pot is the sweet spot. This size gives the roots plenty of space to expand, which supports a healthy plant capable of producing a great yield, while still being manageable inside a grow tent. It can be tempting to think bigger is always better, but an oversized pot can retain too much water and cause problems for the roots. A simple strategy is to plant your indoor cannabis seeds directly into their final 3- to 5-gallon home. However, many experienced growers prefer to start in a 1-gallon pot and transplant right before flowering to help build a dense, compact root ball.
Common Beginner Mistakes to Avoid
Every grower makes mistakes, but a few common ones are easy to avoid. The number one issue for beginners is overwatering. It’s tempting to give your little plant lots of love, but soggy soil suffocates the roots and invites problems. Always check the soil before you water.
Another pitfall is creating a stressful environment. Big temperature swings, inconsistent lighting, and improper pH can slow growth and weaken your plant. The goal is consistency. Providing a stable environment is one of the best things you can do to ensure your plant grows up healthy and strong. Learning from other grower confessions can help you sidestep these early challenges.
How to Create the Perfect Grow Environment
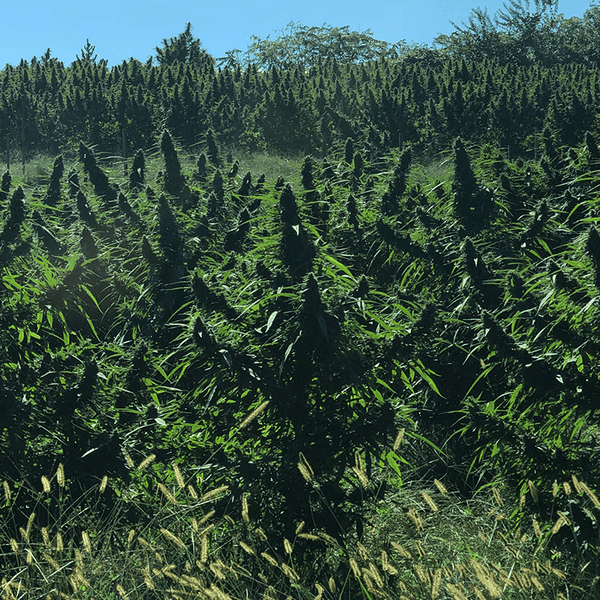
Once your seedlings are established, your main job is to become the master of their universe. Growing indoors gives you complete control over your plant's environment, which is a huge advantage. Unlike outdoor growing, you don’t have to worry about unpredictable weather, pests, or seasons. Instead, you can create the perfect conditions to help your plants thrive through every stage of their life. Think of your grow room as a finely tuned ecosystem where you manage the temperature, humidity, airflow, and light.
Getting these elements right is the secret to healthy, resilient plants and impressive yields. It might sound like a lot to manage, but it’s simpler than you think once you understand what your plants need. By dialing in these four key factors, you’re setting the stage for success and ensuring your high-quality indoor cannabis seeds reach their full genetic potential. Let’s walk through how to create the ideal home for your plants.
Dialing In the Right Temperature
Cannabis plants are a bit like Goldilocks—they don’t like it too hot or too cold. Maintaining the right temperature is key to healthy growth. During the vegetative stage, when your plants are focused on growing big and leafy, aim for a temperature between 75-86°F (24-30°C). This warmer climate encourages vigorous growth.
Once you switch to the flowering stage, it’s time to cool things down a bit. A slightly lower temperature range of 70-79°F (21-26°C) signals to the plant that it's time to produce dense, resinous buds. Keeping a simple thermometer in your grow space will help you monitor and adjust as needed.
Managing Humidity at Every Stage
Humidity plays a huge role in your plant's health, and the ideal level changes as your plant matures. Young seedlings love high humidity, around 70%, because their root systems are still developing. As your plants enter the vegetative stage, you can lower the relative humidity to a range of 40-70%.
When your plants start to flower, it's crucial to drop the humidity to 40-50%. Lower humidity during this phase helps prevent mold and mildew from forming on your precious buds. A hygrometer is an inexpensive tool that will help you keep your humidity levels exactly where they need to be.
Perfecting Your Garden's Airflow
Stagnant air is a recipe for disaster in a grow room. Good air circulation is essential for several reasons: it strengthens your plants' stems, helps manage heat and humidity, and prevents pests and mold from taking hold. An oscillating fan or two is usually all you need to keep the air moving gently around your plants.
You don’t want to blast them with a direct wind, which can cause windburn. Instead, aim for a light breeze that rustles the leaves. This mimics a natural outdoor environment and ensures your plants get a steady supply of fresh CO2 for photosynthesis, leading to healthier growth.
Setting a Consistent Light Schedule
For photoperiod plants like most feminized seeds, light is the trigger that tells them when to grow and when to flower. During the vegetative stage, you’ll want to provide 18 hours of light and 6 hours of complete darkness each day. This long light period encourages your plants to focus all their energy on growing strong roots and lush foliage.
To initiate the flowering stage, you’ll switch the schedule to a 12/12 cycle—12 hours of light followed by 12 hours of uninterrupted darkness. This change mimics the shortening days of fall and signals to your plants that it’s time to start producing buds.
Why Your Water's pH Matters
You can give your plants the best nutrients on the market, but if your water's pH is off, they won't be able to absorb them. The pH level determines how well your plants can take in nutrients through their roots. For cannabis grown in soil, the ideal pH range for your water and nutrient solution is between 6.0 and 7.0. If you're using a hydroponic setup, aim for a slightly more acidic range of 5.8 to 6.5.
You can easily test your water’s pH with a digital pen or simple test strips. This small step is one of the most effective ways to prevent nutrient deficiencies and ensure your plants are happy and well-fed.
Feeding Your Cannabis Plant Properly
Just like us, cannabis plants need a balanced diet to thrive. Giving them the right nutrients at the right time is one of the most important parts of indoor cultivation. Think of it as setting the table for a feast; if you provide everything your plants need, they’ll reward you with strong growth and a bountiful harvest. But if something is missing, they’ll let you know through stunted growth or discolored leaves.
Getting your feeding and watering routine right can feel a little intimidating at first, but it’s simpler than it seems. It’s all about understanding the basic building blocks your plants use for energy and growth. We’ll cover the essential nutrients, how to spot signs of trouble, and how to create a simple schedule that keeps your plants happy and healthy from seedling to harvest. With a little attention to detail, you’ll be able to read your plants’ cues and give them exactly what they need to flourish.
What Nutrients Do Your Plants Need?
Your cannabis plants rely on three main nutrients, often called macronutrients: Nitrogen (N), Phosphorus (P), and Potassium (K). Each one plays a starring role in your plant's development. Nitrogen is the key to lush, green growth, helping build strong stems and leaves during the vegetative stage. Phosphorus is crucial for developing healthy roots and, most importantly, for producing big, dense flowers. Potassium acts as an all-around health regulator, strengthening the plant against stress and disease. Your chosen fertilizer will show these values as an N-P-K ratio, which you’ll change as your plant moves from growth to flowering.
How to Spot Nutrient Deficiencies Early
Your plants will tell you when they’re hungry or unhappy; you just need to learn their language. One of the most common signs of a nutrient deficiency is yellowing leaves. If you see yellowing between the veins on new, younger leaves, your plant might be asking for more iron. Widespread yellowing, brown spots, or even red and purple stems can also signal that something is off in their diet. By checking your plants daily, you can spot these issues early and make adjustments before they become serious problems, ensuring your garden stays on track.
Creating a Simple Feeding Schedule
A feeding schedule doesn't have to be complicated. The main thing to remember is that your plants' dietary needs change as they grow. During the vegetative stage, when they’re focused on getting big and leafy, they crave a fertilizer high in nitrogen. You’ll typically keep them on an 18-hour light and 6-hour dark schedule during this phase. Once you switch the lights to a 12/12 cycle to trigger flowering, it’s time to change their diet. At this point, you’ll want to use a bloom fertilizer with more phosphorus and potassium to support bud production.
Are You Watering Your Plants Correctly?
Overwatering is one of the most common mistakes new growers make. Too much water suffocates the roots and can lead to mold or disease. Instead of watering on a strict schedule, let your plants tell you when they’re thirsty. A great way to do this is by feeling the weight of the pot. After a thorough watering, the pot will feel heavy. Wait until it feels noticeably lighter to water again. This simple trick ensures your plants get the perfect amount of water every time, promoting a healthy and robust root system for all your feminized seeds.
Advanced Watering Techniques
Beyond the simple pot-lift test, you can refine your watering by focusing on creating a consistent wet-dry cycle. This means letting the soil dry out almost completely between waterings. This practice does more than just prevent overwatering; it forces the roots to stretch out in search of moisture, building a stronger, more extensive root system. It also allows plenty of oxygen to reach the roots, which is essential for nutrient uptake and overall plant health. This level of precision ensures your plants can make the most of every drop of water and every nutrient you provide, which is especially important when you're working with innovative genetics like triploid cannabis that have incredible growth potential.
Keeping Your pH Levels in Check
You can give your plants the best nutrients in the world, but if the pH is off, they won’t be able to absorb them. The term pH refers to how acidic or alkaline your water and soil are. For most cannabis plants grown indoors, the sweet spot for water and nutrient solutions is a pH between 5.8 and 6.5. Outside of this range, plants experience "nutrient lockout," meaning they can't access the food you're giving them. Regularly testing your water with a simple pH kit is a critical step for ensuring your plants can properly absorb all the nutrients they need to thrive.
A Guide to Cannabis Plant Growth Stages
Once your seedlings are established, your job is to guide them through their lifecycle. Understanding what your plants need at each stage—from vegetative growth to flowering—is the key to a successful harvest. Think of yourself as a supportive coach, providing the right environment, nutrients, and training to help your plants reach their full potential. This is where your attention to detail really pays off.
Feminized seeds are fantastic for indoor growers because you can control exactly when they start to flower by adjusting the light schedule. This gives you the power to manage their size and structure, which is a huge advantage when you're working with limited space. During the vegetative stage, your focus will be on building a strong, healthy plant structure. Then, when you're ready, you'll switch the lights to trigger the flowering phase and watch those beautiful buds develop. We’ll walk through the key actions you can take during these stages, from training and pruning to managing stress, to ensure your plants stay happy and productive.
What Are the Main Growth Cycles?
Your cannabis plant goes through a few distinct phases on its way to harvest. After the initial germination and seedling stages, the plant enters the vegetative stage. This is all about growth—developing strong roots, a sturdy stalk, and lots of leaves to soak up light. Once you've built a healthy plant, you can initiate the flowering stage. For feminized seeds, this is done by changing the light schedule to 12 hours of light and 12 hours of darkness. This mimics the changing seasons and tells the plant it's time to produce buds. From seed to harvest, this entire process can take about 12 to 20 weeks, depending on the strain.
The Overall Growth Timeline
Patience is a virtue in gardening, and growing cannabis is no exception. From the moment you plant a seed until you're ready to harvest, you can expect the journey to take anywhere from four to eight months. The exact timeline depends heavily on the specific strain you're growing and your setup. One of the major perks of an indoor grow is that you have more control over the light cycle, which can help you move your plants into the flowering stage a bit faster. This control allows you to manage the plant's size and timeline to fit your space and schedule perfectly.
Stage 1: Germination (1-7 Days)
This is the very first step, where your seed "wakes up" and begins its life. During germination, the seed absorbs water, which activates its growth processes. A tiny white root, called a radicle, will emerge and start growing downward to anchor the plant. Shortly after, a small stem will push its way upward, carrying the seed casing with it. Once it breaks through the soil, you'll see the first two small, rounded leaves. These aren't true leaves but are called cotyledons, and they provide the initial energy the sprout needs to get started.
Stage 2: Seedling (2-3 Weeks)
Once your sprout has emerged, it enters the seedling stage. For the next two to three weeks, your plant is very young and delicate, much like a newborn. It will focus on developing a stronger root system and growing its first set of "true" leaves—the iconic serrated cannabis leaves. These will start with a single leaflet and gradually grow more as the plant matures. A healthy seedling is typically short and bushy with vibrant, bright green leaves. It's crucial to be gentle during this phase, especially with watering, to avoid stressing the young plant.
Stage 3: Vegetative (2-8+ Weeks)
This is where the explosive growth happens. During the vegetative stage, your plant's sole mission is to get as big and strong as possible. It will grow rapidly, developing a thick main stalk, more branches, and a dense canopy of leaves to absorb light. This phase is all about building a robust structure that can support heavy buds later on. With an indoor setup, you can keep a plant in this stage for as long as you want by providing 18 or more hours of light per day. This gives you the flexibility to grow your indoor cannabis seeds to the perfect size for your space.
Stage 4: Flowering (6-8+ Weeks)
The flowering stage is the grand finale you've been waiting for. This is when your female plants stop focusing on leafy growth and start producing the dense, resinous buds you want to harvest. For photoperiod strains, you trigger this stage by switching your light schedule to 12 hours of light and 12 hours of complete, uninterrupted darkness. This change mimics the shorter days of autumn and signals to the plant that it's time to reproduce. The length of the flowering stage varies by strain, but it typically lasts between six and eight weeks, though some can go much longer.
Identifying Plant Sex
If you're not using feminized seeds, this is a critical step. Around the beginning of the flowering stage, your plants will start to show "pre-flowers" at the nodes, which are the points where branches meet the main stem. Female plants will produce two small, white, hair-like pistils. Male plants, on the other hand, will develop small, green, grape-like pollen sacs. It's essential to identify and remove any males immediately before those sacs burst and pollinate your females, which would result in a seedy, lower-quality harvest. Of course, you can skip this entire stressful process by starting with our premium feminized seeds, which are guaranteed to produce female plants.
Keeping a Plant in the Vegetative Stage
One of the coolest things about growing photoperiod cannabis indoors is that you can keep a plant in the vegetative stage indefinitely. As long as you provide it with 18 or more hours of light per day, it will continue to focus on leafy growth and won't start flowering. Growers use this technique to create "mother plants." A mother plant is a healthy, robust plant that is kept in a permanent vegetative state to serve as a source for cuttings, or clones. This allows you to create genetically identical copies of a plant you love, ensuring consistent results with every grow. If you're interested in starting with established genetics, you can also explore our selection of cannabis clones.
Training Your Plants for a Bigger Harvest
Training your plants might sound intense, but it’s just a way to shape their growth for better light exposure and bigger yields. Techniques like Low-Stress Training (LST), where you gently bend and tie down branches, encourage the plant to grow wider rather than taller. This creates a more even canopy where more bud sites can receive direct light. Feminized seeds have a strong natural defense system, making them great candidates for training. When you shop for seeds, look for strains known to develop strong side branches and flexible stems, as they respond especially well to methods like LST or a Screen of Green (SCROG) setup.
Pruning Tips for Healthy Growth
Pruning is like giving your plant a haircut—it helps keep things tidy and directs energy where it’s needed most. By selectively removing dead or yellowing leaves and any lower branches that aren't getting much light, you improve airflow around the plant. This simple step helps prevent mold and pests from taking hold. Better air circulation and light penetration are essential for healthy growth and encourage the plant to focus its resources on developing dense, high-quality buds on the main colas. Regular maintenance ensures your premium THCA seeds can truly flourish.
How to Control Your Plant's Height
In an indoor garden, space is everything. Without intervention, some cannabis strains can grow quite tall, quickly outgrowing your tent or room. Training techniques like topping or LST are your best tools for managing height. Topping involves snipping the main stalk, which encourages the plant to grow two new main colas and bush out. This not only keeps the plant shorter but also creates more bud sites. It’s also important to maintain a stable environment. Any major stress can sometimes cause a female plant to develop male parts, a condition known as hermaphroditism. Keeping your indoor cannabis seeds happy is the best way to keep them compact and productive.
Simple Ways to Prevent Plant Stress
A stressed plant is an unproductive plant. Stress can be caused by many factors, including big temperature swings, inconsistent lighting, or improper watering. These issues can slow down growth, reduce your final yield, and in some cases, even cause hermaphroditism in your female plants. The best defense is a good offense. Monitor your grow room daily. Check for any signs of drooping, discoloration, or pests. By catching and fixing problems early, you can keep your plants on a steady, healthy path. A stable environment is the foundation of a successful indoor grow, allowing your plants to focus all their energy on producing amazing buds.
Keeping Your Indoor Garden Pest-Free
Nothing is more frustrating than seeing your hard work threatened by tiny invaders or fuzzy mold. An indoor garden gives you a ton of control, but it’s not a fortress. The best defense is a good offense. Staying vigilant and creating an environment where your plants thrive—and pests don’t—is the secret to a healthy, happy harvest. When you start with strong genetics from quality feminized seeds, your plants are already set up for success. Your job is to maintain that clean, stable environment where they can flourish without unwanted guests. Think of it as proactive plant parenting; a little daily attention goes a long way in preventing major headaches down the road.
Spotting the Most Common Pests
Get into the habit of inspecting your plants daily, especially the undersides of leaves where pests love to hide. The most common culprits you’ll encounter indoors are spider mites, aphids, and whiteflies. Spider mites are tiny and create fine, web-like structures on your plants. Aphids are small, pear-shaped insects that cluster on new growth, while whiteflies will scatter in a cloud when you disturb a leaf. Catching these pests early is everything. A small infestation can be managed easily, but a full-blown invasion can quickly cause significant damage and stress your plants, hurting your final yield.
How to Prevent Common Plant Diseases
The best way to fight plant diseases like mold, mildew, and root rot is to never let them start. These issues almost always stem from environmental factors you can control. Good air circulation is non-negotiable; a gentle breeze from a fan prevents stale, damp air from settling on your leaves. Also, be careful not to overwater. Soggy soil suffocates roots and creates the perfect breeding ground for root rot and other fungal problems. A simple rule of thumb is to let the top inch or two of your growing medium dry out completely before you water again.
Choosing Natural Pest and Disease Treatments
If you do spot a few pests, don’t panic and reach for harsh chemicals. There are plenty of effective natural treatments that are safe for your plants and your final product. Neem oil is a fantastic all-in-one solution that works as a fungicide, insecticide, and miticide. You can mix it with water and a drop of gentle soap to spray on your plants. Insecticidal soap is another great option that targets soft-bodied insects like aphids and spider mites without harming your plants. These treatments are most effective when applied consistently, so follow the product instructions for the best results.
Why You Should Monitor Your Grow Room
A stable environment is your greatest ally in pest and disease prevention. Wild swings in temperature and humidity can stress your plants, weakening their natural defenses and making them prime targets for problems. Keep a close eye on your grow room’s climate using a digital thermo-hygrometer. If you notice your humidity spiking or temperatures dropping too low, make adjustments right away. A stressed plant is much more susceptible to everything from powdery mildew to spider mites, so keeping your environment consistent is one of the most protective measures you can take.
The Importance of a Clean Grow Space
Think of your grow room like a clean room in a lab—hygiene is critical. Pests and disease spores can hitch a ride on your clothes, tools, or old plant debris. Make it a rule to keep the area tidy. Regularly wipe down surfaces, clean your tools after each use, and immediately remove any dead or fallen leaves from the floor and your pots. A clean space eliminates potential hiding spots and food sources for pests and reduces the risk of mold spores taking hold. This simple housekeeping routine is especially vital when growing beautiful indoor cannabis seeds.
How to Harvest, Dry, and Cure Like a Pro
You’ve made it to the finish line! After weeks of careful attention, your plants are ready for the final steps that transform them into a top-shelf product. Harvesting, drying, and curing are just as important as the growing process itself. This is where you lock in the aroma, flavor, and potency you’ve worked so hard to cultivate. Rushing these final stages can undo all your effort, so take your time and follow these steps to ensure your harvest reaches its full potential. Getting this right is the difference between good and truly great cannabis.
How Do You Know When It's Time to Harvest?
Timing is everything when it comes to harvesting. The key is to watch the trichomes—those tiny, sparkling crystals covering the buds. You’ll need a magnifying glass or a jeweler’s loupe to see them clearly. Early on, trichomes are clear like glass. As the plant matures, they turn a milky, cloudy white. The perfect time to harvest is when at least 50% of the trichomes have turned milky. This indicates peak THC production and the most potent effects. If you wait too long and they turn amber, the effect will be more sedative. Watching your feminized seeds reach this stage is one of the most rewarding parts of the process.
Checking Trichomes and Pistils
While the pistils—the small hairs on your buds—give you a general clue by turning from white to a reddish-orange, the real secret lies in the trichomes. These are the tiny, mushroom-shaped glands that give your buds their frosty look, and they are the most accurate indicator of peak potency. To get a good look, you'll need a jeweler's loupe or a small microscope. When you zoom in, you'll see the trichomes change color over time. At first, they'll be clear, which means it's too early. As they mature, they'll turn a cloudy, milky white—this is your signal that THC levels are at their highest. If you're growing potent THCA seeds, this is the sweet spot. Waiting until they turn amber will result in a more relaxing, sedative effect as the THC begins to convert to CBN.
Drying Your Buds the Right Way
Once you’ve cut down your plants, the next step is a slow and steady drying process. Find a dark, cool space with good air circulation, like a closet or a dedicated drying tent. Aim for a temperature between 60-70°F and humidity around 50-60%. Hang the branches upside down, making sure they have enough space between them to breathe. This slow drying process, which usually takes one to two weeks, is essential for preserving the delicate terpenes that give your cannabis its unique smell and taste. Rushing this step with heat or fans blowing directly on the buds will only result in a harsh, unpleasant smoke.
Ideal Temperature and Humidity for Drying
Let's get specific about that perfect drying environment. You're aiming for a temperature between 60 and 70°F and a relative humidity of 50% to 60%. Think of it as a cool, slightly damp cellar. This "low and slow" approach is crucial because it preserves the terpenes—the compounds responsible for your plant's amazing aroma and flavor. If the temperature is too high, these delicate compounds evaporate, leaving you with a product that smells like hay. At the same time, the humidity level ensures the buds dry evenly from the inside out. Too dry, and the outside gets crispy while the inside stays wet. Too damp, and you’re rolling out the welcome mat for mold. A simple thermo-hygrometer is your best friend here, helping you maintain the perfect balance to protect the quality of your harvest.
Curing for Better Flavor and Potency
Curing is the final touch that refines your harvest. After the branches snap instead of bend, it’s time to trim the buds and place them in airtight glass jars. For the first couple of weeks, open the jars for a few minutes each day—a process called "burping." This releases excess moisture and replenishes the oxygen, preventing mold and allowing the flavors to develop fully. A proper cure breaks down chlorophyll, which gets rid of any grassy taste, and enhances the potency and smoothness of the final product. This step is crucial for developing the complex profiles found in premium THCA seeds.
Perfecting Your Curing Environment
The environment inside your curing jars is just as important as the one in your grow room. Your goal is to create a stable, dark, and cool space where the magic of curing can happen. Store your jars in a closet or cabinet where the temperature stays consistent, ideally around 60-70°F. Light degrades cannabinoids and terpenes, so keeping them in the dark is non-negotiable. The burping process is your way of managing the jar's microclimate. By opening them daily, you release moisture that could otherwise lead to mold and introduce fresh air, which is essential for the aerobic bacteria that break down chlorophyll. This patient process is what transforms your harvest, developing the smooth flavors and rich aromas that define a top-quality collection of indoor cannabis seeds.
How to Store Your Harvest for Lasting Quality
After curing for at least two to four weeks, your buds are ready for long-term storage. The same airtight glass jars you used for curing are perfect for this. Keep them in a cool, dark, and dry place to protect your harvest from light, heat, and oxygen, all of which can degrade cannabinoids and terpenes over time. A properly dried, cured, and stored harvest will maintain its quality for months, allowing you to enjoy the results of your hard work long after your grow is complete. When you’re ready for your next project, you can check out our new releases for fresh inspiration.
Troubleshooting and Finding Help
Even with the most careful planning, you'll eventually run into a question or a problem you can't solve alone. That's perfectly normal. Every successful grower has a story about a challenge they had to overcome, whether it was a mysterious yellowing leaf or a stubborn pest. The good news is, you're not on this journey by yourself. Knowing where to turn for reliable advice is just as important as having the right gear. There are tons of resources and communities ready to help you figure things out and get your garden back on track.
Where to Find Support from Other Growers
One of the best resources you have is the collective wisdom of other growers. You’re not the first person to wonder why your plant's leaves are curling or what those tiny white spots are. Online forums and social media groups are fantastic places to connect with a global community of cultivators who are passionate about sharing their knowledge. Places like Reddit have a very supportive community where people share everything from their first plant setups to troubleshooting tricky nutrient issues. Don't be shy about posting photos and asking questions—chances are, someone has faced the exact same problem and is happy to share what worked for them.
Ready to Level Up? Advanced Grower Tips
Once you’ve mastered the fundamentals of indoor growing, you can start refining your technique to get even better results. These advanced tips are for growers who are ready to move beyond the basics and fine-tune their craft. By focusing on maximizing your yield, optimizing your space, and working more efficiently, you can produce truly exceptional harvests. It all starts with having the right genetics, so make sure you’re working with high-quality cannabis seeds from the get-go. Think of these strategies as the next level in your cultivation journey—ways to get more out of every single plant.
Advanced Techniques to Maximize Your Yield
If you want to see a significant increase in your harvest, you’ll need to be more hands-on with your plants. To maximize your yield, consider using training methods like Low Stress Training (LST) or Screen of Green (ScrOG) to encourage even canopy growth and increase light exposure to all parts of the plant. These methods guide your plant to grow horizontally, creating a flat canopy where more bud sites receive direct light. You should also adjust your feeding schedule as your plants mature. Be sure to switch to fertilizers richer in phosphorus and potassium during the flowering stage to enhance bud development and density.
Making the Most of a Small Grow Space
No matter the size of your setup, you can always find ways to be more efficient. If you’re working with limited square footage, choose compact, fast-growing strains for small spaces, like many of the autoflower seeds available. It’s also critical to ensure that your grow area has good air circulation to prevent mold and pests, which can thrive in cramped, stagnant conditions. A simple but effective trick is using reflective materials like Mylar on the walls of your grow space. This small addition can help maximize light efficiency by bouncing light back onto your plants, ensuring no photon goes to waste and every lower branch gets the energy it needs.
Grow Smarter: Tips for Energy Efficiency
A smarter grow is often a more sustainable and cost-effective one. One of the biggest impacts you can make is with your lighting. Utilize LED grow lights, which consume less energy and produce less heat compared to traditional HPS lights. This efficiency allows for closer placement to plants without the risk of burning them, giving you more control over your canopy. Another easy win is implementing a timer for your lights. This simple device can help maintain consistent light cycles while saving energy, taking one more task off your daily checklist and ensuring your plants get the exact amount of light they need, every single day.
Automating Your Grow Room Environment
For the grower who loves precision and consistency, automation is the ultimate upgrade. Consider using automated systems for temperature and humidity control, such as smart thermostats and humidistats, to maintain optimal growing conditions without constant manual adjustments. These tools create a stable environment where your plants can thrive. Similarly, automated watering systems can help prevent the common mistake of overwatering and ensure consistent moisture levels in the soil. When you pair these advanced environmental controls with innovative genetics like triploid cannabis, you create a high-performance system that consistently produces top-tier results with less manual effort.
Related Articles
- How to Grow Cannabis at Home: A Simple Guide
- What is a Feminized Weed Seed? Pros, Cons & How to Grow
- Tips and Tricks for Growing Weed Easily: Excellent Results With Minimal Effort
- The Ultimate Guide to Growing Cannabis from Seed Indoors
- How to Plant Feminized Seed for Max Yields
Frequently Asked Questions
Can feminized seeds ever produce male plants? It's incredibly rare, but severe stress can sometimes cause a female plant to develop male characteristics. This is why creating a stable, consistent environment is so important. By avoiding major swings in temperature, light, and watering, you ensure your feminized seeds do exactly what they're designed to do: grow into healthy, bud-producing female plants.
I'm on a budget. What are the absolute must-have items to start my indoor grow? If you have to prioritize, invest in a quality light source. Your light is your plant's sun, and it's the one piece of equipment that has the biggest impact on your final yield. After that, you'll need a simple fan for air circulation and a timer to automate your light schedule. You can start with those essentials and build out your setup over time.
How do I know when to switch from the vegetative to the flowering stage? With feminized photoperiod seeds, you are in complete control of this timing. The decision is based on how big you want your plants to get. A good rule of thumb is to flip your light schedule to 12/12 when your plant has reached about half the final height you want it to be, as it will continue to stretch and grow for the first few weeks of flowering.
My plant's leaves are turning yellow. What's the first thing I should check? Before you assume it's a nutrient problem, check your water's pH. If the pH is outside the ideal range of 6.0-7.0 for soil, your plant can't absorb the nutrients you're giving it, a problem known as nutrient lockout. This is one of the most common and easily fixable issues for new growers.
Is it better to dry my harvest quickly or slowly? A slow and controlled dry is always the better choice. Rushing the process with heat or too much direct airflow will trap chlorophyll in the buds, resulting in a harsh, grassy taste and smell. Patience during the drying and curing phase is what preserves the delicate flavors and aromas you worked so hard to cultivate.