Let's clear the air about autoflowers. For years, some growers dismissed them as small, low-yielding plants that couldn't compete with their photoperiod cousins. But that's old news. Thanks to incredible advancements in breeding, modern autoflowers are a completely different story. They can produce massive yields, incredible potency, and a rich spectrum of flavors and effects, all in a fraction of the time. The key is knowing how to get that potential. This guide is your roadmap to understanding today's high-performance autoflower seeds. We'll show you how to choose the best strains and use simple techniques to achieve a harvest that will impress even the most seasoned cultivators.
Key Takeaways
- Autoflowers Run on Autopilot: Their unique genetics mean they flower automatically based on age, not light schedules. This removes the most common point of failure for new growers and simplifies the entire cultivation process from start to finish.
- A Strong Start is Non-Negotiable: With a short lifespan, autoflowers can't recover from early stress. Give them their best shot by planting them in their final pot with light, airy soil and providing consistent light (18+ hours) and gentle watering from day one.
- Match Your Genetics to Your Goals: The quality of your harvest is locked into the seed's DNA. Invest in feminized seeds from a reputable supplier and choose a strain specifically bred for the results you want, whether that's a massive yield, a fast turnaround, or outdoor resilience.
What Are Autoflower Seeds?
If you're just starting your growing journey, you've likely heard about autoflower seeds. Think of them as the low-maintenance, fast-track option in the cannabis cultivation world. Unlike other types of cannabis that require specific light schedules to start producing buds, autoflowering plants operate on their own internal clock. This unique trait makes them incredibly straightforward to grow, whether you have a sprawling outdoor garden or a small indoor setup.
Autoflower seeds are perfect for beginners because they remove a lot of the guesswork. They tend to be smaller, faster, and more resilient than their counterparts, offering a quicker path from seed to harvest. This means you can get multiple harvests in a single season and learn the ropes of cultivation without the stress of managing complex light cycles. They are a fantastic entry point for anyone looking to grow their own high-quality cannabis with confidence.
Ruderalis: The Secret to Automatic Flowering
The "auto" in autoflower comes from a special genetic ingredient: Cannabis ruderalis. This tough, wild cannabis variety adapted to survive the short summers and harsh climates of places like Siberia. To reproduce quickly, it evolved to flower automatically after a certain amount of time, regardless of how much daylight it received.
Modern breeders have skillfully crossed this hardy ruderalis with popular indica and sativa strains. The result is a plant that retains the desirable traits of its famous parents—like potency and flavor—but inherits the automatic flowering gene. This means your plants will switch from vegetative growth to flowering all on their own, typically just a few weeks after germination. This genetic trick is what makes growing autoflowers so uniquely simple.
How Do Autoflowers Differ from Photoperiods?
The main difference between autoflower and photoperiod cannabis comes down to light. Photoperiod strains, which include most traditional cannabis varieties, depend on changes in the light cycle to begin flowering. Indoor growers typically switch their lights to a 12-hours-on, 12-hours-off schedule to trigger this stage. Outdoors, these plants wait for the days to get shorter in late summer.
Autoflowers, on the other hand, completely ignore light cues. They begin to flower based on their age, usually within two to four weeks of sprouting. This makes them much faster, often finishing their entire life cycle in just eight to ten weeks. While photoperiod plants can grow much larger and potentially yield more, autoflowers offer speed, simplicity, and the ability to harvest multiple times in one season.
Why Beginners Love Autoflowers
New growers often choose autoflowers for a few key reasons. First, their speed is a huge advantage. A quick turnaround means you see the results of your efforts sooner and can learn from each cycle more rapidly. Their compact size also makes them ideal for growing in small spaces like tents, balconies, or discreet corners of a garden.
Beyond their speed and size, autoflowers are famously resilient. Thanks to their ruderalis heritage, they are naturally tough and can handle temperature fluctuations and resist pests and diseases better than many other strains. This built-in durability provides a safety net for beginners who are still learning about plant care. Their natural hardiness makes them excellent candidates for outdoor gardens, where they can thrive with minimal intervention.
The Autoflower Growth Timeline
One of the best things about growing autoflowers is their predictable, fast-paced life cycle. From the moment you plant the seed, the clock is ticking. Understanding what's happening at each stage helps you provide the right care at the right time, ensuring your plant stays healthy and on track for a fantastic harvest. The entire journey is broken down into three main phases: germination, the seedling stage, and flowering.
Germination Stage (2-7 days)
This is where it all begins. During germination, your seed wakes up, cracks open, and sends out its first root, called a taproot. Your main job here is to provide a warm, moist, and dark environment to encourage it to sprout. This initial process is surprisingly quick. As the experts at Onrec point out, "The seed sprouts. This usually takes 2 to 7 days." Be careful not to overwater during this delicate phase; think damp, not soaking wet. Once you see the sprout emerge, it's ready for a gentle light source.
Seedling Stage (2-3 weeks)
After your seed has sprouted, it enters the seedling stage. For the next two to three weeks, the plant will focus its energy on developing its first few sets of leaves and establishing a strong root system. This is a critical period for autoflowers. Because their lifespan is so short, they don't have time to recover from significant stress or damage that occurs early on. According to Onrec, "The young plant grows its first leaves and roots. This stage lasts about 2 to 3 weeks." Your goal is to provide a stable environment with consistent light and careful watering to build a solid foundation for the flowering to come.
Flowering Stage (6-8 weeks)
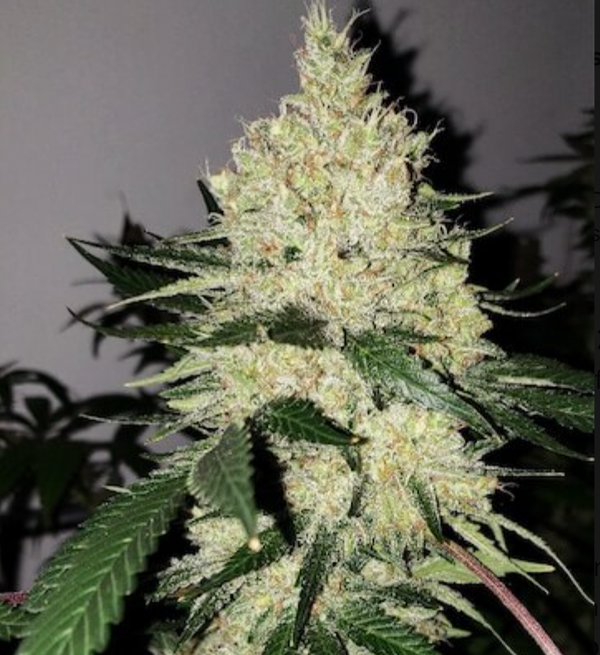
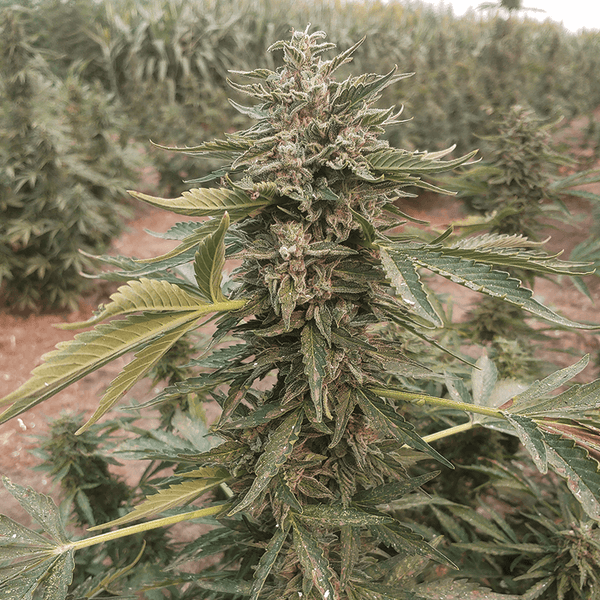
This is the phase you've been waiting for. True to their name, autoflowers will automatically switch from growing leaves to producing buds, no light change required. You'll start to see small white hairs, called pistils, forming at the nodes of the plant. This is the first sign of flowering. Over the next six to eight weeks, those sites will develop into dense, resinous buds. The exact timing can vary depending on the genetics of your chosen autoflower strain, with Onrec noting that "Some fast strains can finish in as little as 6 weeks." During this time, the plant's nutrient needs will change as it pours all its energy into flower production.
How to Spot a High-Quality Autoflower Seed
Starting your grow with the best possible genetics is the single most important step you can take toward a successful harvest. But when you’re looking at a tiny seed, how can you tell if it has the potential to become a thriving plant? It’s easier than you think. By checking for a few key indicators and understanding your options, you can confidently choose seeds that are set up for success from day one. Let’s walk through what to look for.
Feminized vs. Regular: What's the Right Choice?
When you’re shopping for seeds, you’ll see two main types: regular and feminized. For growers who want to harvest buds (also known as flowers), the choice is simple. Feminized seeds are bred to produce only female plants nearly 99.9% of the time. This is a huge advantage because female plants are the ones that grow the cannabinoid-rich flowers you’re after. Regular seeds, on the other hand, have a 50/50 chance of growing into male or female plants. Male plants produce pollen sacs instead of buds and can pollinate your females, causing them to produce seeds instead of flowers. For a straightforward grow with a predictable, smokable harvest, feminized autoflower seeds are the way to go.
Look for High Germination Rates
When you're choosing autoflower seeds, the germination rate is a big deal. Think of it as a promise from the seed bank—it’s the percentage of seeds you can expect to successfully sprout. A high rate is your best insurance against wasting time, money, and excitement on seeds that never get started. Reputable suppliers take great care in storing and handling their genetics to ensure they remain viable, which is why they can stand behind their products. While no seed is a 100% guarantee, starting with seeds from a source that prioritizes quality gives you a massive head start and sets the stage for a healthy, vigorous plant.
To give your seeds the best chance, you can use a simple germination method. Many growers swear by the paper towel technique: just place your seeds between two damp (not soaking wet) paper towels on a plate. Cover them with another plate to create a dark, humid environment and keep them somewhere warm. In just a few days, you should see a tiny white taproot emerge, which is your signal that the seed is viable and ready for soil. This simple step confirms you're working with strong genetics and helps you avoid planting duds. Starting your grow with proven, high-quality autoflower seeds is the foundation of a great harvest.
How to Pick a Strain You'll Love
Once you’ve decided on feminized seeds, the fun part begins: choosing your strain. Think about what you want from your final harvest. Are you looking for high THC, or are you more interested in the therapeutic potential of CBD seeds? Autoflowers come in a massive variety of options, each with a unique profile of cannabinoids, flavors, and effects. You can find strains that taste sweet and fruity or earthy and pungent. Some offer an energetic, creative buzz, while others provide deep relaxation. Take some time to read the descriptions and find a strain that matches the experience you want to cultivate. It’s the best way to ensure you’ll love the results of your hard work.
Filtering by Flavor, Difficulty, and Smell
Beyond the main effects, you can really dial in your choice by considering the sensory details and your own experience level. Think about the aromas and tastes you enjoy. Do you prefer something sweet and citrusy, or are you drawn to more earthy, pine-like scents? The flavor profile is a huge part of the experience, and detailed strain descriptions will give you a clear idea of what to expect. At the same time, be honest about your skill level. While most autoflowers are forgiving, some are exceptionally hardy and perfect for first-timers. If you're planning a garden grow, look for outdoor cannabis seeds bred for resilience. Reading the fine print ensures you pick a strain that not only delivers the effects you want but also matches your growing style.
Getting Your Seeds to Sprout
Germination is the first sign of life, and it’s an exciting moment for any grower. A high-quality seed should sprout without much trouble. One of the most reliable techniques is the paper towel method. Just place your seeds between two damp (not soaking wet) paper towels and put them between two plates to create a dark, humid environment. Keep them in a warm spot, ideally between 70–79°F, with high humidity. Within about 72 hours, you should see a tiny white taproot emerge from the seed. This little root is the beginning of your plant, and its appearance is a great sign that you have a viable, healthy seed ready for planting.
The Pre-Soak Method
For an extra helping hand, you can try the pre-soak method before using paper towels. Think of it as a gentle wake-up call for your seeds. Simply drop your seeds into a glass of room-temperature water for about 12 to 24 hours. This quick dip softens the hard outer shell and signals to the embryo inside that it's time to start growing. You might even see the seeds sink to the bottom, which is a good sign they've taken on water. After their soak, you can move them to the damp paper towel to finish sprouting. This simple step is one of the most effective ways to encourage stubborn seeds and ensure a uniform start for your entire crop.
Proper Planting Depth and Direction
Once your seed has sprouted a small white taproot, it's ready for its new home. Handle it with care, as this tiny root is very delicate. When you're ready to plant, make a small hole in your soil or starter plug. The key here is to plant the sprouted seed about one inch deep with the taproot pointing down. This orientation is crucial. The taproot is the plant's anchor and primary source for water and nutrients, so giving it a direct path downward helps it establish itself quickly. For an autoflower with a limited lifespan, avoiding any early stress is essential, and planting it correctly gives it the strong, healthy start it needs to thrive.
What Does a Healthy Seed Look Like?
Before you even start the germination process, you can spot a good seed just by looking at it. Healthy, mature cannabis seeds have a distinct appearance. They should feel hard and firm when you gently squeeze them. Look for a dark color, often brown or gray, sometimes with mottled stripes or spots. A healthy seed will also have a slight sheen or waxy coating that protects its precious contents. Steer clear of seeds that are pale green or white, as they are likely immature and won't sprout. You should also avoid any seeds that are cracked, feel soft, or crush easily, as these are signs of poor quality. Starting with robust seeds from our autoflower collection gives your plant a strong foundation.
Find Your Perfect Autoflower Strain
Once you understand the basics, the fun really begins: choosing the right strain for you. The "perfect" autoflower depends entirely on your goals. Are you hoping for a massive harvest that will last you a long time? Or maybe you need a quick turnaround before the season changes? Perhaps you’re a new grower looking for a forgiving plant that can handle a few mistakes.
The beauty of autoflowers is their variety. Breeders have developed strains that excel in different areas, so you can find one that fits your space, timeline, and experience level. Think about what a successful grow looks like to you, and use that vision to guide your choice. Below, we’ll walk through some common goals and the types of strains that can help you get there.
Want a Huge Harvest? Try These Strains
If your main goal is to maximize your yield, you’re in luck. While autoflowers are known for their compact size, don't let that fool you—many modern strains are bred to produce seriously impressive harvests. With the right genetics and a good setup, you can find varieties that yield between 500 and 600 grams per square meter.
The key to a big harvest is starting with a strain that has the genetic potential for it. Look for descriptions that highlight "high-yielding" or "heavy producer." These plants have been specifically selected for their ability to grow big, dense buds. Paired with proper lighting and nutrients, these autoflower seeds will reward your efforts with a stockpile of your own homegrown cannabis.
Understanding Yield Potential in Grams
When you see a strain described as a "heavy producer," what does that actually mean in grams? For indoor growers, a high-yielding autoflower can produce between 500 and 600 grams per square meter under optimal conditions. It's important to remember that this number isn't a guarantee—it represents the plant's maximum genetic potential. Your final harvest will depend on your setup, lighting, and growing skills. However, the key to a big harvest is starting with a strain that has the genetic potential for it. You can't push a plant beyond what its DNA allows. That's why it's so important to invest in quality feminized seeds from a supplier who clearly outlines the potential of each strain, giving you a solid genetic foundation to build upon.
Need Speed? Try These Quick Strains
One of the biggest advantages of growing autoflowers is their incredible speed. If you’re short on time or just eager to get to harvest day, a fast-finishing strain is the way to go. Most autoflower varieties are ready for harvest in just 8 to 12 weeks from the day you plant the seed. That’s less than three months from start to finish.
This rapid growth cycle is perfect for growers who want multiple harvests in a single outdoor season or want to keep a continuous cycle going indoors. When browsing for seeds, check the estimated seed-to-harvest time listed in the strain description. Choosing a quick strain means you’ll be enjoying the results of your grow before you know it.
Examples of Fast-Finishing Strains
If you're looking for specific recommendations to get you started, some strains are famous for their quick turnaround. For example, our Tropicana Cookies Auto is a fantastic choice that races from seed to harvest in just eight to nine weeks, delivering a vibrant citrus flavor without the long wait. Similarly, God's Gift Auto offers a deeply relaxing experience and is also ready in about nine weeks. These varieties prove you don't have to sacrifice quality for speed. When exploring our full autoflower collection, pay close attention to the product details, where you'll find the estimated seed-to-harvest time. This little piece of information is your best guide to finding a strain that fits perfectly into your timeline.
Hardy Strains for a Worry-Free Grow
For anyone new to growing, a resilient and forgiving plant can make all the difference. Autoflowers get their toughness from their Ruderalis heritage, which makes them naturally more resistant to pests, mold, and temperature fluctuations than many photoperiod strains. This built-in hardiness provides a great safety net while you’re still learning the ropes.
These tough genetics also make autoflowers excellent candidates for an outdoor garden. They can handle less-than-perfect conditions and still produce a great crop. If you want a low-stress growing experience, look for strains known for their vigor and resilience. These outdoor marijuana seeds will give you peace of mind and a much higher chance of success.
Meet Our Top-Performing Strains
Ultimately, a great harvest—whether it’s big, fast, or simply successful—starts with great genetics. The quality of the seed determines the plant's potential for growth, potency, and flavor. Investing in seeds from a reputable source ensures you’re setting yourself up for the best possible outcome.
At Trilogene, we focus on developing stable, high-performance genetics that deliver consistent results. The combination of top-tier traits, ease of growth, and reliability makes our seeds a solid choice for growers at any level. When you’re ready to start your journey, you can shop all seeds from our collection to find the perfect match for your garden.
Don't Miss Out on Limited Edition Seeds
As the cannabis cultivation landscape evolves, limited edition seeds are where you'll find the most exciting innovations. Modern breeders are constantly pushing the envelope, skillfully crossing hardy ruderalis with popular indica and sativa strains. The result is a plant that keeps the easy automatic flowering gene but also inherits the incredible potency and flavor of its famous parents. These exclusive drops often showcase unique genetic profiles you won't find anywhere else. Investing in seeds from a reputable source is critical, as the quality of the seed directly influences the plant's potential for growth and a successful harvest. Keep an eye on our new releases—they could be the key to a truly remarkable crop.
Set Up Your Grow for Success
With autoflowers, you don’t have time for a do-over. Their life cycle is short and sweet, so creating the perfect environment from day one is the best way to guarantee a healthy, heavy harvest. Think of it like building a strong foundation—if you get the light, climate, food, and soil right from the start, your plants will have everything they need to flourish without any setbacks. These four elements work together to create a stable home where your autoflowers can reach their full genetic potential. Let’s walk through how to set up each one for a successful grow.
Get Your Lighting Right
One of the best things about autoflowers is that they don’t rely on a change in the light schedule to start flowering. But that doesn't mean they don't love light—they do! To get the best results, you should plan to keep your lights on for 18 to 24 hours a day. An 18-hour-on, 6-hour-off schedule is a popular choice because it gives your plants a short rest and helps save on electricity. However, some growers find that a 20/4 or even a 24/0 schedule can lead to slightly faster growth and bigger plants. The choice is yours, but consistency is key. Just make sure your indoor cannabis seeds get plenty of strong, direct light throughout their entire life.
Choosing a Light Cycle (18/6 vs. 20/4)
Since autoflowers don't need a light change to trigger flowering, you have some flexibility. The most common and recommended schedule is 18 hours of light followed by 6 hours of darkness (18/6). This gives your plants plenty of energy for vigorous growth while also providing a crucial rest period for them to process nutrients and develop strong roots. Some growers push for faster growth with a 20/4 schedule, giving the plants even more light. While you can technically run lights 24/7, most experienced cultivators agree that a short dark period is beneficial for plant health. The 18/6 cycle offers a great balance between robust growth and energy efficiency, making it a perfect starting point for your autoflower seeds.
Setting the Right Light Distance
Where you position your lights is just as important as how long you leave them on. Placing them too close can cause light burn, stressing your plants and damaging their leaves. If they're too far away, your plants will stretch to reach the light, resulting in weak, lanky stems. A good rule of thumb is to hang your grow lights about 18 to 24 inches above the tops of your seedlings. As your plants grow taller, you'll need to adjust the height to maintain this ideal distance. A simple way to check is the "hand test": place your hand at the top of your plant's canopy for 30 seconds. If it feels uncomfortably warm, the light is too close. This simple check helps ensure your indoor cannabis seeds get the perfect amount of light intensity.
Create the Perfect Climate
Your plants will perform best when their environment is stable and comfortable. During the vegetative stage, aim to keep the temperature between 75–85°F (21–29°C) with a relative humidity of 50–60%. This warm, humid air mimics a perfect spring day and encourages lush, leafy growth. Once your plants begin to flower, you’ll want to adjust the climate slightly. Lower the temperature to 70–80°F (21–26°C) and drop the humidity to 40–50%. This change signals to the plant that it's time to focus on producing dense, resinous buds and helps prevent issues like mold. A simple thermometer and hygrometer will be your best friends for keeping your climate dialed in.
The Importance of Good Airflow
Beyond temperature and humidity, good airflow is a critical piece of the climate puzzle. Stagnant, humid air is a welcome mat for problems like mold and mildew, especially once your plants develop dense foliage. Keeping the air moving gently around your plants prevents that moisture from building up and protects your crop from potential disaster. Using a few small oscillating fans is an easy way to keep air moving, which helps prevent pests and diseases from taking hold. But the benefits don't stop there. A constant, gentle breeze also encourages your plants to grow stronger, sturdier stems, just as they would in nature. This is especially important for autoflowers, which have a limited time to build a strong frame to support their future buds. Creating the perfect environment from day one is the best way to guarantee a healthy, heavy harvest.
Feed Your Plants What They Need
When it comes to feeding autoflowers, less is more. They require the same core nutrients as other cannabis plants—nitrogen, phosphorus, and potassium—but in smaller quantities. Because of their short lifespan and compact size, they are much more sensitive to overfeeding. A great rule of thumb is to start with one-quarter to one-half of the recommended dose on your nutrient bottle and see how the plant responds. Most importantly, do not give your plants any nutrients during the first couple of weeks. The seed contains all the energy it needs to sprout, and your soil should have enough food to get it through the seedling stage.
Understanding NPK Ratios for Each Stage
On any nutrient bottle, you'll see three numbers. This is the NPK ratio, representing the percentage of Nitrogen (N), Phosphorus (P), and Potassium (K). These are the core building blocks for your plant. During the vegetative stage, your autoflower is focused on growing strong stems and lush leaves, so it needs a nitrogen-rich diet. A fertilizer with a ratio around 10-7-5 is a great starting point. Once your plant starts to flower, its priorities change. It now needs less nitrogen and more phosphorus and potassium to develop big, dense buds. At this point, you'll want to switch to a bloom formula with a ratio closer to 5-10-10. Remember, these are just guidelines. Since every strain is a little different, always start with a diluted nutrient solution and watch how your plant responds. This careful approach ensures you're giving your autoflower seeds exactly what they need without overwhelming them.
Choose the Best Pot and Soil
Autoflowers thrive in light, airy soil that gives their roots room to breathe and expand quickly. A dense, heavy soil can slow down root development, which is something you want to avoid with a fast-finishing plant. You can buy a pre-made potting mix or create your own. A fantastic DIY recipe is a blend of 3 parts peat moss, 3 parts compost, 2 parts perlite, and 1 part vermiculite. This mix provides excellent drainage and aeration. When selecting a pot, choose the final container you plan to use—transplanting can stress autoflowers. A 3- to 5-gallon fabric pot is usually a perfect home for most autoflower seeds.
Matching Pot Size to Your Grow Space
Since autoflowers are on a tight schedule, they don't have time to bounce back from the stress of being transplanted. That's why it's best to plant your sprouted seed directly into its final home. When selecting a pot, choose the final container you plan to use—transplanting can stress autoflowers. A 3- to 5-gallon fabric pot is usually a perfect home for most autoflower seeds. Fabric pots are fantastic because they promote great root aeration, which fuels vigorous growth. If you're growing in a smaller tent or closet, a 3-gallon pot will help keep your plant's size in check. If you have more vertical and horizontal space, a 5-gallon pot gives the roots more room to stretch out, which can lead to a larger plant and a more substantial harvest.
What Kind of Soil to Avoid
Knowing what soil to use is only half the battle; you also need to know what to avoid. A dense, heavy soil can slow down root development, which is something you want to avoid with a fast-finishing plant. Steer clear of using soil directly from your garden, as it’s usually too compact, drains poorly, and can introduce unwanted pests. You should also be wary of potting soils loaded with time-release nutrients, which are common in all-purpose mixes. These can be too "hot" for delicate seedlings and cause nutrient burn, stunting their growth from the get-go. Stick with a light, airy mix to give your autoflower seeds the healthy, gentle start they need.
Master These Techniques for a Better Harvest
Once your grow is set up, you can fine-tune your approach to get the most out of every plant. These simple, hands-on techniques will help you guide your autoflowers toward a healthy and abundant harvest. It’s all about working with the plant’s natural tendencies, not against them.
How to Water Your Autoflowers
When it comes to watering autoflowers, less is definitely more. These plants are sensitive to overwatering, which can lead to root rot and stunted growth. The golden rule is to only water when the top inch or two of soil feels completely dry to the touch. As your plant grows, you can gradually increase the amount of water, applying it in a circle around the base to encourage the roots to spread out. A great way to check if it’s time to water is by lifting the pot—you’ll quickly get a feel for how light it is when the soil is dry versus when it’s saturated. This simple practice helps ensure your plants get exactly what they need for robust indoor cultivation.
To Train or Not to Train?
The quick life cycle of an autoflower means it has very little time to recover from stress. For this reason, you should avoid high-stress training (HST) techniques like topping or heavy pruning. Your plant simply won’t have enough time to bounce back. However, that doesn’t mean all training is off the table. Gentle, low-stress training (LST) can be effective if done carefully. You can also do some light trimming, removing less than 20% of the lower leaves during the first few weeks of flowering to improve air circulation and light penetration. The key is to be gentle and let your autoflower seeds do what they do best: grow fast and finish strong with minimal interference.
Guidelines for Light Trimming
If you decide to do some light trimming, think of it as a strategic touch-up rather than a full haircut. The goal is simple: remove a few large, lower fan leaves that are blocking light from reaching the developing bud sites below. This small adjustment can make a big difference by improving air circulation around the base of the plant, which helps prevent mold, and allowing more light energy to penetrate the canopy. By redirecting energy to the buds instead of shaded leaves, you’re helping your plant focus on what matters most during the flowering stage.
The key is timing and moderation. The ideal window for this is during the first two or three weeks of flowering. Use clean, sharp scissors to snip off only the largest fan leaves at the bottom of the plant. Never remove more than a few leaves at a time, and avoid touching anything near the top of the plant or the smaller leaves growing from the buds. This gentle approach ensures you don’t cause unnecessary stress, allowing your indoor plants to continue their rapid growth without missing a beat.
Should You Grow Indoors or Outdoors?
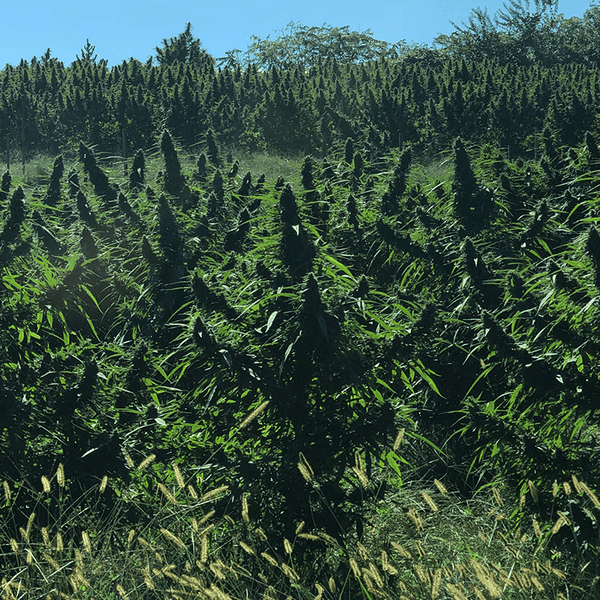
Autoflowers thrive in both indoor and outdoor settings, giving you plenty of flexibility. Growing indoors offers complete control over light cycles and climate, but growing outdoors can lead to bigger plants with potentially larger yields. If you choose to grow outside, you can plant your seeds anytime between February and September, as long as all danger of frost has passed. One of the biggest advantages of growing autoflowers outdoors is the ability to plan for a continuous harvest. By planting a new batch of seeds every few weeks, you can enjoy a steady supply of fresh buds throughout the season. It’s an efficient way to make the most of your collection of outdoor marijuana seeds.
Simple Ways to Maximize Your Yield
Getting a great yield from your autoflowers starts from the ground up. Use a light, airy, nutrient-rich soil mix with a neutral pH. Look for soils containing ingredients like perlite, coco coir, or peat moss to ensure your plant’s roots have plenty of oxygen and drainage. With the right conditions, you can typically expect a harvest of one to four ounces per plant. Another critical factor is light. Whether you’re growing indoors or out, make sure your plants receive plenty of strong, direct light to fuel bud production. Choosing the right genetics is also key, so be sure to shop all seeds to find a strain known for its generous yields and robust growth.
Potency Expectations: THC and CBD Levels
Let's clear up a common myth: the idea that autoflowers aren't as potent as other cannabis plants. While that might have been true years ago when early strains topped out around 10-15% THC, modern breeding has completely changed the landscape. Today's high-performance autoflowers can easily produce buds with THC levels soaring over 25%. They are just as strong and flavorful as their photoperiod cousins. The potential for potency is locked into the seed's DNA, so starting with top-tier genetics is the most important step toward a powerful harvest.
But potency isn't just about chasing the highest THC percentage; it's about cultivating the specific experience you want. The beauty of modern autoflowers is the incredible variety available. You can find strains bred for maximum THC, but you can also explore genetics rich in other valuable cannabinoids. For instance, you can grow potent THCA seeds for a powerful effect or choose from a wide selection of CBD seeds if you're more interested in therapeutic benefits without an intense high. It all comes down to matching your goals with the right genetics.
Avoid These Common Autoflower Pitfalls
Growing autoflowers is an incredibly rewarding experience, especially for beginners. Their speed and resilience make them very forgiving. However, a few common missteps can keep you from getting the best possible harvest. By understanding these potential issues ahead of time, you can sidestep them completely and ensure your plants thrive from seedling to harvest. Let’s walk through the most frequent pitfalls and how to handle them like a pro.
Are You Overfeeding Your Plants?
It’s easy to think that more food equals bigger plants, but with autoflowers, less is definitely more. Because of their short, fast life cycle, they simply don’t require as many nutrients as their photoperiod cousins. Overfeeding is one of the quickest ways to stress your plant, leading to nutrient burn, which looks like yellow or brown, crispy leaf tips. A good rule of thumb is to start with half, or even a quarter, of the recommended nutrient dosage. You can always add more later if the plant looks hungry, but it’s much harder to fix the damage from giving too much. When you start with high-quality autoflower seeds, you give your plants a strong genetic foundation that doesn't need to be pushed with excessive nutrients.
How to Prevent Light Stress
One of the best things about autoflowers is their simple lighting needs. You don’t have to worry about changing the light schedule to make them flower. Most growers find success with a consistent schedule of 18 hours of light on and 6 hours off for the plant's entire life. This gives them plenty of energy to grow without the risk of light-related stress. While the schedule is simple, you still need to pay attention to light intensity. Keep your lights at the manufacturer's recommended distance from the plant canopy to avoid light burn, which can bleach or scorch the top leaves. This straightforward approach makes growing indoor cannabis seeds much more manageable.
Know Exactly When to Harvest
Patience is a virtue, especially when it comes to harvesting. Chopping your plants down too early or too late can significantly impact the potency and effects of your final buds. Forget about guessing and get a jeweler's loupe or a small magnifying glass to look at the trichomes—the tiny, crystal-like glands on the flowers. For peak potency, you’ll want to harvest when about 80% of the trichomes have turned from clear to a milky white color. If you see a lot of amber trichomes, the effect will be more sedative. Watching your trichomes is the most reliable way to ensure your THCA seeds reach their full potential.
Reading Trichomes for Peak Potency
Think of trichomes as tiny cannabinoid factories. These frosty, mushroom-shaped glands cover your buds and produce the compounds that determine your flower's potency, aroma, and effects. To the naked eye, they just look like crystals, but with a jeweler's loupe or a digital microscope, you can watch them mature. At first, they'll be crystal clear, which means they're still developing and not yet at their peak. As they ripen, they'll turn a cloudy or milky white. This is the sweet spot. When most trichomes are milky, the plant's THCA production is at its highest, promising a potent and vibrant effect. Harvesting at this stage ensures you get the most out of the powerful genetics locked inside your feminized seeds.
Timing Your Harvest for Desired Effects
The magic of harvesting is that you can steer the effects of your final product just by choosing the right day. It all comes down to the ratio of milky to amber trichomes. If you prefer a more energetic, head-focused high, harvest when the trichomes are almost all milky, with just a few starting to turn amber. For a more balanced, euphoric experience that combines a cerebral buzz with gentle body relaxation, wait until you see a mix of about 70% milky and 30% amber. If you’re looking for a deeply relaxing, sedative effect perfect for nighttime, let more trichomes mature to a deep amber color. This indicates that the THCA is converting to CBN, a cannabinoid known for its calming properties. This level of control allows you to truly customize the experience from your autoflower seeds.
Solving Common Autoflower Problems
Even with the best care, you might run into a few hiccups. The good news? Autoflowers are incredibly resilient. Their tough genetics mean they can often bounce back from common issues and are naturally more resistant to pests and mold than many other strains. This makes them incredibly forgiving for new growers. If you see yellowing leaves, your first instinct should be to check your watering habits—overwatering is a common culprit. If growth seems slow, check that your temperature and humidity are in the ideal range. By starting with robust genetics from a diverse collection of seeds, you’re already setting yourself up for a smoother, more successful grow.
Drying, Curing, and Storing Your Harvest
You’ve made it to harvest day—congratulations! But the journey isn’t quite over yet. The steps you take after you chop down your plants are just as important as the care you gave them while they were growing. Drying and curing are the final, crucial processes that transform your fresh flowers into the high-quality, flavorful, and potent buds you’ve been working toward. This is where you lock in all the amazing characteristics of the genetics you started with. Taking your time here will make all the difference in your final product.
The Ideal Conditions for Drying
The key to a successful dry is creating a stable environment. You’re looking for a dark space with a consistent temperature between 60–70°F and a relative humidity of 50–60%. A closet, a spare room, or your grow tent can work perfectly. This slow and steady process, which usually takes about 7 to 14 days, allows the moisture to leave the buds evenly without stripping away the delicate terpenes that give your cannabis its unique aroma and flavor. Rushing this step with heat or too much airflow can result in a harsh, hay-like smoke, which is the last thing you want after tending to your beautiful autoflower seeds for weeks.
How to Properly Cure Your Buds
Once your buds feel dry on the outside but still have a little give when you squeeze them, it’s time to cure. Curing is the slow-aging process that develops the true character of your cannabis. Place your trimmed buds into airtight glass jars, filling them about three-quarters full to leave some room for air. This process allows the remaining moisture to redistribute evenly, breaking down chlorophyll and sugars, which results in a much smoother smoke. Over the next few weeks to months, you’ll notice the flavors and aromas becoming richer and more complex. This is how you ensure the premium THCA seeds you grew reach their maximum potential.
The "Burping" Process Explained
During the first week or two of curing, you’ll need to "burp" your jars. This is simply the process of opening each jar for a few minutes every day to release any built-up moisture and let in fresh air. This is a critical step for preventing mold from forming inside the jars. After the first couple of weeks, you can reduce burping to once every few days. If you notice the buds feel a bit too dry, you can add a two-way humidity pack to the jar to maintain the perfect moisture level. This simple daily ritual is the final touch that ensures all your hard work pays off with a perfectly preserved harvest.
How to Buy the Best Autoflower Seeds
Starting your grow with the right seeds is the single most important step you can take. The quality of your genetics will determine everything from germination rates to the size and potency of your final harvest. But with so many options out there, how do you choose? It comes down to finding a trustworthy source, understanding your own timeline, and knowing what a fair price for quality looks like. Think of it as an investment in your future garden—a little research now pays off with healthy, thriving plants later. We’ll walk through exactly what to look for so you can purchase your seeds with total confidence.
How to Find a Reputable Seed Bank
Your first move is to find a seed bank with a solid reputation for quality and consistency. A great supplier is transparent about their genetics, offers detailed strain information, and has positive reviews from other growers. You want a company that stands behind its products. At Trilogene Seeds, we've built our reputation on a commitment to premium, stable genetics and an impressive catalog of autoflower seeds. When you buy from a trusted source, you’re not just getting a seed; you’re getting the assurance that it has been bred and selected for performance, vigor, and reliability.
How Long Do You Have to Grow?
One of the biggest perks of autoflowers is their speed. Most autoflower varieties are ready for harvest in just 8 to 12 weeks from seed to flower. This rapid turnaround is perfect if you’re eager to see results or want to fit multiple harvests into a single season. Before you buy, check the estimated growth cycle for the strains you’re considering. If you have a specific deadline or a short outdoor growing season, choosing a faster-finishing strain is a smart move. This allows you to plan your grow with precision and enjoy your harvest sooner.
What to Budget for Quality Seeds
While it can be tempting to go for the cheapest seeds you can find, this is one area where you get what you pay for. Investing in high-quality genetics is an investment in your entire grow. Premium seeds from established breeders have higher germination rates and produce more resilient plants. For example, well-bred feminized seeds are bred to be tough against pests and diseases, which saves you time, money, and stress down the line. Think of the seed cost as a small fraction of your total grow budget that has a huge impact on your final outcome.
Find Great Deals Without Sacrificing Quality
Budgeting for quality doesn’t mean you can’t find a good deal. Reputable seed banks often have a sales section where you can find top-tier genetics at a reduced price. This is a fantastic way to try new strains or stock up on your favorites without breaking the bank. The key is to buy from a source you already trust. The combination of top-tier genetics, ease of growth, and consistent results makes a trusted supplier the best all-around choice for sourcing your seeds. Always check for sale seeds to get the best of both worlds: excellent genetics and a great price.
Properly Storing Your Extra Seeds
It's common to have a few extra seeds left over after planting, and you'll want to protect that investment. Proper storage is simple and ensures your seeds stay viable for future grows. The three biggest threats to a seed's longevity are light, heat, and moisture. To keep them safe, your goal is to create a cool, dark, and dry environment. The crisper drawer in your refrigerator is an ideal spot, as it maintains a stable temperature, typically between 41–46°F. Place your seeds in a sealed, airtight container—like a small jar or a Ziploc bag inside another container—and toss in a small silica gel packet or a few grains of uncooked rice to absorb any moisture. When you properly store your seeds this way, they can remain viable for years, ready for when you want to start your next grow.
Ready to Level Up? Advanced Techniques
Once you’ve mastered the basics of growing autoflowers, you can start exploring more advanced methods to get even better results. While these plants are famously low-maintenance, a few expert tweaks can make a significant difference in your final harvest. Think of it as moving from simply following a recipe to adding your own signature touch. These techniques are all about fine-tuning your process to help your plants reach their full genetic potential. By paying closer attention to their environment, nutrition, and structure, you can push your yields and quality to the next level. It's not about reinventing the wheel, but about making small, intentional adjustments that compound over the plant's short life. For example, creating a perfectly stable climate or using a gentle training method can encourage your plant to develop more bud sites and produce denser, more resinous flowers. These aren't complicated procedures; they just require a bit more attention to detail. The reward is a harvest that truly reflects the premium genetics you started with. Let’s get into a few simple ways you can refine your grow and see what your plants are truly capable of.
Dial In Your Climate Control
Autoflowers are incredibly resilient and can handle a wider range of conditions than many photoperiod strains. This forgiving nature is a huge plus, but don’t let it make you complacent. To truly get the most out of your plants, you need to create a stable and ideal environment. For an indoor grow, this means keeping temperatures between 70-85°F (21-29°C) and managing humidity levels—aim for 50-60% during the vegetative stage and drop it to around 40% during flowering to prevent mold. Consistent conditions reduce stress on your plants, allowing them to focus all their energy on producing dense, resinous buds. This is especially important when growing premium indoor cannabis seeds.
Perfect Your Soil Mix
The right soil is the foundation of a healthy plant. Since autoflowers have a short life, they need a medium that allows their roots to grow quickly and without restriction. A light, airy soil mix is perfect. Avoid heavy, nutrient-packed soils, which can burn young seedlings. Instead, create your own blend or find a pre-made one that drains well. A popular recipe is a simple mix of 3 parts peat moss, 3 parts compost, 2 parts perlite, and 1 part vermiculite. This combination provides a great balance of moisture retention, aeration, and gentle nutrients, giving your autoflower seeds the perfect start.
Advanced Training for Bigger Buds
Training cannabis plants can dramatically increase yields, but you have to be gentle with autoflowers. Their rapid life cycle means they don’t have time to recover from high-stress training methods like topping or heavy pruning. Instead, focus on Low-Stress Training (LST). This involves carefully bending and tying down branches to expose more bud sites to the light, creating a more even canopy without cutting the plant. You can also perform very light defoliation during the first few weeks of flowering, removing only a few large fan leaves that are blocking light to lower buds. With feminized seeds, this gentle approach ensures every plant puts its energy toward flower production.
Keep Pests Away for Good
One of the best features of autoflowers is their natural hardiness and pest resistance, which makes them excellent candidates for outdoor gardens. However, "resistant" doesn't mean "invincible." To keep your plants protected, you can use preventative measures that work with nature. Companion planting is a fantastic organic strategy. Planting aromatic herbs like basil, mint, or rosemary around your cannabis can help deter common pests. You can also introduce beneficial insects like ladybugs or predatory mites to your garden to handle any pests that do show up. These proactive steps ensure your outdoor marijuana seeds thrive without the need for harsh chemical pesticides.
Related Articles
- Autoflower Seeds for Beginners: Grow Fast & Easy
- Autoflower Cannabis Seed 101: Your Complete Guide
- Auto Cannabis Seeds: The Ultimate Beginner's Guide
- Autoflower Seed 101: A Complete Beginner's Guide
- The Complete Guide to Autoflower Weed Seeds
Frequently Asked Questions
Why is transplanting autoflowers a bad idea? Think of an autoflower's life as a short sprint. It's programmed to finish the race in a set amount of time, and any disruption can throw it off pace. Transplanting causes stress, and while other plants have plenty of time to recover, an autoflower doesn't. That recovery period eats into its limited vegetative growth time, which can permanently stunt its size and reduce your final yield. It's always best to plant your seed in its final container to avoid this setback.
Do autoflowers produce less potent buds than photoperiod plants? This is a common myth left over from the early days of autoflowers. Thanks to incredible breeding advancements, today's high-quality autoflowers are just as potent, flavorful, and effective as their photoperiod counterparts. The final potency of your harvest comes down to the quality of the genetics you start with, not whether the plant flowers automatically. A well-bred autoflower strain will deliver impressive results every time.
What's the single biggest mistake new growers make with autoflowers? The most frequent misstep is trying to do too much. New growers often show their plants too much love, which usually means overwatering and overfeeding. Because autoflowers have a compact size and a rapid life cycle, they simply need less water and fewer nutrients than larger, longer-living plants. It's always better to start with a light hand and give them a little less than you think they need.
Can I grow autoflowers outdoors if my season is short? Absolutely! This is one of the best reasons to grow them. Their quick seed-to-harvest timeline, often under 12 weeks, makes them perfect for climates with short summers. You can easily get a full harvest completed long before the first frost arrives. This speed also allows growers in warmer climates to fit multiple harvests into a single outdoor season.
Is it better to use an 18/6 or 24/0 light cycle for my indoor grow? There isn't one perfect answer, as both schedules can work well. The 18/6 schedule (18 hours on, 6 hours off) is the most popular choice because it provides plenty of light for vigorous growth while also saving on electricity and giving the plants a short rest period. Some growers use a 24/0 schedule to maximize growth, but it's best to watch your plants closely for any signs of stress. If you're just starting, 18/6 is a reliable and effective schedule to follow.