You finally found it—the perfect plant. The one with the ideal structure, aroma, and effects you've been searching for. So, what's next? How do you preserve those amazing genetics? While clones work, seeds offer longevity and creative freedom. By learning to create your own feminized seeds, you can capture that plant's magic and cross it with another favorite. This is how you become a strain designer, building a personal seed library from the plants you love most. We'll show you exactly how to start your first breeding project and create genetics that are uniquely yours.
Key Takeaways
- Eliminate Guesswork for a Full Harvest: Feminization is the key to a garden full of bud-producing plants. By using a simple solution to make a female plant create pollen, you can produce seeds that are over 99% female, ensuring no space or time is wasted on males.
- Your Process Determines Your Success: Creating feminized seeds is a science that requires precision. Handle chemicals safely, apply your reversal solution on a strict schedule, and control your environment to guide your plants through a successful pollination and seed maturation phase.
- Breed Smarter, Not Harder: The quality of your seeds is determined by the parent plants you select. Choose females with stable genetics and the traits you want to preserve, and keep detailed records of your projects to refine your technique and build your own library of custom strains.
What Are Feminized Seeds?
If you’re a grower, your goal is a garden full of beautiful, resinous buds. The key to achieving that is growing female cannabis plants. Male plants, while essential for traditional breeding, can be a real headache for cultivators focused on flower production because they can pollinate your females, filling your buds with seeds. This is where feminized seeds come in—they're a game-changer for getting a reliable, all-female crop. They take the guesswork out of the initial growing stage, ensuring every plant you nurture has the potential to produce high-quality flowers.
How Do Feminized Seeds Work?
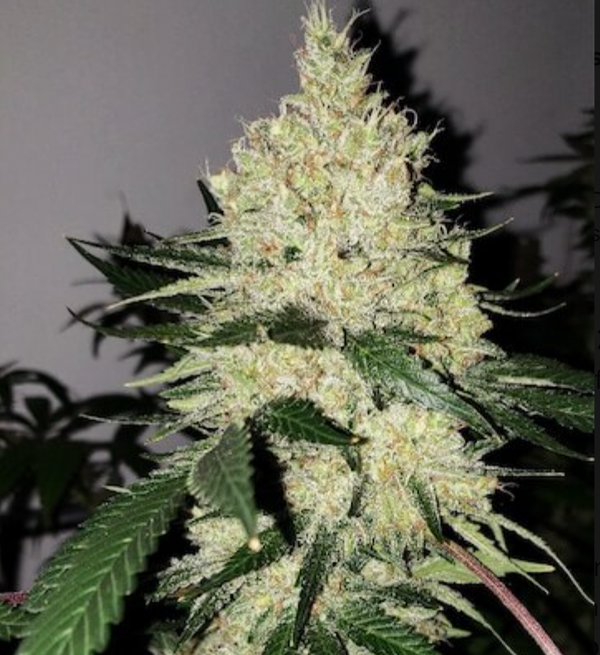
So, what exactly are they? Simply put, feminized seeds are genetically bred to produce female plants more than 99% of the time. Female plants are the ones that grow the cannabinoid-rich flowers, while male plants produce pollen sacs. The process of creating these seeds involves carefully stressing a female plant to make it produce its own pollen. This pollen, which only carries female (XX) chromosomes, is then used to fertilize another female plant. Since both parents contribute female genetics, the resulting seeds are almost guaranteed to grow into bud-producing female plants. It's a clever bit of science that gives growers a massive head start.
The Evolution of Feminized Seeds
Before feminized seeds hit the scene, growing was a bit of a gamble. Cultivators would plant a bunch of seeds, cross their fingers, and wait to see which ones were male and which were female. They’d have to pull the males quickly before they pollinated the whole crop, which meant a lot of wasted time and space. The big breakthrough happened when breeders figured out how to use specific, controlled stressors to prompt a female plant to create its own pollen. Since this pollen comes from a female, it only carries female chromosomes. When you use it to fertilize another female, the seeds you get are virtually all female. This technique uses natural breeding methods—not genetic modification—and it completely changed the game by giving growers control and guaranteeing every plant is a keeper.
Why Should You Use Feminized Seeds?
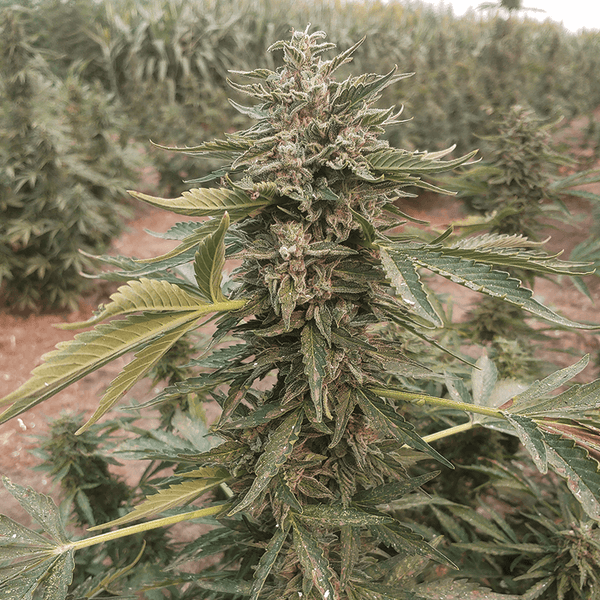
The biggest advantage of using feminized seeds is efficiency. You won't waste time, nutrients, or precious grow space on male plants that you'll eventually have to identify and remove. This is especially crucial for home growers with limited room, but it's just as important for commercial operations looking for a predictable and profitable harvest. Because you can count on every plant being a producer, you get a more consistent and abundant yield of high-quality, seedless flower, also known as 'sinsemilla.' This reliability removes a major variable from your cultivation process, letting you focus on what matters most: helping your plants thrive.
Ideal for First-Time Growers
When you're just starting, the last thing you want is an unnecessary complication. Learning to identify male plants and removing them before they pollinate your crop is a classic grower's rite of passage, but it's one you can easily skip. Using feminized seeds makes the entire process more straightforward and forgiving. You can channel all your energy, nutrients, and grow space into nurturing plants that will actually produce flowers. This is a huge advantage for anyone, but it’s especially helpful for home cultivators who are often working with a limited number of plants in a small tent or room. It simplifies your grow from day one, letting you focus on the fundamentals of watering, lighting, and feeding.
Achieving Consistent Quality and Yield
For experienced growers, predictability is profit. The ability to forecast your harvest size and quality is essential for planning, and feminized seeds are the foundation of that consistency. When you know that every plant in your garden is a female, you can optimize your setup for maximum flower production without worrying about rogue pollen. This reliability allows you to cultivate a uniform canopy of high-quality, seedless flower—or sinsemilla—every single time. By removing the genetic lottery of male-female ratios, you take control of a major variable in your cultivation process. This lets you fine-tune other factors to push your chosen genetics to their full potential, leading to more dependable and abundant yields cycle after cycle.
Debunking Common Myths About Feminized Seeds
Feminized seeds have been popular for years, but a few myths still float around. Let's clear the air on some of the most common misconceptions.
Myth: Feminized seeds cause hermaphroditism. This is largely untrue. A plant's tendency to become a hermaphrodite (developing both male and female flowers) is tied to its genetic stability and environmental stress, not the feminization process itself. Starting with strong, stable genetics from a reputable breeder is the best way to avoid this issue.
Myth: Feminized seeds create "mutant" plants. This is also false. While any plant from any seed type can occasionally show unusual traits, there is no evidence that feminization increases the rate of mutations.
Myth: The seeds themselves contain chemicals. Nope. The solutions used to reverse a female plant are applied to the parent plant to trigger pollen production. The seeds it produces are not treated with or coated in any chemicals.
Myth: Feminized Seeds Are Genetically Modified
Let's set the record straight: feminized seeds are not genetically modified organisms (GMOs). The process of creating them doesn't involve altering a plant's DNA in a lab. Instead, it's a clever breeding technique that works with the plant's natural reproductive capabilities. By applying a solution like colloidal silver, we can safely encourage a female plant to produce pollen sacs. This pollen is special because it only contains female chromosomes. When used to pollinate another female, the resulting seeds are naturally programmed to be female. It’s a method of controlled reproduction, not genetic engineering, ensuring you get the high-quality, non-GMO seeds you expect.
Myth: "Feminized" Guarantees a Mother Plant for Life
While feminized seeds offer an incredibly high success rate—typically over 99%—they aren't a 100% guarantee. There's still a very small chance that a plant might express male traits or become a hermaphrodite. This isn't usually a fault of the seed itself but is often triggered by significant environmental stress. Things like inconsistent light cycles, extreme temperature fluctuations, or nutrient problems can push a plant to develop male flowers as a survival mechanism. This is why starting with stable, resilient genetics from a trusted source is so important. It minimizes the risk and gives you the best possible foundation for a successful, all-female garden.
Quality and Reliability: What to Look For
When you're investing your time and resources into a grow, the quality of your seeds is everything. Not all feminized seeds are created equal, and the difference often comes down to the stability of the parent genetics and the breeder's expertise. A reputable seed bank is transparent about its breeding process and stands behind its products. Look for breeders who prioritize genetic stability to minimize the risk of undesirable traits like hermaphroditism. High-quality genetics are the foundation of a successful harvest, ensuring your plants grow vigorously and express the characteristics you're looking for, from potency to flavor.
Germination and Female Plant Rates
Two of the most important metrics for seed quality are the germination rate and the female plant rate. Reputable suppliers will have high standards for both. A germination rate of 99% means you can trust that nearly every seed you plant will sprout into a healthy seedling, preventing wasted money and time. Similarly, a 99%+ female plant rate is the entire point of using feminized seeds. This level of reliability ensures your garden will be full of flower-producing plants, giving you a predictable path to a full and successful harvest without any surprises.
How Feminized Seeds Compare to Other Types
Feminized seeds are a fantastic tool for many growers, but they're not the only option out there. Understanding how they stack up against regular and autoflowering seeds will help you choose the right genetics for your specific goals and setup. Each type has its own set of advantages, whether you're looking to produce flowers, breed new strains, or get the quickest harvest possible. Let's break down the key differences so you can make an informed decision for your garden and find the perfect match for your cultivation style.
Feminized vs. Regular Seeds
The primary difference here is predictability. As we've covered, feminized seeds are bred to produce only female plants, which simplifies the growing process immensely for anyone focused on harvesting buds. Regular seeds, on the other hand, produce a natural mix of male and female plants, typically at about a 50/50 ratio. While this requires you to identify and remove the males to prevent pollination, regular seeds are essential for breeders who need male pollen to create new crosses and preserve genetic lines. For most cultivators, feminized seeds offer a more direct and efficient route to a garden full of sinsemilla.
Feminized vs. Autoflower Seeds
This comparison comes down to the flowering trigger. Most feminized seeds are photoperiod plants, meaning they require a change in the light cycle to start flowering. This gives you control over the plant's vegetative growth period, allowing you to grow bigger plants that can produce larger yields. Autoflower seeds, however, will begin to flower automatically after a certain number of weeks, regardless of the light schedule. This makes them a great choice for beginners or for growers looking for a fast turnaround, though their yields are often smaller than their photoperiod counterparts.
Cultivation Basics: Growing From Feminized Seeds
Once you've chosen your feminized seeds, it's time to get growing. While these seeds remove the need to sex your plants, they still depend on you to provide the right environment to thrive. Nailing the fundamentals of light, nutrients, and your growing medium is crucial for helping your all-female garden reach its full potential. Getting these elements right from the start will set you up for a smooth cultivation cycle and a rewarding harvest of dense, resinous flowers. Here are the core basics you need to manage.
Getting the Light Schedule Just Right
Because most feminized seeds are photoperiod-dependent, you have direct control over when they flip from growing leaves and stems to producing flowers. During the vegetative stage, you'll want to provide a consistent light schedule of 18 hours of light followed by 6 hours of darkness. This long light period encourages robust growth. When your plants have reached the desired size, you can trigger the flowering stage by switching the schedule to 12 hours of light and 12 hours of uninterrupted darkness. This change mimics the shortening days of fall and signals to your indoor cannabis plants that it's time to start budding.
Feeding Your Plants: Nutrients for Each Stage
Your plants have different dietary needs during their vegetative and flowering stages. In the vegetative stage, they crave higher levels of nitrogen (N) to fuel the growth of strong leaves and stems. Once you switch to the flowering stage, their needs change. They'll require less nitrogen and much more phosphorus (P) and potassium (K). Phosphorus is vital for developing large, dense buds, while potassium plays a key role in resin production and overall plant health. Following a nutrient schedule designed for cannabis will ensure your plants get exactly what they need when they need it.
Soil vs. Hydro: Picking Your Growing Medium
Your plants need a healthy medium to anchor their roots and access water and nutrients. For many growers, especially those starting out, a high-quality soil mix is an excellent choice. Look for soil that provides good drainage and aeration by incorporating amendments like perlite or coco coir. This prevents the roots from becoming waterlogged. It's also important to maintain a proper pH level in your soil, typically between 6.0 and 7.0, as this affects your plant's ability to absorb nutrients. While hydroponic systems offer faster growth, a well-managed soil environment is forgiving and can produce outstanding results.
Your Prep and Safety Checklist
Before we get into the science of creating feminized seeds, let's talk about preparation. Like any good project, success starts with having the right tools and a safe, organized workspace. Taking a few minutes to gather your supplies and set up your area properly will make the entire process smoother and safer for both you and your plants. Think of it as setting the stage for your breeding success. A little prep work now saves a lot of headaches later.
Gathering Your Essential Supplies
You don’t need a full-blown laboratory, but you will need some specific items to create your silver thiosulfate (STS) solution and apply it correctly. Having everything on hand before you begin is key.
Here’s your shopping list:
- Chemicals: Silver Nitrate powder and Sodium Thiosulfate powder.
- Pure Water: Distilled or reverse osmosis (RO) water is a must for mixing your solutions without contaminants.
- Measurement Tools: A digital scale that measures to at least 0.1 gram and a 60 ml syringe for accuracy.
- Glassware: Two 32-ounce brown glass bottles for stock solutions, one 32-ounce brown glass spray bottle, and a 500 ml glass measuring cup.
- Surfactant: A few drops of Yucca extract or non-antibacterial dish soap will help the spray stick to the leaves.
- Light Protection: A black trash bag and tape to wrap your spray bottle and protect the solution from light degradation.
How to Handle Chemicals Safely
Safety first, always. The chemicals used to make STS and colloidal silver are effective for feminizing plants, but they are toxic and require careful handling. Wear gloves and safety glasses when mixing your solutions to protect your skin and eyes from accidental splashes. Most importantly, never consume any part of a plant that has been sprayed with these chemicals. The treated plant is only for producing pollen to create seeds; it is not safe for consumption. Make sure to clearly label any plant you’ve treated so there are no mix-ups later on.
Setting Up Your Workspace for Success
Choose a well-ventilated area to mix your chemicals, away from pets and children. It’s a good idea to protect your surfaces with newspaper or a plastic sheet just in case of spills. If you do spill something, don’t panic. You can clean it up thoroughly with plenty of water. Both silver nitrate and sodium thiosulfate can be safely rinsed down the drain with a large volume of running water. Keeping your space clean and organized will help you work efficiently and minimize any risks, letting you focus on the task at hand.
How to Control Your Grow Environment
Your plants need a stable and comfortable environment to handle the stress of hormonal changes. Keep your grow room temperature between 75–80°F during the day and a little cooler, around 65–70°F, at night. Humidity is also important—aim for a relative humidity of 45–55%. You might need a humidifier or dehumidifier to maintain this sweet spot. A stable environment helps ensure your plant stays healthy throughout the reversal process, leading to better pollen production and, ultimately, high-quality feminized seeds.
Choosing the Right Feminization Method
Once you have your setup ready, it’s time to decide how you’ll encourage your female plant to produce pollen. There are a few popular ways to do this, each with its own set of pros and cons. The three main techniques are using silver thiosulfate (STS), colloidal silver, or a natural stress method called rodelization.
Your choice will depend on your comfort level with using chemicals, your budget, and the results you’re aiming for. The STS and colloidal silver methods are generally more reliable and produce more pollen, while rodelization is a completely natural approach that requires a bit more patience and carries different risks. Let's walk through each one so you can pick the best path for your project.
Method 1: Silver Thiosulfate (STS)
The STS method is widely considered the most effective and reliable way to create feminized seeds. It involves spraying a female plant with a solution made from silver nitrate and sodium thiosulfate. This solution blocks the plant’s ethylene production—a key hormone in flower development—and triggers the growth of male pollen sacs. When you use this pollen to fertilize another female, the resulting seeds will be about 99.9% female.
To use this technique, you’ll spray your selected branches five days before you switch the plant to its flowering light cycle. Continue spraying every five days until you see male flowers begin to form. This consistency is key to achieving a successful reversal and a healthy amount of viable pollen for your breeding program.
Method 2: Colloidal Silver
If you’re looking for a slightly more accessible option, the colloidal silver method is a popular choice. Colloidal silver is easier to find and purchase than the components for an STS solution. Similar to STS, it works by inhibiting ethylene, which prompts the female plant to produce pollen sacs instead of buds. While some growers find it a bit less potent than STS, it can still be very effective when applied correctly.
For this method, you’ll start spraying the bud sites on your chosen female plant on the very first day of the flowering stage. You’ll need to apply it daily for two to three weeks to ensure the plant fully transitions to producing pollen. Diligence is crucial here—missing applications can reduce your chances of success.
Method 3: Rodelization
For those who prefer a completely chemical-free approach, rodelization is the way to go. This 100% natural technique involves intentionally stressing a female plant to trigger a survival mechanism: producing its own pollen. The most common way to do this is by delaying harvest by two or three weeks past peak maturity. The plant senses it’s at the end of its life cycle without being pollinated, so it creates a few male flowers in a last-ditch effort to reproduce.
The main drawback is that this method produces far less pollen than chemical induction. There’s also a higher chance the resulting seeds could carry hermaphroditic traits, so it’s important to start with genetically stable cannabis clones or seeds.
Which Method Is Right for You?
Choosing the right method is only half the battle; selecting the right parent plants is just as important. Start with genetics that show the traits you want to see in the offspring, like impressive yields, specific cannabinoid profiles, or strong disease resistance. Not all plants respond to these feminization techniques in the same way. Some are more resistant to sex reversal, and even with successful pollination, the resulting feminized seeds can produce a variety of phenotypes.
Ultimately, the best method depends on your goals. If you want maximum reliability and a large amount of pollen, STS is your best bet. If you prefer an easier-to-source chemical option, colloidal silver works well. And if you’re committed to a natural process, rodelization is the answer.
How to Apply STS, Step by Step
Using Silver Thiosulfate (STS) is the most reliable and widely used method for creating feminized seeds. It works by inhibiting the production of ethylene, a plant hormone responsible for female flower development. This encourages a female plant to produce male flowers that carry feminized pollen. When this pollen fertilizes another female plant, the resulting seeds are almost guaranteed to be female. It sounds complex, but with a careful approach, you can master this technique. Let’s walk through the process together, step by step.
How to Mix Your STS Solution
First things first, you need to prepare your STS solution. You’ll be working with chemicals, so remember to wear your safety gear, including gloves and goggles. To create the solution, you will need Silver Nitrate powder, Sodium Thiosulfate powder, and distilled or reverse osmosis (RO) water. A digital scale that measures to at least 0.1 grams is also essential for accuracy. You’ll mix the powders with the water according to your chosen recipe—there are many reliable guides available online. Once mixed, store your solution in a spray bottle that’s protected from light. A simple trick is to wrap the bottle in a black trash bag and secure it with tape.
When and How to Apply STS
Timing is everything when applying your STS solution. The goal is to treat your chosen female plant just before it starts flowering. A great schedule to follow is to begin spraying your selected branches five days before you switch your light cycle to 12/12 for flowering. Continue to spray those same branches every five days until you see male flowers, or pollen sacs, beginning to form. When you spray, be thorough. Make sure you completely coat the branches and all the new budding sites you intend to reverse. This consistent application is what signals the plant to start producing that valuable feminized pollen, which is the key to creating your own feminized seeds.
Monitoring Your Plant for Changes
Patience is a virtue, especially in cultivation. After you begin your STS spray schedule, you’ll need to keep a close eye on the treated plant. It can take anywhere from one to three weeks for the first signs of male flowers to appear. You’re looking for small, grape-like clusters to form at the nodes where female pistils would normally grow. These are the pollen sacs. During this time, it’s crucial to isolate the treated plant or branches from any other flowering females you don’t want pollinated. Accidental pollination can turn a whole crop seedy, so be diligent about keeping your project contained until you’re ready to collect the pollen.
Signs of a Successful Reversal
You’ll know your STS application was successful when you see well-formed male pollen sacs developing on your female plant. These sacs will look just like those on a true male plant. As they mature, they will swell and eventually open to release a fine, yellow powder—the feminized pollen. This happens because the STS has effectively blocked the ethylene hormone, tricking the plant into a different form of expression. Seeing this pollen is your green light. It confirms the reversal is complete and you’re ready for the next exciting phase: pollination. For growers who want to skip this process, you can always explore a variety of professionally bred cannabis seeds to find your perfect match.
A Guide to Successful Pollination
Once you’ve successfully reversed a female plant and it’s producing pollen, you’re ready for the most exciting part: pollination. This is where you get to play matchmaker, combining the genetics of two exceptional plants to create your very own feminized seeds. Think of yourself as a strain architect, carefully selecting traits to build something new. The goal is to transfer pollen from your reversed female onto a flowering female, which will then produce seeds instead of sinsemilla buds.
This process requires a gentle hand and good timing, but it’s incredibly rewarding. By controlling which plants cross, you can create a new generation of seeds that carry the specific characteristics you value most, whether that’s a unique terpene profile, a robust structure, or impressive yields. Taking the time to perfect your technique here will pay off when you harvest a batch of high-quality, stable feminized seeds that are ready for your next grow.
How to Choose the Best Parent Plants
The quality of your feminized seeds starts with the quality of your parent plants. Your final product will only be as good as the genetics you begin with, so choose wisely. Look for plants that exhibit the traits you want to pass on. This could be anything from strong effects and high yields to excellent disease resistance or a fast flowering time. You are essentially selecting the genetic blueprint for your future crops.
When making your selection, consider plants with similar genetic backgrounds. This helps ensure that the resulting seeds are stable and produce consistent, predictable offspring. If you’re aiming for high-THCA content, for example, start with two parent plants known for their potency. By carefully selecting both the pollen donor (the reversed female) and the pollen recipient, you can steer the genetic direction of your new THCA seeds with intention.
How to Collect and Store Pollen
Once your reversed female plant develops male pollen sacs, it’s time to collect the pollen. This is a delicate process that requires a bit of care. Wait until the sacs are mature and just about to open, then gently tap them over a clean, dry, and non-porous surface like a piece of glass or a mirror to release the fine, yellowish powder. You can also use tweezers to carefully pluck the sacs and break them open over your collection surface.
Proper storage is critical because pollen loses its viability quickly. To preserve it, place the collected pollen in a small, airtight container. Adding a food-grade desiccant packet will help keep it dry. Store the container in a cool, dark place—a refrigerator is ideal. When stored correctly, pollen can remain viable for several months, giving you plenty of time to pollinate your chosen female when she’s ready.
Your Step-by-Step Pollination Guide
With your pollen collected and your receptive female plant ready, it’s time to bring them together. The key to successful pollination is timing and a gentle touch. Pollinate your female when she is in the early stages of flowering, typically two to three weeks after you see the first pistils appear. At this stage, the pistils are white and reaching out, making them perfect targets for pollen.
Here’s a simple process to follow:
- Isolate your target. If you only want to pollinate a few branches, cover the rest of the plant with plastic bags to prevent stray pollen from reaching them.
- Apply the pollen. Using a small, soft paintbrush or a cotton swab, carefully dab the collected pollen directly onto the receptive pistils of your chosen branches. Be thorough but gentle to avoid damaging the flowers.
- Let it rest. After application, turn off any fans for a day or two to allow the pollen to settle and do its work.
Caring for Your Plant After Pollination
Your work isn’t finished once the pollen has been applied. Proper care in the following weeks is essential for developing healthy, mature seeds. First, make sure to label the pollinated branches clearly. Note the date of pollination and which pollen was used. This record-keeping is vital for tracking your breeding projects, especially if you’re working with multiple cannabis clones or strains.
From here, it’s a waiting game. Continue to care for the mother plant as you normally would, but allow the seeds to fully mature inside the calyxes before you harvest. This can take several weeks. During this time, keep your growing area clean and disinfected to prevent pests or diseases from compromising your plant and its precious seed crop. Patience now will ensure you get viable, robust seeds for future cultivation.
How to Harvest and Store Your Feminized Seeds
After all your hard work, the final steps are just as important as the first. Harvesting and storing your newly created seeds correctly ensures they remain viable for future grows. Think of this as the final lap—a strong finish protects your investment of time and effort. Proper handling at this stage means you’ll have a healthy, reliable seed stock ready whenever you decide to plant it. We’ll walk through how to create the perfect environment for your seeds to mature, identify the exact moment they’re ready for harvest, and store them so they last for years to come.
Creating the Ideal Conditions for Seed Maturation
Once your female plant is pollinated, your job is to create a stable and nurturing environment for the seeds to develop. Mimicking nature’s ideal conditions is the goal here. For temperature, aim for a comfortable 75–80°F during the day, dropping slightly to 65–70°F at night. Humidity is also key; keep the air moisture level between 45–55%. You might need a humidifier or dehumidifier to hit this sweet spot. Maintaining these conditions helps the mother plant focus its energy on producing robust, healthy seeds, which is especially important when growing high-quality indoor cannabis seeds.
How to Spot Mature Seeds
Patience is a virtue, especially when waiting for seeds to ripen. Harvesting too early can result in underdeveloped seeds that won’t germinate, while waiting too long can cause them to lose viability. So, how do you know when the time is right? Keep a close eye on the calyxes—the small, leaf-like pods enclosing the seeds. As the seeds mature, the calyxes will swell and begin to turn brown. This is your signal that the seeds inside are fully developed and ready for harvest. Some may even start to peek out. This visual cue is one of the most reliable indicators for any grower working with any type of cannabis genetics.
The Right Way to Dry Your Seeds
Once you’ve harvested your seeds, you need to dry them properly to prevent mold and preserve them for storage. This step is simple but crucial. Gently separate the seeds from the plant material and spread them in a single layer on a screen or paper towel. Place them in a dark, dry, and well-ventilated area for several days. You’ll know they’re ready when they feel hard and completely dry to the touch. Don’t forget to label your batch with the strain name and harvest date. This simple habit will save you a lot of guesswork later, especially when you start building a collection of your own custom feminized seeds.
Long-Term Seed Storage Tips
Proper storage is what gives your seeds longevity. Once your seeds are perfectly dry, place them in an airtight container. A small glass jar or a labeled, sealed bag works great. The goal is to protect them from their three biggest enemies: light, heat, and moisture. Find a cool, dark place to store your container, like a refrigerator or a dedicated cabinet. When stored correctly, your seeds can remain viable for many years. This means the unique genetics you’ve created, whether they are standard feminized or advanced triploid cannabis seeds, will be ready for you when you’re ready to grow again.
Solving Common Problems
Even when you follow every step perfectly, you can still run into a few bumps on the road to creating your own feminized seeds. The key is knowing what to look for and how to respond. Think of these challenges not as failures, but as learning opportunities that will make you a better, more intuitive grower. Most common problems come down to genetics, environment, or simple human error. Let’s walk through how to spot and solve them.
By paying close attention to your plants and your process, you can catch minor issues before they become major setbacks. A little extra care in these areas will protect your project and ensure you end up with a healthy batch of high-quality feminized seeds.
How to Avoid Common Genetic Issues
Your project’s success starts with the genetics you choose. Not all plants are great candidates for feminization; some cultivars are simply more resistant to sex reversal. If you choose a stubborn plant, you might find that the process doesn’t work well, or the resulting seeds produce a wide and unpredictable range of traits. To give yourself the best chance, start with stable, reliable genetics from a trusted source. Choosing a strain with a proven track record will save you a lot of potential headaches and lead to more consistent, predictable feminized seeds.
How to Manage Environmental Stress
Cannabis plants are sensitive, and stress can cause them to behave in unexpected ways—including producing male flowers on their own. Your goal during feminization is to control this process, not let random stress dictate it. Keep your grow environment as stable as possible. This means maintaining a consistent light schedule, keeping temperatures and humidity in the ideal range, and ensuring your plants have proper airflow and nutrition. An unstable environment can compromise your results. By providing a calm, consistent space, you ensure that the only thing influencing your plant’s sex expression is the feminization solution you apply.
Key Stressors to Avoid
To keep your project on track, be vigilant about the common culprits that can throw your plants off balance. The biggest offenders are often the simplest to manage once you know what to look for. Pay close attention to light leaks during the dark cycle, as even a small amount of light can confuse a flowering plant. Also, watch out for drastic temperature swings between day and night, inconsistent watering schedules, and any nutrient imbalances. Each of these issues can trigger the plant’s natural survival instincts, potentially leading to unwanted hermaphroditism that competes with your controlled reversal process. This is especially critical in outdoor cultivation, where environmental factors are harder to control. Your goal is to create a predictable, low-stress environment so the only variable at play is the one you introduce.
How to Prevent Pollen Contamination
Pollen is microscopic, airborne, and incredibly persistent. A few stray grains can accidentally pollinate your entire crop, undoing all your hard work. To prevent this, you need to be meticulous about hygiene. Designate a separate, isolated area for your reversed female plant once it starts producing pollen. Always handle it after you’ve tended to your other plants. It’s a good idea to change your clothes and wash your hands thoroughly after working with the pollen-producing plant. This diligence is crucial for ensuring that your resulting seeds are truly feminized. For a completely different approach to pollination control, you can also explore genetics like Triploid Cannabis, which are bred to be virtually seedless.
How to Test Your Seeds for Viability
Once your pollinated female has matured, how do you know the seeds are ready and viable? Timing is everything. Look for the calyxes—the small pods that hold the seeds—to become swollen and start to wither. This is a good sign the seeds inside are mature. Once harvested and dried, you can test their viability. Healthy, mature seeds are typically dark brown or grey, often with mottled patterns. They should feel hard and firm; if a seed crushes easily between your fingers, it’s likely not viable. You can also try the float test: drop a few seeds in a glass of water. The ones that sink within a few hours are generally considered viable and ready for your next grow.
Ready for More? Advanced Breeding Tips
Once you’ve successfully created your first batch of feminized seeds, you’ve officially unlocked a new level in your cultivation journey. This is where the real fun begins. Moving beyond the basic mechanics, you can start thinking like a true breeder, intentionally shaping the genetic future of your garden. It’s about more than just making seeds; it’s about creating plants that are uniquely yours, tailored to your exact preferences for flavor, effect, and growth habits.
Developing a breeding program is a long-term project that requires patience, a keen eye for detail, and a passion for the cannabis plant. By carefully selecting parent plants, ensuring their genetic stability, and keeping meticulous records, you can refine your techniques over time. This process allows you to create new, stable strains that consistently express the traits you value most. Think of your garden as a living laboratory where you can experiment, learn, and ultimately cultivate something extraordinary. The goal is to build a personal library of high-quality genetics, just like our collection of premium cannabis seeds.
Developing Your Strain Selection Strategy
Your breeding project is only as good as the plants you start with. That’s why a thoughtful selection strategy is so important. Begin by identifying the specific traits you want to see in your new strain. Are you aiming for a particular terpene profile, high resistance to pests, or massive yields? Maybe you’re focused on a specific cannabinoid, like those found in our THCA seeds.
Pick parent plants that strongly exhibit these desired characteristics. To create stable offspring, it’s also wise to choose plants with similar genetic backgrounds. This reduces the chances of unpredictable or undesirable traits popping up in the next generation. By being selective and intentional with your parent stock, you set the foundation for a successful and rewarding breeding outcome.
How to Ensure Genetic Stability
Genetic stability is the bedrock of any successful breeding program. Before you even think about reversing a female plant, you need to be absolutely certain she is genetically solid and not prone to hermaphroditism. Some plants have a genetic predisposition to develop male flowers under stress, and passing on this trait will only lead to headaches and seeded buds down the line.
The best practice is to use only female plants that remain 100% female, even when put through rigorous stress testing. This involves intentionally exposing them to stressors like light leaks or temperature swings to see how they react. If a plant stays true to its sex, you know you have a reliable candidate for breeding. This commitment to stability is why we’re so proud of our innovative triploid cannabis seeds, which are bred for maximum stability and consistency.
Why You Should Keep Detailed Records
If you’re serious about breeding, a detailed journal is your most valuable tool. Meticulous record-keeping is what separates casual experimentation from a structured breeding program. For every project, you should be tracking everything from the parent strains to the final performance of the offspring. Label everything clearly, noting which pollen was used on which female.
Your notes should include key dates, the feminization method used, environmental conditions, and any observations about the plant's development. Once you harvest the seeds, continue tracking their performance. How is the germination rate? What traits do the new plants exhibit? This data helps you understand your genetics, replicate your successes, and avoid repeating mistakes. It’s the only way to truly measure the progress of your feminized seeds.
How to Start Your Own Breeding Program
With these principles in hand, you’re ready to build your own breeding program. Start small by focusing on one or two projects at a time. Experiment with different parent combinations and techniques, and never stop learning. The world of cannabis genetics is always evolving, and there’s always something new to discover that can improve your results.
Be patient—breeding is a marathon, not a sprint. It can take several generations to truly stabilize a new strain and lock in the traits you’re looking for. But the reward is creating something that is entirely your own. For inspiration on what’s possible with dedication, check out our new releases. Embrace the process, trust your instincts, and enjoy the journey of creating exceptional cannabis.
Related Articles
- What is a Feminized Seed? The Ultimate Guide
- Feminized Weed Seeds: A Comprehensive Grower's Guide
- 10 Best Feminized Seeds to Grow This Year
- Feminized Seeds: The Complete Grower's Guide
Frequently Asked Questions
Is it safe to consume any part of the plant I sprayed with STS or colloidal silver? Absolutely not. The plant that you treat with a silver-based solution is only for producing pollen. It is not safe to smoke, vape, or ingest in any way. The silver accumulates in the plant's tissues, and you don't want that in your body. Be sure to label the treated plant very clearly so there are no mix-ups, and keep it separate from the plants you intend to harvest for consumption.
How many seeds can I expect from one pollinated branch? The number of seeds you get can vary quite a bit, but a single well-pollinated branch on a healthy plant can easily produce several hundred seeds. The final count depends on the size of the branch, how thoroughly you applied the pollen, and the overall health and genetics of the mother plant. A successful pollination will result in dense clusters of seeds developing within the flower calyxes.
Can I use the pollen from a reversed plant to pollinate itself? Yes, you can. This process is known as "selfing," and it creates what are called S1 seeds. By pollinating a plant with its own feminized pollen, you are essentially creating a new generation that is a direct copy of the parent. This is a great technique for preserving the exact genetics of a plant you love, but it's crucial to start with a very stable plant that shows no signs of hermaphroditism under stress.
What should I do if my plant doesn't produce any pollen after I've sprayed it? If you're not seeing any pollen sacs form after a few weeks, there are a few things to consider. First, review your application schedule—inconsistent spraying is a common reason for failure. Second, consider the genetics. Some strains are more resistant to reversal than others. Finally, check your environment. Any major stress from inconsistent light, temperature, or feeding can interfere with the process. If it fails, it's best to start over with a new plant and double-check your process.
How long does the entire process take, from the first spray to harvesting mature seeds? You should plan for this to be a multi-month project. The reversal process itself, from the first spray until pollen is ready, typically takes about three to four weeks. After you pollinate your female plant, the seeds will need another four to six weeks to fully mature on the plant. All in all, you're looking at roughly two months from the day you start spraying until you're harvesting your own feminized seeds.