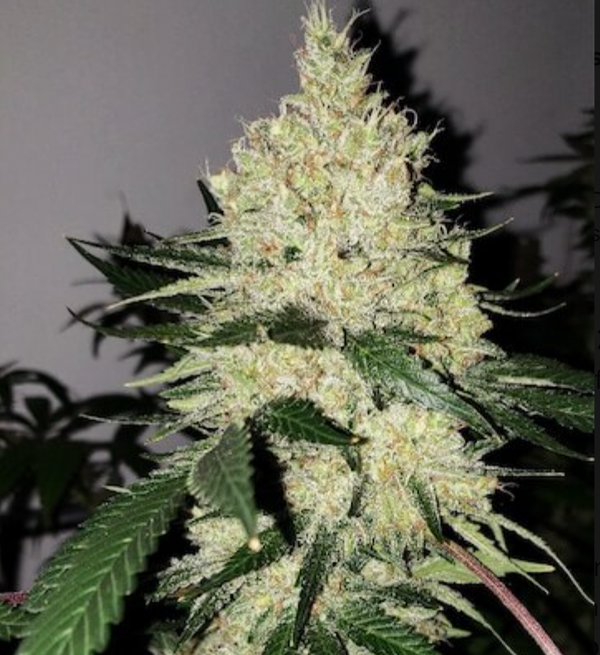
Growing autoflowers is a sprint, not a marathon. There are no second chances. Everything that happens in the first two weeks sets the absolute limit for your final harvest. Any stumble during germination or the seedling stage is a mistake you can't fix later. This is why learning how to properly start autoflower seeds is the single most important skill for a great yield. This guide gives you the exact playbook for a flawless start, ensuring your plants launch into growth with unstoppable momentum.
Key Takeaways
- Respect the Autoflower Clock: These plants run on a tight schedule, flowering automatically based on age. This means there's no time to recover from early mistakes, so protecting your seedling from stress is crucial for a successful harvest.
- Create a Consistent Environment: Autoflowers thrive on stability. Keep temperatures between 70-80°F and humidity around 50% to prevent shock. A predictable environment tells your plant it's safe to grow quickly and strongly.
- Handle with Care to Avoid Setbacks: Simple actions make a huge difference. Plant your seed directly in its final pot to skip transplant shock, water gently with a spray bottle to protect roots, and use only low-stress training (LST) to shape your plant.
So, What Exactly Are Autoflower Seeds?
If you're looking for a straightforward path to a successful harvest, autoflower seeds are your new best friend. Think of them as the low-maintenance superstars of the cannabis world. These seeds are created by cross-breeding traditional cannabis plants with a special, hardy variety called Cannabis ruderalis. Native to colder regions with short summers, Ruderalis evolved a unique survival skill: it flowers automatically based on its age, not the amount of light it receives.
This genetic trait is what makes autoflowers so special. Instead of waiting for the seasons to change or manually adjusting your light schedule, these plants operate on their own internal clock. This makes them incredibly beginner-friendly and efficient, allowing you to focus more on plant health and less on complex lighting setups. Whether you're a new grower finding your footing or an experienced cultivator looking for a quick turnaround, autoflowers offer a simple and rewarding growing experience.
How Are Autoflowers Different?
The biggest difference between autoflowers and other cannabis plants, like traditional feminized seeds, is how they start to bloom. Photoperiod plants (the technical term for regular seeds) rely on light cues. They need long days during their vegetative growth and short days to trigger their flowering stage. Autoflowers, thanks to their Ruderalis genetics, completely ignore these light cycles. They will automatically switch from vegetative growth to flowering after just a few weeks, no matter what. This means you can keep them on a consistent light schedule—like 18 hours on, 6 hours off—from seedling to harvest, simplifying your entire setup.
Why Choose Autoflower Seeds?
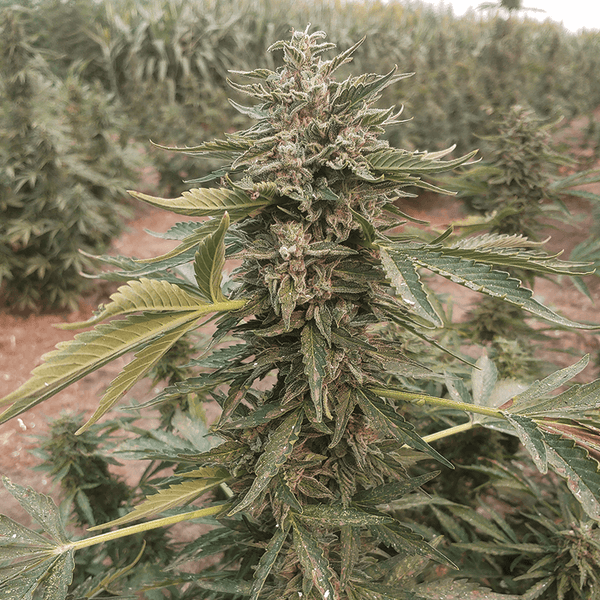
So, why should you choose autoflowers for your next grow? The list of benefits is pretty long. First, they are incredibly fast. Most autoflower strains go from seed to harvest in just 8–10 weeks, allowing for multiple harvests in a single season. Their compact size also makes them discreet and perfect for small spaces like balconies or grow tents. Because their life cycle is so short, there’s less time for pests or diseases to become a problem. They are also famously resilient and tough, making them forgiving for first-time growers. This combination of speed, simplicity, and durability makes them an excellent choice for anyone wanting a reliable harvest without the hassle.
Common Autoflower Myths, Debunked
You might hear some growers say you should never transplant an autoflower seedling because the shock can stunt its growth. This has led many to plant their seeds directly into their final, large container. While it’s true that autoflowers have a short vegetative period and don’t have much time to recover from stress, a gentle transplant isn’t off the table. The real key is minimizing root disturbance. Many successful growers start their seeds in a small plug or pot and carefully move them once they’re established. A well-executed germination and transplant is often better than a poor start directly in a big pot. The goal is simply to be as gentle as possible.
Before You Start: Key Principles for Success
Before you even think about soil or lights, let's talk about the most important ingredient: the seed itself. A successful grow starts long before you see a sprout. It begins with high-quality genetics, proper storage, and a realistic mindset. Getting these fundamentals right from the beginning sets the stage for a healthy, vigorous plant and a rewarding harvest. Think of this initial phase as your pre-flight check. Taking the time to prepare and understand the basics will help you avoid common pitfalls and give your autoflowers the best possible chance to reach their full potential. A little bit of knowledge and preparation now will save you a lot of headaches later.
Why Starting with Quality Seeds Matters
Your seed is the genetic blueprint for your entire plant. It contains all the potential for growth, potency, and flavor, but that potential can only be realized if the seed is healthy and viable. Germination is the very first test, and even under perfect conditions, not every seed will make it. That's why starting with premium genetics from a trusted source is non-negotiable. A quality seed is more likely to sprout successfully, grow into a resilient plant, and produce the results you’re looking for. Investing in good seeds is investing in your final harvest, ensuring you don't waste weeks of time, energy, and resources on a plant that was set up to fail from the start.
Choosing a Reputable Seed Bank
Finding a reputable seed bank is the first step to securing quality genetics. Look for a company that is transparent about its breeding processes, provides detailed information about each strain, and has a solid track record of customer satisfaction. A great seed bank doesn't just sell seeds; it offers a guarantee of genetic stability and viability. At Trilogene Seeds, we pride ourselves on providing premium, non-GMO cannabis genetics that you can count on. When you shop for seeds from a reliable source, you’re not just buying a product—you’re gaining a partner in your cultivation journey, ensuring your grow starts with a strong, healthy foundation.
Understanding Seed Viability and Storage
It’s easy to forget, but cannabis seeds are living organisms in a dormant state. They need to be treated with care to maintain their viability, which is just a fancy word for their ability to sprout and grow. A seed's viability can be affected by age, light, temperature, and humidity. Fresh seeds will almost always have a higher germination rate than old ones, but proper storage can keep them healthy for years. Think of your seeds as tiny, sleeping plants. Protecting them from harsh conditions ensures they’ll be ready to wake up and thrive when you are.
Short-Term vs. Long-Term Seed Storage
How you store your seeds depends on how soon you plan to plant them. For short-term storage—a few weeks or months—simply keep them in a cool, dark, and dry place, like a drawer or a cupboard away from any heat sources. For long-term storage, you’ll want to create a more stable environment. The best method is to place your seeds in an airtight container and store them in a refrigerator set between 43-46°F (6-8°C) with a relative humidity of 20-30%. This keeps them in a state of suspended animation, preserving their viability until you’re ready to bring them to life.
Managing Expectations: The Reality of Germination
Germination can feel like a test of patience, and it’s important to go into it with realistic expectations. While the goal is always a 100% success rate, nature doesn't always cooperate. Some seeds may not sprout, and others might take longer than their siblings. This is a normal part of the process. The key is to control the variables you can—like temperature, moisture, and technique—and not get discouraged if things don't go perfectly. Every grow is a learning experience, and with each attempt, you'll become more attuned to what your seeds need to succeed.
Why Seeds Are So Fragile
During germination and the early seedling stage, your plant is at its most vulnerable. Unlike a mature plant that might just show signs of stress from poor conditions, a seed or seedling can be killed by them. A sudden drop in temperature, too much water, or physical damage to the delicate taproot can end your grow before it even begins. This is why providing a stable, gentle environment is so critical. Your job as a grower is to act as a protector during this fragile period, shielding your future plant from any stress that could hinder its development.
Patience After Planting
Once you’ve planted your germinated seed, the waiting game begins. It can take anywhere from 24 hours to several days for the seedling to break through the soil's surface. It’s tempting to poke around in the soil to see what’s happening, but resist the urge! Disturbing the seed at this stage can damage its delicate root. Trust the process and give it time. As long as you’ve provided the right conditions, your seedling is working hard beneath the surface. A little patience now will be rewarded when you see that first set of green leaves emerge.
Understanding Seed Anatomy and the Germination Process
To give your seeds the best start, it helps to understand a little bit about what’s going on inside that tiny shell. A cannabis seed is a self-contained life-support system, packed with everything a new plant needs to begin its life. The germination process is a magical sequence of events where water and warmth signal the seed to wake up and begin its journey. Knowing the basic parts of a seed and what to look for as it sprouts will help you provide the right care at the right time, making you a more confident and successful grower.
The Parts of a Cannabis Seed
Take a close look at a cannabis seed, and you'll notice it isn't perfectly round. It has a slightly pointed end and a flatter, crater-like end, often called the crown. When the seed germinates, a single root called a taproot will emerge from the pointed end. This is an important detail for planting. For the best start, you should plant your seed with the pointed end facing down. This allows the taproot to grow directly into the soil without having to reorient itself, saving the seedling precious energy that it can then use for upward growth.
What Are Cotyledons?
After your seedling emerges from the soil, the first leaves you’ll see aren't "true" cannabis leaves. These are the cotyledons. They are small, oval-shaped leaves that were already formed inside the seed's embryo. Their job is to provide the initial energy the seedling needs to grow until its first set of true leaves can develop and take over the process of photosynthesis. Once you see the first set of serrated, "true" leaves appear, you'll know your plant has officially started its vegetative stage. The cotyledons will eventually yellow and fall off, having successfully completed their mission.
Everything You Need to Start Autoflower Seeds
Before you even think about popping a seed, let’s get your grow space set up. Having all your supplies ready from the start makes the entire process smoother and less stressful for both you and your future plants. Think of it as creating the perfect nursery for your seedlings to thrive in. When you begin with high-quality cannabis seeds and the right environment, you’re giving your autoflowers the best possible head start.
Your main focus should be on three key areas: the growing medium, the right containers, and the tools to maintain a stable environment. Autoflowers grow quickly, so they are particularly sensitive to their early conditions. Unlike photoperiod plants that can recover from early mistakes during a longer vegetative stage, an autoflower's clock is always ticking. Any stress during the seedling phase can permanently stunt its growth and reduce your final harvest. A little preparation now pays off with healthy, robust plants later. We’ll walk through exactly what you need to create a welcoming home for your seeds, ensuring they have everything required to sprout successfully and transition into strong seedlings.
Choosing the Best Grow Medium
Your seeds need a light, airy home for their roots to grow freely. A dense, compacted soil can suffocate young roots and hold too much water, leading to rot. You want a growing medium that provides a perfect balance of moisture retention and drainage. Many growers have great success with a simple soilless mix. A popular and effective recipe is combining 3 parts peat moss, 3 parts compost, 2 parts perlite, and 1 part vermiculite. This blend stays fluffy, allows for excellent airflow to the roots, and holds just enough water without becoming soggy.
Using a Pre-Made Seed-Starting Mix
If mixing your own soil sounds like a bit much, don't worry—there are fantastic pre-made options that get the job done perfectly. The most important thing to look for in a seed-starting mix is a light, fluffy texture. The goal is to find a medium that won't compact over time or hold too much water, as both can suffocate delicate new roots. Brands like Pro-Mix are popular for a reason; they provide a consistent, well-aerated environment that makes it difficult to overwater. Using a quality pre-made mix takes the guesswork out of the equation, giving your autoflower seeds a reliable foundation to sprout and grow without any early setbacks.
Beneficial Amendments for Young Plants
Whether you’re using a pre-made mix or your own blend, a few simple additions can significantly improve your results. The most common and effective amendment is perlite. These little white volcanic rocks are incredibly lightweight and create air pockets in your soil, which is crucial for root health and preventing waterlogging. A good rule of thumb is to add about 20% perlite to your potting soil to improve its structure and drainage. This simple step ensures that your plant's roots have plenty of oxygen and room to expand, setting the stage for vigorous growth. It’s an inexpensive way to give your high-quality genetics the premium environment they deserve.
Picking the Perfect Pots for Your Plants
Autoflowers have a short and fast life cycle, which means they don’t like being stressed. One of the biggest stressors for any plant is transplanting. To avoid this, it’s best to plant your germinated seed directly into its final container. This prevents any potential for transplant shock that could slow down its growth. Fabric pots, often called "smart pots," are an excellent choice. They allow the roots to breathe and prevent them from becoming root-bound by naturally air-pruning them. A 3- to 5-gallon pot is usually a great size for most autoflower strains.
Why You Should Only Plant One Seed Per Pot
It might be tempting to plant a few seeds in one big pot to save space, but this is one shortcut you'll want to avoid. When you put multiple seedlings together, they immediately start competing for everything: light, water, and nutrients. This constant battle for resources can seriously stunt their growth, leaving you with several weak plants instead of one strong one. As the experts at 2 Fast 4 Buds note, this competition can "hinder their growth and overall health." This is especially true for autoflowers. Because they have such a short and fast life cycle, they are extremely sensitive to stress during their early weeks and simply don't have time to recover from fighting a neighbor for survival. By giving each seed its own dedicated pot, you eliminate this competition entirely and create a stress-free environment where each plant has all the resources it needs to reach its full potential.
Essential Tools for the Perfect Environment
Your seedlings are sensitive, and they thrive in stable conditions. Big swings in temperature or humidity can cause stress and stunt their growth. A simple digital thermometer/hygrometer is an essential tool for monitoring your grow space. You’ll want to keep the temperature consistently between 70°F and 80°F (21°C to 27°C). This cozy warmth encourages healthy germination and early development. Maintaining this stable environment is one of the easiest ways to ensure your plants feel safe and can focus all their energy on growing.
Your Quick Supply Checklist
Ready to get started? Here’s a simple checklist of the essential items you’ll want to have on hand before you begin the germination process. Having everything in one place will make you feel prepared and confident.
- High-quality autoflower seeds
- Your light, airy growing medium
- Final containers (3- to 5-gallon fabric pots are ideal)
- A spray bottle for gentle watering
- A pH testing kit to check your water
- A thermometer/hygrometer to monitor the environment
- Grow lights (if you're growing indoors)
How to Germinate Your Autoflower Seeds
Germination is the very first step in your growing journey—it’s the process of waking your seed up so it can sprout into a healthy plant. Think of it as giving your seed the perfect signal to start growing. The goal is simple: to encourage a small white taproot to emerge. Once you see that little root, your seed is ready for soil. There are a few tried-and-true methods to get this done, and they’re all incredibly simple. The key is to provide a consistently warm, moist, and dark environment. Let’s walk through the most popular techniques so you can choose the one that feels right for you.
Germinating with the Paper Towel Method
This is a classic for a reason—it’s easy and effective. Start by taking two paper towels and dampening them with water. You want them moist, not dripping wet. Lay one paper towel on a plate and gently place your autoflower seeds on top, leaving about an inch of space between each one. Place the second damp paper towel over the seeds. To create the dark, humid environment they need, cover everything with another plate. Store the plates in a warm, dark place, like a kitchen cabinet. Check on them daily. In about 2 to 7 days, you should see a small white taproot emerge. Once it’s about a quarter-inch long, it’s time to carefully plant it.
Trying the Water Soaking Method
If you want an even simpler approach, try soaking your seeds in water. Just drop your seeds into a glass of lukewarm water and let them sit for 24 to 48 hours. You’ll know it’s working when you see a tiny white taproot pop out. This method is great because it helps soften the seed’s tough outer shell. Just be careful not to leave them in the water for too long, as the seeds can drown without access to oxygen. Once that little root appears, handle the seed with care and plant it directly into your growing medium. This technique works well for all kinds of feminized seeds, not just autoflowers.
Should You Plant Seeds Directly in Soil?
For growers who want to avoid moving a delicate sprout, planting directly into the soil is a great option. This method completely removes the risk of transplant shock, which can sometimes slow down an autoflower’s growth. Simply plant your seed about a quarter-inch deep in your final container filled with a quality potting mix. Water the spot gently with a sprayer so you don’t disturb the seed. Keep the soil consistently moist and warm until you see a seedling emerge from the surface. At first, keep the pot in a dark place, and then slowly introduce light once your plant has sprouted. This is an excellent method for both indoor and outdoor grows.
Using Rockwool Cubes or Peat Pellets
For a clean and controlled start, Rockwool cubes or peat pellets are fantastic options. These mediums provide a stable environment for your seed to sprout without the risk of soil-borne pathogens. To get started, soak your chosen cube or pellet in pH-balanced water until it's fully saturated, then gently squeeze out any excess. You want it damp, not waterlogged. Use a small tool, like a toothpick, to create a shallow hole about a quarter-inch deep. Carefully place your seed inside, cover it lightly, and place it in a tray with a humidity dome. This setup traps moisture and warmth, creating the perfect microclimate for germination. Once your seedling has developed its first set of true leaves, you can transplant the entire cube directly into its final pot, minimizing root disturbance.
Using a Germination Chamber
If you want to take the guesswork out of germination, a dedicated chamber is the way to go. These simple setups, which usually consist of a small plastic tray with a heat mat underneath and a humidity dome on top, give you complete control over the environment. The heat mat provides consistent, gentle warmth from below, encouraging the taproot to grow downwards, while the dome maintains high humidity levels. This stability is exactly what seedlings crave and can significantly increase your success rate. When you're working with premium genetics like high-quality THCA seeds, a germination chamber helps protect your investment by ensuring as many seeds as possible sprout into healthy, vigorous plants.
How to Spot a Healthy Sprout
Congratulations, your seed has sprouted! The first thing you’ll see is a tiny seedling pushing through the soil with two small, rounded leaves called cotyledons. These aren’t “true” leaves; they’re part of the seed’s embryo and provide the initial energy for the plant to grow. The real sign of a healthy, thriving plant is the appearance of its first set of true leaves. These will have the classic serrated edges you associate with cannabis. By the end of the second week, your seedling should have developed a few sets of these leaves and started establishing a stronger root system. At this stage, your main job is to provide a stable environment and resist the urge to overwater.
Setting Up the Ideal Grow Environment
Once your seed has sprouted, your job is to become the architect of its world. Creating the perfect environment is the single most important thing you can do to ensure your tiny seedling grows into a healthy, productive plant. Think of it as setting up a five-star resort where your plant has everything it needs to thrive. The key is to find a stable balance between temperature, humidity, lighting, airflow, and pH. Getting these elements right from the beginning will save you from troubleshooting problems down the line.
While you have more control when growing indoors, these principles are just as important for outdoor marijuana seeds. Your goal is to mimic the ideal conditions your plant would naturally seek out. By dialing in your environment, you’re giving your autoflower seeds a clear runway for the rapid growth they’re known for. A stable, nurturing environment reduces stress on the plant, allowing it to focus all its energy on developing strong roots and lush foliage.
Getting the Temperature Just Right
Your autoflower seedlings are happiest in a "Goldilocks zone"—not too hot and not too cold. Aim to keep the temperature in your grow space consistently between 70°F and 80°F (21°C to 27°C). More importantly, avoid drastic temperature swings. A sudden drop or spike can shock your delicate seedlings and stunt their growth. A simple digital thermometer placed at canopy level will help you monitor the conditions and make adjustments as needed. Consistency is your best friend here, as it tells your plant that it’s in a safe, stable place to grow.
The Optimal Temperature Range for Germination
During the germination phase, your main goal is to mimic the perfect spring day. The sweet spot for waking up your autoflower seeds is a consistent temperature between 70°F and 80°F. This warmth is the signal that tells the seed it's safe to sprout, helping to soften its outer shell and kickstart the growth process. If you're using the paper towel method, keeping the plates on top of a refrigerator or near a router can provide a gentle, steady warmth. The key is stability; sudden drops in temperature can shock the seed and halt germination altogether. A predictable, cozy environment ensures your seed has the best possible chance to send out its first taproot with confidence.
Finding the Sweet Spot for Humidity
Humidity, or the amount of moisture in the air, is especially important during the seedling stage. Young plants have small root systems and absorb some moisture through their leaves. Keeping the relative humidity around 50% helps them stay hydrated while their roots get established. As your seedling grows stronger over the first couple of weeks, you can gradually lower the humidity to about 45%. This encourages the roots to expand and seek water from the soil, and it also helps prevent issues like mold or mildew from developing as the foliage gets denser.
Maintaining High Humidity for Germination
Keeping the air moist for your tiny seedlings is easier than it sounds. The simplest way to do this is by creating a humidity dome. You don’t need any fancy equipment—a clear plastic cup or the top half of a plastic bottle placed over your seedling works perfectly. This little dome traps moisture evaporating from the soil, creating a mini-greenhouse that keeps the humidity high right where your plant needs it. Just remember to lift the dome for a few minutes each day to allow for fresh air exchange, which helps prevent mold. This simple step provides the stable, humid environment that high-quality autoflower seeds need to get a strong, stress-free start.
How to Set Up Your Grow Lights
Unlike photoperiod plants, autoflowers don’t need a change in the light schedule to begin flowering. This gives you a lot of flexibility. Most growers find that a light schedule of 18 hours on and 6 hours off provides the perfect balance. This gives your plants plenty of light to fuel photosynthesis for rapid growth while also giving them a short "rest" period. Using a quality light source is crucial for developing strong plants, especially when you’re working with premium indoor cannabis seeds. A simple outlet timer will make it easy to keep your light schedule consistent.
Why Good Airflow Is So Important
Gentle air movement is vital for a healthy grow space. Good airflow strengthens your plant's stems, preparing them to support future buds. It also helps prevent pockets of stale, humid air from forming around the leaves, which can be a breeding ground for mold and pests. Use a small oscillating fan to create a light breeze, but make sure it’s not pointed directly at your seedlings. You want to see the leaves rustling gently, not getting blasted by a windstorm. This simple step helps create a more robust and resilient plant.
A Simple Guide to Balancing pH
Think of pH as the gatekeeper for nutrients. It measures how acidic or alkaline your soil and water are. If the pH is too high or too low, your plant’s roots can’t absorb the essential nutrients they need to survive, even if those nutrients are plentiful in the soil. For soil grows, the sweet spot for pH is between 6.0 and 7.0. You can get an inexpensive pH testing kit to check your water and soil. Taking a moment to balance your pH ensures your plant can access all the food it needs for vigorous growth.
Adjusting Water pH for Your Grow Medium
Adjusting your water’s pH is much easier than it sounds and only takes a minute. Always mix any nutrients into your water first, as they can alter the pH level. Then, use a pH testing kit or a digital pen to get a reading. If your water is outside the ideal 6.0 to 7.0 range, you’ll use a product called "pH Up" or "pH Down" to correct it. These solutions are highly concentrated, so add just a drop or two at a time, stir well, and re-test. Keep repeating this process until you hit that sweet spot. This simple check ensures that all the care you put into selecting high-quality cannabis seeds pays off, as your plants will be able to absorb every nutrient they need to thrive.
From Sprout to Seedling: Your Care Guide
Once your seed has sprouted a taproot, it’s officially a seedling and ready for its new home. This is a delicate stage where your plant is most vulnerable, so a little extra care goes a long way. Getting these next steps right sets the foundation for a healthy, robust plant and a successful harvest. Think of it as giving your new plant the best possible start in life. From planting depth to watering, every detail matters. Let’s walk through how to give your seedling the attention it needs to thrive.
How Deep Should You Plant Your Sprout?
Proper planting depth is key to helping your seedling establish strong roots. In your prepared growing medium, make a small hole about a quarter to a half-inch deep. If you’re working with a germinated seed, gently place it in the hole with the taproot pointing down. This orientation helps the root system grow downward naturally.
Lightly cover the seed with your soil or coco coir. Avoid packing the medium down, as this can make it difficult for the delicate sprout to push through to the surface. The goal is to tuck the seed in, not bury it. A light covering protects the seed while allowing it to emerge easily as it continues to grow. All of our Autoflower Seeds benefit from this gentle approach.
When to Plant Your Germinated Seed
Timing is everything with a delicate new sprout. The moment you see that little white taproot emerge from the seed, that’s your green light. As we explain in our guide on how to germinate your autoflower seeds, the goal of germination is simply to encourage that taproot to appear. Once it’s about a quarter- to a half-inch long, it’s ready for soil. Don’t wait too long, as this tiny root is very fragile and can easily dry out or get damaged if left exposed. Moving it to its new home promptly allows it to anchor itself and start absorbing the water and nutrients it needs to push its first leaves up toward the light.
How to Orient the Seed in the Soil
How you place the seed in the soil can give your plant a helpful head start. Always plant the seed with the taproot pointing down. This simple step works with gravity, allowing the root to continue its natural downward journey into the growing medium without wasting any energy reorienting itself. Think of it as setting your plant up for success from day one. After making your small hole, gently place the germinated seed inside and lightly cover it. This proper orientation ensures the seedling can efficiently establish its root system while the stem pushes upward, a crucial first step for all types of cannabis seeds.
Watering Your Seedling Without Overdoing It
When it comes to watering seedlings, less is definitely more. Your tiny plant doesn’t have a large root system yet, so it can’t absorb much water. Overwatering is one of the most common mistakes and can quickly lead to root rot, which is often fatal for a young plant.
To avoid this, use a spray bottle to gently mist the soil around the seedling. This provides enough moisture to keep the plant happy without waterlogging the medium. The soil should be damp, like a wrung-out sponge, but never soaking wet. Let the top layer of the medium dry out slightly between waterings to ensure the roots are getting enough oxygen. This careful watering technique is crucial for both indoor and outdoor grows.
What to Expect in the First Two Weeks
The first two to three weeks are the official seedling stage. During this time, your main job is to maintain a stable and nurturing environment. Keep the temperature consistent, ideally between 70°F and 80°F (21°C to 27°C). Big temperature swings can stress your plant, so try to keep conditions as steady as possible.
Continue to keep the growing medium moist but not saturated. Your seedling will spend this period developing its first set of true leaves (the serrated ones) and establishing its root system. Provide plenty of gentle light, but be careful not to place high-intensity lights too close, as they can burn the fragile leaves. A stable environment is the best gift you can give your young plant.
How to Avoid Transplant Shock
Autoflowers have a short, fast-paced life cycle, which means they don’t have much time to recover from stress. Transplanting can be a major shock to their system, potentially stunting their growth permanently. For this reason, most experienced growers recommend planting your germinated seed directly into its final container.
By starting your feminized seeds in the pot they will finish in, you eliminate the risk of transplant shock entirely. This allows the plant to establish its root system without interruption, leading to healthier growth and better yields. If you absolutely must start in a smaller container, be extremely gentle during the transplant process, but direct planting is always the safest bet for autoflowers.
Protecting Outdoor Seedlings
Growing outdoors means you have less control, but you can still protect your delicate seedlings from the elements. Young plants are vulnerable to harsh sun, strong winds, and heavy rain. A simple and effective trick is to create a mini-greenhouse using a clear plastic bottle with the bottom cut off. This acts as a cloche, shielding your seedling while trapping warmth and humidity, creating the stable environment they love. It also offers a physical barrier against common garden pests like slugs and birds. As your plant gets stronger, you can gradually acclimate it to the open air by removing the cover for a few hours each day. This gentle introduction helps your outdoor marijuana seeds build resilience without the shock of sudden exposure.
How to Avoid Common Autoflower Problems
Even with their hardy nature, autoflowers can run into trouble if their basic needs aren't met. The good news is that most common issues are easy to prevent with a little foresight. By creating a stable environment and paying attention to your plant's early development, you can sidestep problems that might slow down growth or reduce your final yield. Let’s walk through a few key areas where you can be proactive and keep your plants happy from sprout to harvest.
What to Do When Your Seeds Don't Sprout
Getting your seeds to sprout is the very first hurdle. If you’re struggling with poor germination rates, it’s time to look at your environment. Seeds need consistent warmth, moisture, and darkness to pop. Aim for a temperature between 70°F and 80°F. You can use a simple heat mat to maintain this range. Keep your paper towel or soil moist but never soaking wet, as too much water can rot the seed. Starting with high-quality autoflower seeds gives you a significant head start, as strong genetics are naturally more vigorous and ready to grow.
Techniques for Germinating Older Seeds
Older seeds sometimes need a little extra encouragement to sprout. Over time, their outer shells can become harder and less permeable to water, which is the key trigger for germination. If you have some older seeds you want to try, a couple of simple tricks can make a big difference. First, you can try a technique called scarification. This just means gently scuffing the seed's shell to help water get inside. You can do this by lightly rubbing it with a piece of fine-grit sandpaper or the striker on a matchbox. After scuffing, a pre-soak can work wonders. Just place the seeds in a glass of lukewarm water for about 12 to 24 hours. This combination of scuffing and soaking helps soften that tough outer layer and signals to the seed that it's time to wake up and grow. Of course, for the best germination rates, starting with fresh, vigorous autoflower seeds is always the most reliable path.
Recognizing and Reducing Plant Stress
Autoflowers have a short life cycle, which means they don't have much time to recover from stress. Big swings in temperature or humidity can stunt their growth permanently. For the best results, keep your grow space temperature between 68°F and 77°F and your relative humidity around 50%. As your plant gets bigger, you can gradually lower the humidity to about 45%. Consistency is your best friend here. When growing indoors, using timers for your lights and fans can help create a stable, predictable environment that your plants will love.
Simple Steps for Strong, Healthy Roots
Healthy roots are the foundation of a healthy plant. To give your autoflower the best root environment, start with the right container and soil. Fabric pots are a fantastic choice because they allow roots to breathe and prevent them from becoming root-bound. Because autoflowers dislike being moved, it's best to plant your germinated seed directly into its final pot to avoid transplant shock. Use a light, airy soil mix that drains well to avoid waterlogging the delicate root system. A quality seed-starting mix or a living soil with natural nutrients provides everything your seedling needs for the first few weeks.
Can Companion Planting Help Your Grow?
If you’re growing outside, companion planting is a simple and organic way to protect your plants. This technique involves growing beneficial plants alongside your cannabis to deter pests and improve soil health. Plants like marigolds can help repel nematodes and other pests, while basil is known to ward off aphids and whiteflies. This natural approach creates a small ecosystem that supports your autoflower’s growth, making it a great strategy for any outdoor cultivation. It’s an easy way to work with nature to keep your garden thriving without relying on chemical pesticides.
Pro Tips for an Even Better Harvest
Once you have the basics down, you can start fine-tuning your process to get the most out of every plant. Autoflowers grow quickly, so small adjustments can make a big difference in your final harvest. These tips focus on working with your plant's natural tendencies, helping you guide its growth without causing unnecessary stress. From feeding schedules to gentle training, a little extra attention to detail will help you cultivate healthier plants and more impressive yields.
Feeding Your Autoflowers: A Nutrient Guide
Autoflowers are efficient and compact, which means they are often more sensitive to nutrients than their photoperiod cousins. It’s very easy to overfeed them. If you start with a nutrient-rich soil, you likely won’t need to add any fertilizers for the first three to four weeks. When it is time to feed your plants, especially as they enter the flowering stage, a "less is more" approach is best. Start with half or three-quarters of the recommended dose on the fertilizer bottle to avoid nutrient burn. Paying close attention to how your plant responds will tell you everything you need to know about its specific nutritional requirements.
An Introduction to Low-Stress Training
Because autoflowers operate on a fixed timeline, they don’t have weeks to recover from intense stress. High-stress training (HST) methods like topping or heavy pruning are generally not recommended, as the plant may not have time to heal before it starts flowering. Instead, focus on Low-Stress Training (LST). This involves gently bending and tying down stems to create a more even canopy, allowing light to reach lower bud sites. LST encourages wider, bushier growth without shocking the plant, making it the ideal way to shape your autoflower seeds into productive powerhouses.
Does Your Strain Need Special Care?
While all autoflowers share common traits, every strain is unique. Some finish in as little as eight weeks, while others might take twelve. Knowing the specific characteristics of the genetics you’re working with is key. Before you even plant a seed, read the breeder’s description to understand its expected height, life cycle, and potential needs. For example, knowing that a particular strain has a short, two-week seedling stage helps you prepare for its rapid growth. This knowledge allows you to tailor your watering, feeding, and training schedules for the best possible outcome with your chosen cannabis clones or seeds.
How to Get the Most from Your Plants
Vigorous root development is critical for a healthy autoflower. Since their lifespan is short, you want to give the roots every opportunity to grow quickly and efficiently. The best way to do this is by using a light, airy growing medium. Heavy, dense soils can suffocate roots and slow down growth. Try amending your soil with 30-50% coco coir or perlite to improve drainage and aeration. This encourages the roots to expand rapidly in search of water and nutrients. Using fabric pots or air pots can further enhance root health by allowing more oxygen to reach the root zone, supporting the fast growth of your feminized seeds.
Your Go-To Troubleshooting Guide
Even with the best preparation, you might run into a few hiccups when starting your seeds. Don’t worry—it happens to every grower. The key is to identify problems quickly and know how to respond. Whether it’s a stubborn seed that won’t sprout or a seedling that looks a little sad, a few simple checks and fixes can often get your grow back on track. This guide will walk you through the most common issues and give you clear, actionable steps to take.
How to Spot Trouble Before It Starts
Patience is important, but you also need to know when a delay signals a problem. Healthy autoflower seeds typically sprout within two to seven days. If you’re past the one-week mark with no signs of life, it could point to issues with temperature, moisture, or the seed’s viability. Check your environment first. Are your temperatures swinging wildly? Consistent conditions are far more important than extreme ones. Big fluctuations can stress or even kill a seed before it has a chance to grow. Also, inspect the seed itself if you can. If it looks mushy, discolored, or has any fuzzy mold, it’s unfortunately a dud.
Easy Fixes for Common Plant Problems
If your seed is taking its time but still looks healthy, you can give it a little nudge. Some seeds have particularly tough shells that make it hard for water to get inside. You can help by gently rubbing the seed’s shell with a small piece of fine-grit sandpaper or carefully nicking the edge with a nail clipper. This process, called scarification, creates a small opening for moisture to penetrate. If your growing medium seems dry, use a spray bottle to lightly moisten the area directly around the seed. Avoid pouring water, as overwatering is a common mistake that can lead to rot and kill the delicate taproot.
Is It Time to Start Over? How to Decide
It’s tough to admit defeat, but sometimes the best move is to start over with a fresh seed. If a week has passed and your seed shows no signs of growth despite your best efforts, it’s unlikely to become a strong, productive plant. Autoflowers have a short, fixed lifespan, so a weak start is difficult to overcome. Many growers even plant directly into the final pot because moving an autoflower seedling can "shock" it and stunt its growth. Don’t waste time, nutrients, and energy on a non-starter. Grab a new seed from your collection of new releases and apply what you’ve learned for a better result.
Related Articles
- Auto Cannabis Seeds: The Ultimate Beginner's Guide
- Autoflower Seeds for Beginners: Grow Fast & Easy
- Autoflower Cannabis Seed 101: Your Complete Guide
- Feminized Autoflower Seeds: A Comprehensive Grower's Guide
- 10 Best Autoflowering Seeds for Fast Harvests
Frequently Asked Questions
What's the biggest mistake to avoid with autoflower seedlings? The most common pitfall is overwatering. It’s easy to want to shower your new seedling with love, but too much water will suffocate its delicate, developing roots. Your plant is tiny and can't drink much yet. Always let the top layer of your soil dry out before watering again, and use a spray bottle to gently mist the area instead of pouring water directly. This gives the roots the perfect balance of moisture and oxygen they need to grow strong.
Do I really have to plant my seed in its final pot? While it's not a strict rule, planting your germinated seed directly into its final container is the safest strategy for autoflowers. These plants have a short, fixed lifespan and don't have the luxury of time to recover from stress. Transplanting can shock the root system, and even a few days of stunted growth can permanently impact your plant's size and final yield. Starting in the final pot eliminates this risk entirely.
My seedling looks tall and weak. What should I do? This is a classic sign that your seedling is "stretching" to find more light. When a light source is too far away or not powerful enough, the plant puts all its energy into growing taller to reach it, resulting in a long, flimsy stem. The fix is simple: move your grow light closer to the plant. Just be careful not to place it so close that it burns the leaves. Providing strong, direct light will encourage your seedling to focus on developing a sturdy stem and healthy leaves instead.
When should I start feeding my autoflower plant? You should wait a bit before introducing any nutrients. If you start with a quality, nutrient-rich soil, your seedling will have all the food it needs for the first two to three weeks of its life. Feeding it too early can cause nutrient burn and damage the plant. Once you see it start growing vigorously after the seedling stage, you can begin introducing nutrients at half the recommended strength and see how it responds.
Why are autoflowers considered so beginner-friendly? Autoflowers are great for new growers because they remove a lot of the guesswork. Their main advantage is that they flower based on age, not a change in the light cycle. This means you don't have to worry about managing complicated light schedules. They also grow from seed to harvest in just 8-10 weeks, which means you see your results quickly and have less time to encounter problems like pests or disease. Their resilience and compact size just add to their simple, straightforward nature.