There's a unique kind of excitement that comes with starting a new grow, but for many, it's mixed with a bit of anxiety. You have your high-quality seeds, maybe some new THCA or autoflower genetics, and the last thing you want is to stumble at the first hurdle. The process of germinating marijuana seeds can feel like a high-stakes test, but it doesn’t have to be intimidating. My goal here is to demystify the process completely. We'll cover everything from checking seed viability to creating the perfect environment for that first taproot to emerge. With a little knowledge and a few simple supplies, you can approach germination with confidence, knowing you’re giving your plants the strong start they deserve.
Whether you’re a seasoned grower or a beginner looking to dip your toes into the world of cannabis cultivation, understanding how to germinate marijuana seeds successfully is an essential skill.
As the very first step in the life of a cannabis plant, knowing the ins and outs of germination is key to having the best growing experience possible.
So, let’s talk about how to germinate weed seeds successfully at home.
What is Germination?
Before we talk about how to germinate cannabis plant seeds (for outdoor or indoor), let’s first discuss what germination is as a whole.
Germination is the first stage of the developmental process where a plant begins to sprout and grow from a seed.
The whole purpose of germination is to produce a healthy living plant from a dormant seed, continuing the species over and over again.
In terms of cannabis, germination is the phase where the cannabis seed “wakes up” and starts to grow its first roots and leaves.
When the external conditions are just right, the seed’s out shell will break open, allowing a small white root — known as the taproot — to emerge. This is your sign that your seed has sprouted.
In some cases, you can skip the germination process when growing cannabis; however, you can only do this by buying clones — not seeds.
Cannabis clones are grown parts of the cannabis plant that have been clipped from a healthy Mother plant. Since the plants are already somewhat established, you don’t have to worry about germinating from seed.
However, if you want to learn how to germinate weed seeds, then it’s important to try this process out for yourself! (Then you can decide whether or not you want to try a clone, instead.)
Germination: The First Step in the Cannabis Growth Cycle
Think of germination as the grand opening for your cannabis plant's life. It’s that critical moment when a dormant seed gets the signal that conditions are perfect for it to begin its journey. This is the phase where the seed "wakes up," breaks through its protective shell, and sends out its very first root, called the taproot. Seeing that little white tendril is your first big win as a grower! It’s the sign that you’ve successfully kicked off the growth cycle and your plant is officially on its way. This initial step is short, but its importance can't be overstated, as a strong start is fundamental to developing a healthy, robust plant later on.
Of course, successful germination and a thriving plant depend heavily on the quality of the seed itself. Starting with premium genetics is like building a house on a solid foundation—it sets you up for the best possible outcome. High-quality seeds have higher germination rates and contain the genetic blueprint for desirable traits like potency, flavor, and resilience. When you shop for seeds from a reputable source like Trilogene Seeds, you're investing in the potential of your future harvest. Once that taproot emerges, the clock starts ticking on the next exciting phases of growth, moving your plant from a tiny sprout to a mature, flowering beauty.
The Full Timeline: Seed to Harvest
Patience is a virtue in cultivation, and it helps to have a general idea of the timeline you’re working with. From the moment you start germinating your seed until you’re ready to harvest, the entire process typically takes anywhere from 10 to 32 weeks, or about three to eight months. Germination itself is just a tiny fraction of that, usually lasting between three and ten days. The total duration depends heavily on your chosen strain and your growing environment. For those looking for a quicker turnaround, autoflower seeds are a fantastic option, as they are bred to switch to the flowering stage automatically after a few weeks, often shortening the overall timeline significantly.
Key Growth Stages After Germination
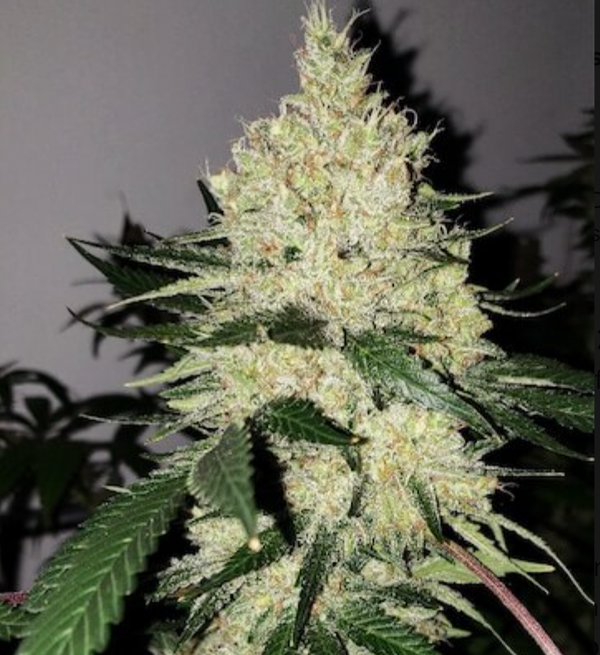
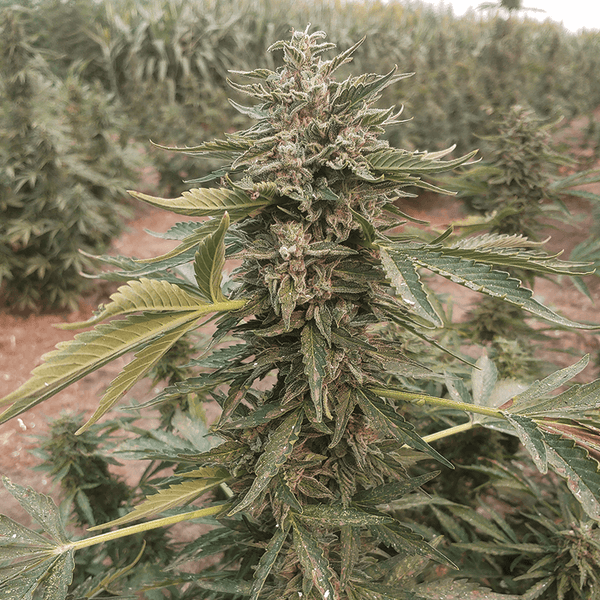
Once your seed has successfully sprouted, it enters the seedling stage. This is when you’ll see the first set of round leaves (cotyledons), followed by the first "true" serrated cannabis leaves. After the seedling establishes a solid root system and a few sets of leaves, it moves into the vegetative stage. During this phase, the plant focuses all its energy on growing bigger and stronger, developing a thick stalk and an abundance of fan leaves to soak up light. Finally, it enters the flowering stage, where it stops its vertical growth and begins producing the resinous buds that growers seek. Using feminized seeds helps ensure every plant you nurture through these stages will be a female that produces flowers.
Types of Marijuana Seeds to Germinate
The world of cannabis seeds is vast, and there are many options you can choose from depending on your preferences, grow space, and even climate.
There are three primary types of weed seeds that growers can choose to germinate: photoperiod cannabis seeds, autoflowering marijuana seeds, and feminized cannabis seeds.
And luckily for you, Trilogene Seeds has a great selection of each type of these seeds.
Let’s explore what each of these cannabis seeds has to offer.
Photoperiod Cannabis Seeds
Photoperiod cannabis seeds are types of marijuana seeds that switch from the vegetative phase to the flowering phase automatically based on the light cycle or light exposure.
The name “photoperiod” derives from the fact that these plants’ flowering is determined by the photoperiod — or the length of day and night. Under cultivation, marijuana requires a tight light schedule.
Typically, this means the cannabis plant needs 18 hours of light during the vegetative stage, and then 12 hours of light and 12 hours of darkness during flowering.
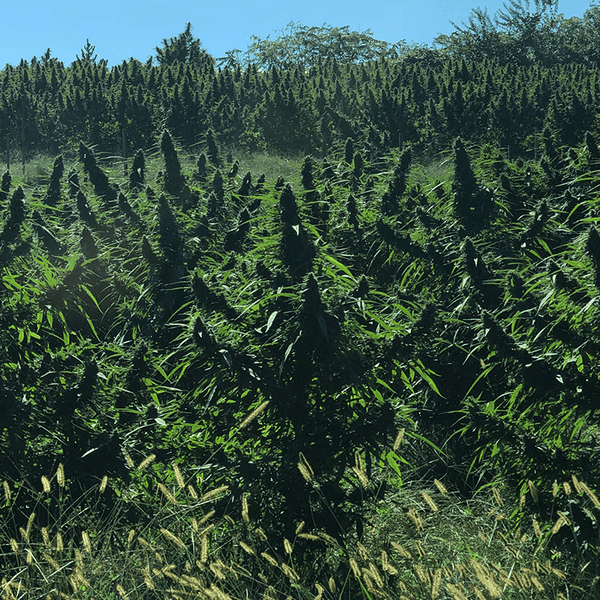
If you’re growing your marijuana outdoors, then these plants will change naturally with the changing of the seasons. This can be quite beneficial (and appealing) for outdoor growers, as it means a lot less work. Instead of relying on artificial light and manipulating cycles, you let the sun do the hard work for you.
Photoperiod cannabis seeds can be either male or female, and female plants are known for their high-quality buds. You can also grow these types of plants either indoors or outdoors, making them quite versatile.
Autoflowering Cannabis Seeds
In the event that you don’t want to rely on light cycles for flowering, you can buy autoflowering cannabis seeds, instead. Autoflowering cannabis seeds are a popular choice for beginners due to their ease of cultivation.
These seeds develop into plants that automatically transition from the vegetative to the flowering stage based on the plant’s age — not the light exposure. This makes autoflowering cannabis seeds much less maintenance-intensive and even faster to harvest than photoperiod seeds.
It is worth noting that autoflowering cannabis plants are going to be a bit more compact than other plants. This makes them a good option for indoor grow setups that don’t have ample space for large plants and canopies.
Of course, the shorter harvest time also allows for several harvests per year. Photoperiod cannabis seeds follow the changing of the seasons, creating just one harvest every year. But, autoflowering cannabis seeds have a much shorter growing season; this is especially great for growers who live in places with short summers.
Feminized Seeds
Finally, you can also come across feminized cannabis seed options — and these seeds can be feminized autoflowering or feminized photoperiod seeds.
Essentially, a feminized germinated seed is a type of marijuana seed that’s been bred to (almost) always produce female plants. The female cannabis plant is highly sought after because they produce the large, resinous buds that we know and love.
Male cannabis plants, on the other hand, don’t produce these buds at all. Instead, they produce pollen sacs that can actually cross-contaminate the female plants. This affects the female plant’s efficacy and potency, sometimes even ruining a yield. Thus, having guaranteed female plants from feminized cannabis seeds is a great way to avoid any potential mishaps.
Feminized cannabis seeds help to produce consistency and stability with your harvests, along with saving time and resources.
A Note on Seed Quality
Before you try any germination method, it’s crucial to talk about the quality of the seeds themselves. Your success rate is directly tied to the viability of your seeds, so starting with the best possible genetics is non-negotiable. As many experienced growers will tell you, you should always choose high-quality seeds from a trusted seller. Good seeds from a reliable seed bank are simply more likely to sprout and develop into strong, healthy plants. This initial investment in quality pays off by saving you the time, resources, and frustration of working with seeds that were never going to thrive in the first place. A healthy seed is mature, properly stored, and comes from stable parent genetics, giving it the best shot at a successful start.
Triploid Cannabis Seeds
Speaking of innovation in seed quality, you might also come across triploid cannabis seeds. These are a game-changer in the cultivation world. A triploid seed has three sets of chromosomes instead of the usual two, and this unique genetic makeup leads to some incredible advantages. The most significant benefit is that they are 99%+ seedless, even when exposed to pollen from male plants. This means you can say goodbye to worrying about accidental pollination ruining your harvest of sinsemilla (seedless) buds. For growers, this offers a new level of crop security and can lead to more consistent, high-quality yields without the need to meticulously weed out males.
How to Germinate Weed Seeds Successfully
Now, let’s talk about how to germinate cannabis seeds right from the comfort of your home. And, spoiler alert: germinating seeds may be easier than you think.
However, before we talk about this process, it’s important to note that there are a few different ways for germinating cannabis seeds correctly. However, we are covering the most popular, common method: the paper towel method.
If you want to learn how to germinate cannabis seeds, here are the materials you will need:
- Healthy cannabis seeds
- Two clean plates
- Paper towels
- Distilled water
- Tweezers
Here’s how to germinate weed seeds successfully at home in just six easy steps:
- The first step to germinating seeds is to start by soaking your cannabis seeds in a glass of distilled water. Soak them for about 12-24 hours to help soften the outer shell of the seeds. This is makes it easier for the taproot to break through.
- While your seeds soak, dampen two paper towels with distilled water. They should be moist, but not dripping wet.
- Once they’ve finished soaking, use your tweezers to remove the seeds from the glass of water and place them on one of the damp paper towels. Make sure to space the seeds out so they’re not touching each other.
- Take the other damp paper towel and lay it over the top of the seeds like a nice blanket. Then, place the second plate on top to create a clamshell-like setup. Doing this creates the environment the seeds need to germinate.
- Now, it’s time to wait. Place the plates in a warm area (usually around 70-85°F) like the top of your fridge or a warm, sunfilled room. Check on them daily to ensure the paper towels haven’t dried out. If they have, lightly mist them with your distilled water.
- Finally, after about 2-5 days, you should start to see the seeds germinate and the small white taproots breaking through the shell. As soon as the taproot is about a quarter to a half-inch long, it’s time to transfer the seedling to your ideal growing medium.
That's all it takes! After this, you've officially germinated seeds right at home. (And you can teach others how to germinate seeds, too.)
It’s important to remember that the taproot of your seed is very delicate: you should never touch it directly.
Creating the Perfect Environment for Germination
While the paper towel method is a fantastic and reliable choice, its success hinges on creating the perfect little micro-environment for your seeds. Think of yourself as a concierge for your future plants, ensuring they have everything they need to start their journey. Three key factors come into play here: temperature, oxygen, and water. Getting this trio right is the secret sauce to coaxing even the most stubborn seeds to sprout. It’s less about complex techniques and more about providing a stable, nurturing space that mimics the ideal conditions they’d find in nature during springtime. Let's break down exactly what that looks like.
Temperature and Germination Speed
Cannabis seeds are a bit like us—they prefer to be cozy and warm. The ideal temperature for germination is between 70 and 85 degrees Fahrenheit (21-29°C). When kept in this sweet spot, seeds tend to sprout much faster, sometimes in just a day or two. This warmth signals to the seed that it's a safe time to start growing. You can easily achieve this by placing your germination setup (like the plates with paper towels) in a consistently warm location, such as on top of your refrigerator or in a cabinet near a small heat source. For growers who want precise control, a seedling heat mat is an excellent tool. Maintaining this warmth is especially important when growing indoor cannabis seeds, as it ensures your seedlings get a strong, healthy start before they even see a grow light.
The Importance of Oxygen
Just like us, seeds need to breathe. Oxygen is a critical component for the metabolic processes that kickstart a seed’s life. This is why it’s so important that your paper towels are damp, not soaking wet. If the seeds are submerged in too much water, they can effectively drown from a lack of oxygen. This principle also applies to other germination methods. Growing mediums like rockwool, peat pellets, or light, airy soil are popular because they do a great job of retaining moisture while still allowing for plenty of air pockets. A proper balance of water and air gives the taproot the fuel it needs to emerge and begin its quest for nutrients, setting the stage for a vigorous plant.
Water Quality and pH
The water you use can also play a role in your germination success. While you don't need to get overly scientific about it, using the right kind of water can prevent potential issues. Distilled or reverse osmosis (RO) water is often recommended because it’s a clean slate, free from chlorine, minerals, or contaminants that might be present in tap water. The ideal pH for germination is a neutral range, typically between 5.5 and 6.5. Most tap water falls within an acceptable range, but using distilled water eliminates any guesswork. When you’re investing in high-quality genetics like feminized seeds, starting with pure water is a simple step to ensure you’re giving them the best possible chance to thrive from day one.
Optional Prep: Soaking Seeds with Hydrogen Peroxide
If you want to give your seeds an extra little nudge, you can try an optional pre-soak with hydrogen peroxide. This trick is particularly useful for older seeds or seeds with tougher shells. Simply add a very small amount of 3% hydrogen peroxide to your glass of distilled water—about one teaspoon per cup of water is plenty. Let the seeds soak in this solution for 12-24 hours before moving them to the paper towel method. The hydrogen peroxide helps soften the seed casing, making it easier for the taproot to break free. It also has the added benefit of killing off any unwanted mold or bacteria and introducing extra oxygen into the water. While premium, fresh seeds like our new releases typically don’t require this step, it’s a great technique to have in your grower’s toolkit.
Alternative Germination Methods
The paper towel method is a classic for a reason, but it’s certainly not the only way to germinate your seeds. Some growers prefer methods that are a bit more direct and involve less handling of the delicate taproot. Depending on your setup and personal preference, you might find that one of these alternatives is a better fit for your cultivation style. Both of these methods are simple, effective, and widely used by beginners and experts alike. Let’s explore two of the most popular alternatives: direct sowing and using starter plugs.
Direct Sowing in Soil
One of the simplest methods is to plant your seed directly into its growing medium. This approach completely removes the risk of shocking the seedling during transplanting, as it will sprout and grow in the same spot. To do this, fill your starter pot with a light, moist soil. Make a small hole about a half-inch deep, gently place the seed inside, and lightly cover it with soil. Keep the soil consistently moist but not waterlogged, and place it in a warm spot. The main downside is that you can’t visually check on the germination progress. However, this is an excellent, low-stress method, especially for robust outdoor marijuana seeds that are destined to grow in the natural ground.
Using Rockwool or Peat Pellets
Another fantastic method involves using starter plugs like rockwool cubes or peat pellets. These provide a perfect, self-contained environment for a seed to sprout. First, soak the pellet or cube in pH-balanced water until it’s fully saturated, then let any excess water drain away. Place one seed into the pre-made hole in the plug and gently pinch the top closed. Keep the plugs in a warm, humid environment, like a covered seedling tray. Once the taproot emerges from the bottom of the plug, you can transplant the entire thing directly into your soil or hydroponic system. This method is clean, easy, and a favorite among growers who use autoflower seeds, as it simplifies the transition from seedling to vegetative stage.
How Long Does it Take to Germinate Marijuana Seeds?
So, how long does it take to germinate cannabis seed plants? In general, it’s going to depend on several factors.
If you’re wondering “How long do cannabis seeds take to germinate?” you have to consider the seed’s quality and the environmental conditions provided.
However, in general, germinating cannabis seeds can take anywhere from 24-120 hours (1-5 days).
During this time, it’s crucial to maintain the proper environment for your seeds. As previously mentioned, they require moisture, warmth, and darkness. Ensure you’re keeping the area where your seeds are germinating at a consistent temperature of around 70-85 degrees Fahrenheit.
Patience is Key: Understanding Timelines
While the 1-5 day window is a great general guideline, it’s not a hard and fast rule. Some seeds are just eager to get started, while others take their sweet time. If your seeds haven't sprouted after five days, don't panic! Factors like the specific genetics, the age of the seed, and even minor fluctuations in your germination environment can extend this timeline. Some stubborn seeds might take up to two or even three weeks to show their taproot. The most important thing you can do is remain patient and keep their environment consistent. Continue to check that your paper towels are damp (not soaked) and that the temperature is stable. Giving up too soon is a common mistake, so it's wise to wait at least a few weeks before calling it quits. Starting with high-quality cannabis seeds from a trusted source can give you the best shot at a quick and successful germination.
The Viability of Old Seeds
You might be surprised to learn that age isn't always a dealbreaker for cannabis seeds. If you've found an old stash of seeds, don't toss them just yet! With proper storage—meaning they were kept in a cool, dark, and dry place—even seeds that are several years old can still be viable. In fact, some growers have successfully germinated seeds that were over a decade old. While their germination rate might be lower than with fresh seeds, and they may take a bit longer to sprout, it's often worth the attempt. The key is providing them with the ideal conditions to wake them up from their long slumber. Of course, for the most reliable results and vigorous growth, it's always best to work with fresh genetics, which ensures you're getting the highest potential for success right from the start.
How Much Light Do Weed Seeds Need to Germinate?
Okay, but how much light do weed seeds need to germinate? Well, it may seem a bit counterintuitive, but germinating seeds do not require light at all!
In fact, it’s actually best to keep them in a dark environment all throughout this stage. The darkness mimics the natural conditions of a seed buried in the soil, which helps to trigger a germinated seed.
Once the seeds have germinated and the seedling emerges from your chosen growing medium, however, light then becomes critical. At this stage providing your young plants with plenty of light will help them grow strong and healthy — just not when you’re learning how to germinate cannabis seeds!
How to Tell if a Weed Seed Will Germinate
Before you invest time and resources into germinating cannabis seeds, it’s beneficial to know whether or not a seed is even viable in the first place.
A good, healthy seed typically has a hard shell that’s dark brown or tan. It should also be round and plump. If the seed is small, green, or white — or if it has a soft shell — it’s likely immature or unhealthy. Subsequently, it likely won’t germinate successfully, either.
You can also perform a simple “float test” to help determine your seeds’ health. Place your seeds in a glass of water and let them sit for a few hours. Generally, good seeds will sink to the bottom, while non-viable seeds will remain floating.
Setting Realistic Expectations: Germination Success Rates
It’s important to go into the germination process with a bit of patience and realistic expectations. While it’s exciting to imagine every single seed sprouting into a thriving plant, nature doesn’t always work that way. Not every seed is guaranteed to germinate, even under perfect conditions. Some seeds might sprout in just a couple of days, but others can be a bit more stubborn, taking up to three weeks to show their first taproot. It’s a good idea to give them up to a month before you decide a seed isn’t viable. This process is a great first lesson in the patience that cultivation requires.
Even experienced growers don’t see a 100% success rate. Achieving a 95% germination rate is incredibly difficult, and many seasoned cultivators consider an 85% success rate to be a great outcome. So, if a few of your seeds don’t make it, don’t be discouraged! It’s a normal part of the process. The best thing you can do to set yourself up for success is to start with the highest quality genetics possible. Sourcing your seeds from a reputable provider that focuses on viability and strength, like our premium cannabis seeds, gives you the strongest possible foundation for a successful grow.
From Sprout to Seedling: Post-Germination Care
Congratulations, you’ve successfully germinated your seeds! Seeing that tiny white taproot emerge is a huge milestone, but the work isn’t over yet. This next stage—transitioning your sprouted seed into a healthy seedling—is just as critical. How you handle this delicate phase will directly impact the future health and vigor of your plant. It’s all about creating a nurturing environment where your new sprout can safely establish its roots and begin its journey upward. We’ll walk through exactly how to plant your sprout, what kind of soil to use, and how to manage water, light, and humidity to give your new plant the best possible start in life.
When and How to Plant Your Sprouted Seed
Timing is everything when it comes to planting your newly sprouted seed. You’re looking for that sweet spot where the taproot is developed enough to thrive but not so long that it becomes fragile and difficult to handle. The general rule of thumb is to plant your seed once the taproot is about a quarter to a half-inch long. At this length, the root is robust enough to orient itself in the soil and begin absorbing nutrients. Be extremely gentle during this process. Use a pair of clean tweezers to carefully pick up the seed by its shell, and whatever you do, avoid touching the delicate taproot directly.
Planting with the Taproot Down
Here’s a simple but crucial tip: always plant your seed with the taproot pointing downwards. Plants are naturally geotropic, which is just a fancy way of saying their roots instinctively grow down in response to gravity. Planting the taproot facing down helps the seedling establish itself faster and more efficiently. Simply make a small hole in your growing medium, about a half-inch deep, and gently place the seed inside. Lightly cover it with soil, being careful not to pack it down too tightly. This gives your seedling a clear path to the surface while its root system gets to work below.
Choosing the Right Soil for Young Plants
A newborn seedling is a lot like a baby—it’s sensitive and can’t handle anything too intense. That’s why you should avoid using nutrient-rich or "hot" soil for this early stage. Potting soils designed for mature plants are often packed with nutrients that can overwhelm and "burn" a delicate new root system. Instead, opt for a specialized seed-starting mix or a light, airy medium with low nutrient content. These mixes provide the perfect balance of moisture retention and drainage without overloading your seedling. This gentle start allows the plant to develop a strong root foundation before it’s ready for more nutrient-dense environments.
Watering Techniques to Prevent Common Issues
One of the most common mistakes new growers make is overwatering their seedlings. Young plants have tiny root systems and don’t require much water. To avoid problems, water in a ring around the seedling rather than pouring it directly onto the delicate stem. This encourages the roots to spread out in search of moisture. This technique also helps prevent a deadly fungal condition known as "damping off," which thrives in overly moist conditions at the base of the stem. A spray bottle is a great tool for gently misting the soil. Let the top layer of the medium dry out slightly between waterings to ensure the roots get enough oxygen.
Lighting for New Seedlings
As soon as you plant your sprouted seed, it’s ready for light—some growers even start providing it before the seedling breaks the surface. However, you don’t want to blast it with intense light right away. Young seedlings are sensitive and can be easily stressed by overly bright conditions. Start with a lower light intensity; for those using advanced equipment, a PPFD of around 300 is a good target. For simpler setups, standard fluorescent lights or a gentle LED grow light positioned further away from the plant will work perfectly. This gives your seedling the energy it needs for photosynthesis without causing any harm.
Managing Humidity and Airflow
Seedlings love humidity. A moist, warm environment mimics the conditions of a greenhouse and helps the young plant transition smoothly from the seed shell. An easy way to create this environment is by making a "humidity dome." Simply place a clear plastic cup or the top half of a plastic bottle over your seedling for its first week of life. This will trap moisture and keep the air around the plant humid. Just be sure to remove the dome for a little while each day to allow for fresh air exchange. Gentle, indirect airflow is also beneficial for strengthening the stem, but avoid aiming a fan directly at your fragile seedling.
Tips for Learning How to Germinate Cannabis Seeds
If you want to understand how to germinate cannabis seeds successfully, there are a few tips you should know:
- Purchase High-Quality Seeds: When you buy quality seeds (like from seed banks such as Trilogene Seeds), you’re helping to guarantee a successful germination. Always purchase your cannabis seed options from reputable, transparent seed banks.
- Give Your Seeds the Right Environment: Make sure your cannabis seeds are getting the moisture, warmth, and darkness that they need to germinate. You have to make sure you can provide these conditions before you start the actual germination process.
- Be Patient: The germination process cannot be rushed, and some seeds take longer than others to sprout. You can expect to wait anywhere from 1-5 days, sometimes even longer. So, make sure you let nature take its course.
- Always Handle With Care: Your seeds and seedlings are very delicate! You have to make sure you handle them with as much care as possible.
- Keep an Eye on Your Seeds: Check on your cannabis seeds daily to ensure the medium isn’t drying out and watch for any signs of germination.
By understanding the ins and outs of germinating seeds, and by following these principles, you can successfully germinate your seeds right at home.
The process can be immensely rewarding and is the first step in a journey toward cultivating your own cannabis plants.
Whether you choose photoperiod, autoflowering, or feminized seeds, the magic of a cannabis plant all starts with a successful germination.
Where to Buy the Best Seeds for Germination
Want to learn how to germinate cannabis seeds and grow cannabis plants right at home? Well, it all starts with buying the best weed seeds. And, here at Trilogene Seeds, we have plenty for you to choose from.
Trilogene Seeds offers a huge selection of high-quality cannabis seeds that are perfect for growers both new and old. Our cannabis seed selection is always stocked and ready to give you everything you want and more -- and they're much better than your regular cannabis seeds.
We have all different types of seeds available, regardless of if you’re growing indoor or outdoor plants. And, if you have a go-to strain or two, we can almost guarantee we have your favorite strains on deck, just waiting for you to buy them.
Frequently Asked Questions
It's been a few days and my seeds haven't sprouted. Did I do something wrong? Don't panic! This is a very common worry, but patience is a huge part of growing. While many seeds sprout within three to five days, some can take a week or even longer, especially if they are older or have a particularly tough shell. As long as you're keeping the environment warm and the paper towels consistently moist (but not soaking wet), you're doing your part. Give them at least two weeks before you start to think they might not be viable.
Is the paper towel method really the best way, or can I just plant my seeds directly in soil? The paper towel method is a classic because it lets you see exactly when the seed has sprouted. However, planting directly into soil is also a perfectly valid and simple technique. It has the added benefit of avoiding any potential stress to the delicate taproot during transplanting. If you choose this route, just be sure to use a light, airy seed-starting mix and plant the seed about a half-inch deep. Both methods work well, so it really comes down to your personal preference.
What's the most common mistake to avoid when germinating seeds? The most frequent mistake I see is overwatering. It comes from a good place—you want to make sure your seeds have enough moisture! But when seeds are sitting in waterlogged paper towels or soil, they can't get the oxygen they need to kickstart their growth, and they can essentially drown. The goal is "damp," not "drenched." A close second is handling the delicate white taproot with your fingers once it emerges, which can easily damage it. Always use clean tweezers to handle the seed by its shell.
Do I need to germinate autoflower or feminized seeds differently than other seeds? Nope! The germination process itself is universal for all types of cannabis seeds. Whether you're working with photoperiod, autoflower, feminized, or even triploid seeds, the fundamental requirements of warmth, moisture, and darkness remain the same. The genetic differences in these seeds will determine how the plant grows after it has sprouted, but the steps to get that first taproot to appear are identical.
My seed has a tiny root! What's the absolute next step? Congratulations! This is the exciting part. Once the taproot is about a quarter to a half-inch long, it's time to plant it. Use a pair of tweezers to gently pick up the seed by its shell and place it in a small hole in your growing medium, with the taproot pointing down. Cover it lightly with about a half-inch of soil, but don't pack it down. Now, you can introduce a gentle light source and focus on keeping the soil moist as your sprout makes its way to the surface.
Key Takeaways
- Start with High-Quality Seeds: The success of your entire grow begins with the seed itself. Sourcing fresh, viable seeds from a reputable provider is the best way to ensure they sprout successfully and grow into strong, healthy plants.
- Create the Perfect Germination Conditions: Your seeds need a balance of warmth (70-85°F), moisture, and darkness to sprout. The goal is to keep them consistently moist but not waterlogged, which allows for the crucial oxygen flow needed to trigger growth.
- Transition Your Sprout Gently: The newly emerged taproot is extremely fragile. When it's about a quarter-inch long, use tweezers to plant the seed—taproot down—into a light starting soil. This gentle handling is critical for helping your seedling establish itself without stress.