Think of a cannabis seed as being in a deep, protected sleep. Your job as a grower is to gently wake it up. But with autoflowers, there's a catch: they're on a tight schedule with no do-overs. A rough start can impact your final yield. That's why learning to germinate autoflower seeds correctly is your most important first step. It’s less about technical skill and more about being a perfect host. You need to provide the ideal balance of warmth, moisture, and darkness to coax out that first tiny taproot. This guide shows you exactly how to create that welcoming space, ensuring your seeds wake up strong and ready to grow.
Key Takeaways
- Prioritize the Environment Over the Method: Your germination success hinges on a stable environment. Focus on maintaining a consistent temperature between 70–85°F and keeping your medium consistently moist—not soaking wet—to give your seeds the perfect signal to sprout.
- Protect the Taproot During Transplanting: That first tiny white root is the most fragile part of the plant. Always handle sprouted seeds with clean tweezers and gently place them root-down into the soil to prevent damage and set them up for healthy growth.
- Go Easy on New Seedlings: The most common mistakes are overwatering and feeding too soon. Keep the soil damp but never soggy, and wait until the first set of true, serrated leaves appears before introducing any nutrients at a very low strength.
What Are Autoflower Seeds?
If you're looking for a straightforward path to a successful harvest, let me introduce you to autoflower seeds. Think of them as the low-maintenance, high-reward option in the cannabis cultivation world. Unlike other types of cannabis, autoflowers don't wait for a change in the light cycle to start producing buds. Instead, they operate on their own internal clock, automatically switching from the vegetative stage to the flowering stage after just a few weeks of growth.
This unique trait comes from their genetic ancestor, Cannabis ruderalis, a hardy variety that adapted to grow in the harsh, short summers of Central Asia and Eastern Europe. By crossbreeding ruderalis with popular indica and sativa strains, breeders have created a wide variety of potent and flavorful autoflower seeds. They are an excellent choice for beginners who are still learning the ropes, as well as for experienced growers who want to fit an extra harvest into their season. Their speed and resilience make them incredibly versatile for both indoor and outdoor setups.
What Makes Autoflowers Different?
The main thing that sets autoflowers apart from other cannabis seeds is how they begin to flower. Most cannabis varieties are "photoperiod" plants, meaning they need a specific light schedule to trigger their flowering phase—typically 12 hours of darkness and 12 hours of light. If you're growing indoors, you're in complete control of this. Outdoors, you have to wait for the seasons to change.
Autoflowers, on the other hand, flower based on their age. They completely ignore light cycles, which simplifies the entire growing process. You can keep them under a consistent light schedule (like 18 hours on, 6 hours off) from seedling to harvest without ever having to make an adjustment. This makes them much more forgiving for new growers and allows for a much quicker seed-to-harvest timeline.
Are Autoflower Seeds Right for You?
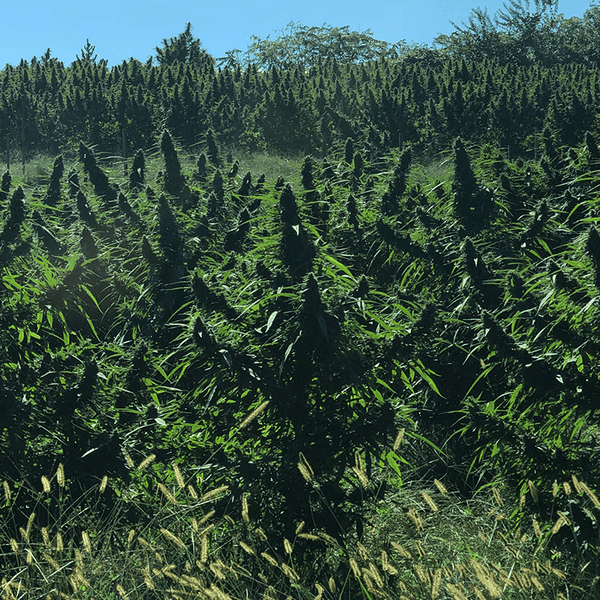
Growing autoflowers is one of the fastest ways to get high-quality cannabis, but it's good to know the trade-offs. The biggest advantage is their speed. Most autoflowers go from seed to harvest in just 8–10 weeks, allowing for multiple harvests in a single outdoor season. They also tend to be smaller and more compact, making them ideal for discreet grows or small spaces. Plus, their ruderalis genetics make them naturally resilient to pests and cooler temperatures.
The primary downside is that their yields can be smaller than those of their photoperiod counterparts. Because they have a shorter vegetative period, they don't have as much time to grow big and bushy before they start flowering. For many growers, however, the convenience, speed, and ability to get a perpetual harvest far outweigh the slightly smaller yield.
How to Choose the Best Autoflower Seeds
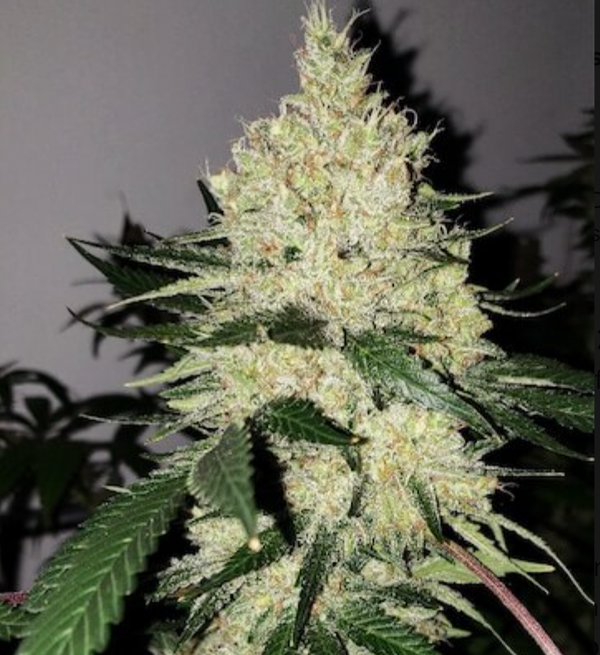
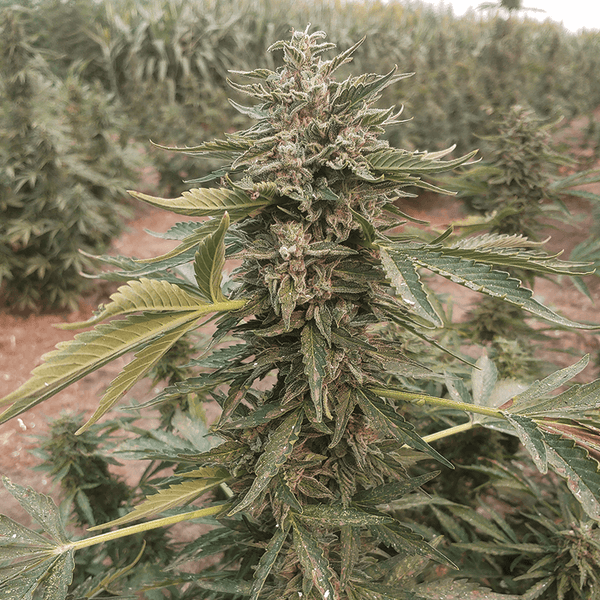
Your final harvest is only as good as the genetics you start with, so learning to identify a viable seed is a crucial first step. High-quality autoflower seeds are typically dark brown, gray, or almost black, often with mottled "tiger stripe" patterns. They should feel hard and firm when you gently squeeze them between your fingers. A healthy seed won't crack or crumble under slight pressure.
Be wary of seeds that are pale green or white, as this is a sign they are immature and unlikely to germinate. You should also avoid seeds that feel soft, are cracked, or seem lightweight and hollow. Starting with premium, healthy seeds from a trusted source gives you the best possible foundation for growing strong, productive plants.
Setting Up the Perfect Germination Environment
Think of your cannabis seeds as being in a deep sleep. To wake them up gently and successfully, you need to create an environment that tells them it’s safe to grow. Nailing the temperature, humidity, and moisture levels from the start is the single most important thing you can do to ensure your seeds sprout. It’s less about complex techniques and more about providing a stable, welcoming space. When you get the environment right, your autoflower seeds will have everything they need to burst to life and begin their journey into healthy, thriving plants.
Dialing In the Perfect Temperature
Cannabis seeds are a bit like Goldilocks—they don’t like it too hot or too cold. The sweet spot for germination is a consistent temperature between 70°F and 80°F (21°C to 27°C). This warmth mimics the ideal conditions of spring, signaling to the seed that it’s time to sprout. If your room is too chilly, the seeds may remain dormant or germinate very slowly. If it’s too hot, you risk damaging the delicate taproot. A simple seedling heat mat placed under your germination tray is a great way to maintain a steady, perfect temperature and give your seeds the cozy start they need.
Keeping Humidity in Check
Humidity is another key piece of the puzzle. You’re aiming for a relative humidity of around 70%. This moisture in the air helps soften the seed’s tough outer casing, making it easier for the taproot to emerge. A humidity dome, which is just a clear plastic lid that fits over your seed tray, is the easiest way to trap moisture and create this humid microclimate. Just be sure to air it out once a day for a few minutes. This prevents the air from becoming stagnant and reduces the risk of mold, which can quickly ruin your germination efforts.
Does the Type of Water Really Matter?
Your seeds need water to kickstart the germination process, but it’s crucial not to drown them. The goal is to keep them consistently moist, not soaking wet. Too much water can suffocate the seed by cutting off its oxygen supply, leading to rot. Always use clean, purified, or distilled water, as tap water can sometimes contain chlorine or other elements that might hinder germination. If you’re using a method like a wet paper towel, ensure it’s damp like a wrung-out sponge, not dripping. This provides enough moisture to activate the seed without waterlogging it.
Checking Your Water’s pH Level
Water quality is a big deal for your seeds, and one of the most overlooked details is its pH level. For germination, you want your water to be in the sweet spot between 6.0 and 7.0. If the water is too acidic or too alkaline, it basically locks the seed out from absorbing the moisture it needs to wake up and start growing, which can slow down or even stop the process. You can easily check this with a simple pH testing kit or a digital meter. If your water is outside the ideal range, use pH up or pH down solutions from a garden store to get it just right. This simple check is a key part of a successful indoor grow and ensures you're giving your seeds the best possible start.
Giving Your Seeds Light and Airflow
While a mature cannabis plant loves light, its seeds prefer the dark to germinate. Darkness signals to the seed that it’s safely underground, where it can send out its taproot without risk. You don’t need to introduce a light source until after your seedling has broken through the soil. At the same time, seeds need to breathe. Oxygen is a vital component of the germination process. Make sure your germination medium, whether it’s soil or a starter cube, is light and airy, not compacted. This ensures good airflow and gives the new roots room to grow.
Choosing the Right Soil or Medium
Once your seed sprouts, its first home will be the soil or growing medium you’ve prepared. This isn't the time for heavy, nutrient-packed garden soil. Your brand-new seedling is incredibly delicate, and a "hot" soil mix can easily overwhelm and burn its fragile new roots. Instead, you want to provide a light, airy, and well-draining environment. Look for a seedling-specific mix that contains ingredients like peat moss, perlite, or coco coir. These materials help retain the perfect amount of moisture without becoming waterlogged, ensuring the roots get the oxygen they need. The goal is to give your premium autoflower seeds a gentle start in a medium that supports, rather than smothers, their initial growth.
How to Germinate Autoflower Seeds: 4 Proven Methods
Once you have your environment dialed in, it’s time for the main event: germination. There are several ways to coax your seeds to life, and there’s no single "best" way—it often comes down to personal preference and what you’re comfortable with. Each method has its own set of benefits. We’ll walk through four of the most popular and reliable techniques so you can choose the one that fits your style and setup.
Method 1: The Classic Paper Towel Trick
This is a classic for a reason. The paper towel method is a fantastic way to visually track your seed’s progress. To start, lightly dampen a paper towel so it’s moist but not dripping wet. Place your Autoflower Seeds on one half of the towel, leaving some space between them, and fold the other half over. Slide the folded towel into a plastic Ziploc bag or place it between two plates to create a dark, humid space. Store it somewhere warm, like on top of your refrigerator. Check on it daily, and in a few days, you should see a tiny white taproot emerge.
Method 2: Straight into the Soil
If you want to keep things simple and avoid the stress of transplanting, planting directly into the final pot is a great option. This hands-off approach is especially good for autoflowers, as they don’t like having their roots disturbed. Just fill your pot with a light, airy soil mix and make a small hole about a quarter-inch deep. Gently place your seed inside and lightly cover it with soil. Keep the soil consistently moist with a spray bottle. This method mimics how seeds grow in nature and removes the risk of damaging the delicate taproot during a transfer, making it a favorite for many growers setting up their Indoor Cannabis Seeds.
Method 3: The Simple Water Soak
For a quick start, you can soak your seeds in water. This method helps soften the seed’s tough outer shell, encouraging the taproot to pop out. Simply drop your seeds into a glass of room-temperature, purified water and store it in a dark, warm place like a cupboard for about 12 to 24 hours. You’ll know it’s working when the seeds sink to the bottom. Don’t leave them in the water for more than 32 hours, as they can drown. Once you see the taproot appear, it’s time to carefully move the seed to its growing medium. This is a great way to kickstart some of our New Releases.
Method 4: Using Starter Plugs or Cubes
Starter cubes offer a perfect middle ground, providing a stable and self-contained environment for germination. Products like Rockwool or peat pellets are designed to hold the ideal amount of water and air for sprouting seeds. First, soak the cube in pH-balanced water, then gently place your seed into the pre-made hole. You can put the cube in a small tray with a humidity dome to keep moisture levels high. Once the seedling sprouts and roots begin to show through the bottom of the cube, you can transplant the entire thing directly into your final pot. This method is clean, efficient, and great for protecting your valuable Feminized Seeds.
Alternative Setups for Advanced Growers
Once you've mastered the basics, you might be looking for ways to fine-tune your process for even greater consistency and success. For growers who want ultimate control over the germination environment or are working with specialized systems like hydroponics, a few alternative setups can make a significant difference. These methods are all about precision, helping you create the perfect conditions to give your high-value seeds the best possible start. They take a bit more equipment but can lead to nearly perfect germination rates, especially when you're working at a larger scale or with specific cultivation goals in mind.
Using a Germination Chamber
If you're aiming for maximum consistency, a germination chamber is your best friend. These controlled environments allow you to dial in the exact temperature and humidity your seeds need, removing any guesswork. To get started, make sure your chamber is clean and set it up in a location with a stable ambient temperature. Set the thermostat between 68–77°F and aim for a steady 70% humidity. Once the conditions are stable, you can sow your seeds in your chosen medium and place them inside. Ensure there's gentle airflow to prevent stagnant air, but keep the chamber dark until the seedlings sprout. This level of control is perfect for commercial growers working with large batches of Industrial Hemp Seeds.
Germinating for Hydroponic Systems
Growing in a hydroponic system requires a slightly different approach to germination, as you need to prepare your seedlings for a soilless life. A great way to start is by soaking your seeds in a glass of room-temperature water for 12 to 24 hours in a warm, dark place. Once they crack open and a tiny taproot appears, carefully transfer them to a hydroponic growing medium like Rockwool cubes or clay pellets. Place the cube in a seedling tray under a humidity dome to keep the environment moist and warm, around 70–75°F. Once the seedling has developed its first set of true leaves, it’s ready to be moved into your main hydroponic system. This method is ideal for getting the most out of premium genetics like our THCA Seeds.
Which Method Is Right for You?
Choosing your germination method really depends on your comfort level and growing style. The paper towel method gives you a clear view of the process but requires a delicate touch when transplanting. Planting directly in soil is the simplest and safest for the plant’s roots, but it requires a bit of faith since you can’t see what’s happening underground. Soaking is fast but demands you act quickly once the taproot appears. Starter cubes are incredibly reliable but do require you to buy extra supplies. If you’re unsure, try experimenting with a few Sale Seeds to see which technique you like best. The most important thing is to find a process that works for you.
How to Prepare Your Germination Station
Before you even think about soaking a seed, take a moment to set up your space. Creating a dedicated, clean, and stable germination station is one of the most important things you can do to ensure your seeds have a strong start. Think of it as building a nursery—you want it to be safe, cozy, and perfectly suited for new life. This isn't a step to rush through. A little preparation here goes a long way, preventing the common issues like mold, rot, and stalled growth that can stop a seed before it even begins.
When you give your seeds a controlled environment, you take the guesswork out of germination. You’re not just hoping for the best; you’re actively creating the conditions for success. Getting this right from the beginning saves you a lot of headaches later and sets the stage for a healthy, vigorous plant that will reward your efforts. It’s the difference between a frustrating start and watching that first tiny taproot emerge with confidence. A proper station also makes monitoring easier, allowing you to make small adjustments to temperature or moisture without disturbing the delicate process. It’s a foundational step that pays dividends throughout your entire grow.
Your Germination Checklist: Tools and Supplies
You don’t need a high-tech lab to germinate seeds, but having the right supplies on hand makes the process much smoother. The tools you need will depend on your chosen method, but most setups require a few basic items. It’s best to gather everything before you start so you aren’t scrambling mid-process.
Here’s a quick checklist for the popular paper towel method:
- High-quality autoflower seeds
- Tweezers (for handling seeds gently)
- Two clean plates or a resealable plastic bag
- Paper towels (unbleached and without dyes are best)
- Spray bottle with filtered or distilled water
If you’re planting directly into a medium, you’ll need your starting pots, soil or starter cubes, and a humidity dome.
Why a Clean Setup Is So Important
Your tiny seeds are vulnerable to bacteria and fungi, so cleanliness is non-negotiable. Before you begin, wipe down your work surface, wash your hands thoroughly, and sterilize any tools you plan to use, like tweezers or trays. This simple step helps prevent contamination that can quickly ruin a batch of seeds. When seeds fail to germinate, it’s often because of environmental factors, and a dirty station is a common culprit. By keeping everything clean, you eliminate a major variable and give your seeds a sterile environment where they can focus all their energy on sprouting.
Final Checks for Your Environment
Cannabis seeds need two things to wake up from dormancy: warmth and moisture. Your job is to provide both consistently. Aim for a steady temperature between 68–77°F (20–25°C). If your room is chilly, a seedling heat mat is a great investment for maintaining a stable temperature. You can also place your setup in a warm spot, like on top of a refrigerator. For humidity, you’ll want to keep the environment moist but not soaking wet. The goal is around 70% humidity, which helps soften the seed’s outer shell. A plastic bag or a humidity dome will trap moisture effectively, creating the perfect microclimate for your seeds to thrive.
A Step-by-Step Guide to Germinate Autoflower Seeds
Once your germination station is ready, it’s time for the main event. This part of the process is all about patience and careful observation. By following these steps, you’ll give your seeds the best possible start and set the stage for a healthy, thriving plant. Remember to be gentle—you’re working with a living thing that’s just about to wake up. Let’s walk through exactly what to do and what to look for as your seeds begin to sprout.
How to Prepare Your Seeds Before Planting
Before you begin, take a moment to prepare your seeds for their new environment. This step is simple but crucial for signaling to the seed that it’s time to grow. If you’re using the soaking method, you’ll place your seeds in a glass of purified water for about 12-24 hours. For the paper towel method, you’ll get your paper towels damp but not soaking wet. The goal is to introduce moisture, which softens the seed’s outer shell and activates the growth process inside. Whichever method you choose, starting with high-quality autoflower seeds is the most important first step to ensure a successful outcome.
A Day-by-Day Germination Timeline
Patience is key during germination. You likely won’t see any action on the first day, and that’s completely normal. Typically, you can expect to see the first signs of life within 2 to 7 days. The exact timing depends on the seed’s genetics, age, and the specific conditions you’ve provided. During this quiet period, the seed is absorbing water and its internal systems are kicking into gear to push out its first root. Just keep the environment stable and resist the urge to poke or prod your seeds. Trust the process and let nature do its work.
Look for These Signs of a Healthy Sprout
You’ll know germination has been successful when you see a tiny, white root emerge from the seed. This is called the taproot, and it’s the first part of the plant to appear. It will look like a small white tail breaking through the shell. This is the moment you’ve been waiting for! The appearance of the taproot signals that your seed is viable and ready to be planted. Handle it with extreme care from this point on, as the taproot is very delicate. Using tweezers can help you move the seed without touching the root directly.
Is It Time to Transplant? Here's How to Tell
Once the taproot is visible and has grown to be about a quarter to a half-inch long, it’s time to move your sprouted seed to its growing medium. If you started directly in soil or a starter cube, you can skip this step. For other methods, gently place the seed into your soil or coco coir with the taproot pointing downwards. Plant it about a half-inch deep and lightly cover it. This orientation helps the plant establish its root system correctly. From here, you’ll begin caring for a seedling as it breaks the surface, which is the next exciting phase of growing your own indoor cannabis seeds.
Planting Your Sprouted Seed Correctly
You’ve successfully coaxed out that first tiny taproot—congratulations! Now comes the most delicate part of the process: moving your sprouted seed to its new home. This is a critical transition where your autoflower seed officially begins its journey to becoming a seedling. It’s a moment that calls for a gentle hand and a bit of precision. Getting the planting depth and orientation right gives your plant the perfect foundation to establish a strong root system and push its way up toward the light. Think of it as tucking your new plant into bed; you want it to be snug, secure, and pointed in the right direction for a healthy start.
Getting the Planting Depth Just Right
When it comes to planting depth, there’s a definite sweet spot. You want to plant your sprouted seed about a half-inch deep in your chosen medium. If you plant it too shallow, the seedling might struggle to anchor itself and could easily topple over. If you plant it too deep, the seedling will have to expend too much precious energy trying to break through the surface, which can stunt its growth or even stop it altogether. After placing the seed in its small hole, gently cover it with soil. Don’t pack the soil down; just a light covering is all it needs to feel secure.
Seed Orientation: Which Way Is Up?
This is one of the most common questions new growers have, and the answer is simple: taproot down. That little white root is the plant’s anchor, and it instinctively wants to grow downward into the soil to search for water and nutrients. To avoid damaging this fragile root, always handle the sprouted seed with a pair of clean tweezers, holding it by the seed casing itself. Carefully place it in the hole with the taproot pointing straight down. This gives your plant a major head start, allowing it to establish its root system efficiently and begin its upward growth without any confusion.
What to Do When Your Seeds Don't Sprout
Even with the best seeds and a perfect setup, you might run into a few hiccups during germination. Don’t worry—it happens to every grower at some point. The good news is that most germination problems are easy to identify and fix. Usually, a small adjustment to your environment is all it takes to get those seeds to pop.
When your seeds don't sprout, it's typically due to one of four things: temperature, water, root issues, or contamination. Let's walk through each of these common problems and figure out how to get your grow back on track. By understanding what your seeds need, you can correct the course and set your plants up for a healthy start.
How to Fix Temperature Problems
Temperature is one of the most critical factors for successful germination. Autoflower seeds need warmth to signal that it's time to wake up and grow, but they are sensitive to extreme fluctuations. If the temperature is too cold, the seeds will remain dormant. If it's too hot or swings wildly, it can stress or even kill the delicate embryo. Consistency is your goal.
Aim to keep your germination station within a stable range of 70–85°F (21–29°C). A simple way to do this is by using a seedling heat mat, which provides gentle, consistent warmth from below. You can also place your setup in a reliably warm spot, like the top of a refrigerator. Use a thermometer to check the temperature of your medium, not just the air, to ensure your seeds are cozy enough to sprout.
Are You Overwatering or Underwatering?
Finding the right moisture balance is like a Goldilocks situation—it needs to be just right. Too much water is one of the most common mistakes. When seeds are waterlogged, they can't get enough oxygen, which can lead to rot. On the other hand, if the medium dries out even once, the germination process can stop completely, and the fragile taproot will wither.
Your goal is to keep the growing medium consistently damp, but never soaking wet. If you're using the paper towel method, the towels should feel like a well-wrung-out sponge, with no excess water dripping out. For soil or starter plugs, the medium should be moist to the touch but not muddy. This careful balance ensures your autoflower seeds have the hydration they need without being suffocated.
Techniques for Old or Stubborn Seeds
Sometimes, you’ll come across seeds that are a little more reluctant to sprout. This is common with older seeds that have been stored for a while, as their outer shells can become extra hard and less permeable to water. It doesn't mean they're not viable; they just need a bit of extra encouragement to get started. Instead of giving up on them, you can try a couple of simple techniques to help them along. These methods are designed to gently weaken that tough outer casing, making it easier for water to get inside and signal that it's time to grow.
Scarification for Hard Shells
Scarification sounds technical, but it’s just the process of physically scratching or weakening the seed’s tough outer shell. Think of it as creating a tiny doorway for water to enter. One of the easiest ways to do this is with a small piece of fine-grit sandpaper. Gently rub the seed along its ridge—the little raised edge—just enough to scuff the surface. You’re not trying to sand it down, just thin the shell slightly. Another method is to carefully rupture the seed coat by gently squeezing it with tweezers until you hear a faint pop, or by making a tiny nick with a sterile blade. Be extremely careful with these methods; the goal is to help, not harm, the delicate embryo inside.
Using Hydrogen Peroxide for a Boost
If a tough shell is the problem, a little chemical assistance can work wonders. Soaking your seeds in a diluted hydrogen peroxide solution is a great way to soften the casing while also providing an extra oxygen atom to the mix. This method also has the added benefit of disinfecting your seeds, killing off any harmful bacteria or fungal spores that might be lingering on the surface. To try this, simply add about one teaspoon of standard 3% hydrogen peroxide to a cup of water. Let your seeds soak in this solution for 12 to 24 hours before moving them to your paper towel or soil. It’s a simple step that can significantly improve your success rate with stubborn seeds.
Tips for Stronger, Healthier Roots
The first thing to emerge from a germinated seed is the taproot, and its health is fundamental to the future of your plant. A strong, white taproot is a sign of a vigorous seedling. If the taproot appears weak, discolored, or fails to grow, it can signal an issue with the seed's viability or, more often, the germination environment.
To give your seeds the best chance, handle them with care once they've sprouted. Use clean tweezers to gently place the seed, taproot down, into its growing medium. This orientation helps the plant establish itself quickly without wasting energy trying to right itself. The paper towel method is excellent for this, as it allows you to visually confirm a healthy taproot before you even plant your seed.
How to Keep Mold and Rot Away
Seeing fuzzy mold or noticing a foul smell is a clear sign that something has gone wrong. Mold and rot are usually caused by a combination of too much moisture and a lack of fresh air. These conditions create the perfect breeding ground for fungi and bacteria that can quickly destroy a viable seed. Sterility and proper moisture levels are your best defenses.
Always start with clean hands and sterilized equipment, including tweezers and containers. Use fresh, clean water—distilled or filtered is a great choice. If you're using a dome or plastic bag to maintain humidity, make sure to open it once a day to allow for air exchange. This simple step prevents the environment from becoming stagnant. By keeping things clean and avoiding overwatering, you can protect your investment in high-quality triploid cannabis seeds and ensure they have a healthy start.
My Go-To Tips for Germination Success
Even with the best methods, germination can sometimes be tricky. Little details can make a huge difference between a tray full of healthy sprouts and a disappointing dud. If you want to give your seeds the absolute best chance at success, a few pro habits can significantly improve your outcomes. It’s all about creating a stable, nurturing environment and handling your seeds with care from the moment you get them. These tips aren’t complicated, but they are the things that separate good growers from great ones. By paying attention to storage, monitoring your environment, and adopting a few key habits, you can set the stage for a thriving garden.
How to Properly Store Autoflower Seeds
Your success starts long before you ever get a paper towel wet. How you store your seeds is critical to their viability. Seeds are living organisms in a dormant state, and improper storage can ruin them before you even begin. The biggest culprits for germination failure are often unsuitable temperatures and moisture levels. To keep your seeds in prime condition, store them in a cool, dark, and dry place. An airtight container in the back of a refrigerator is perfect. This protects them from light, temperature swings, and humidity, ensuring they are ready to sprout when you are. Starting with high-quality autoflower seeds is step one, but proper storage is what preserves that potential.
Keep a Close Eye on Your Setup
Once you’ve started the germination process, your job is to play Mother Nature. Creating and maintaining the right environment is essential for waking your seeds up. You’re aiming for a sweet spot with a steady temperature between 68-77°F (20-25°C) and a humidity level of around 70%. These conditions signal to the seed that it’s safe to sprout. A simple digital thermometer with a hygrometer can help you keep tabs on your setup. Consistency is key, so avoid placing your germination station in drafty areas or spots with direct sunlight that could cause temperatures to fluctuate. This stable environment encourages the taproot to emerge strong and healthy.
Why Timing Is Everything in Germination
Patience is a virtue, especially when germinating seeds. Autoflower seeds typically take anywhere from two to seven days to sprout. Don’t panic if you don’t see a taproot after 24 hours. Some seeds are just a little slower to get going. As long as you maintain the ideal conditions, you can expect a germination rate of 90% or higher. If a week passes and you still don’t see any action, it might be time to gently check on the seed or review your setup to see if any adjustments are needed. Understanding the typical timeline helps you know when to wait and when to troubleshoot.
Start These Good Habits from Day One
The habits you form during germination will serve you well throughout your entire grow. One of the most important is proper watering. Your medium should always be damp but never waterlogged or soggy. Too much water can drown the seed and invite mold, while too little will stop the germination process in its tracks. Using a spray bottle to gently mist the medium is a great way to maintain consistent moisture without overdoing it. Covering your container with a plastic dome or wrap can also help lock in the high humidity that seeds love, creating a perfect little greenhouse for your future plants.
Critical Advice for Autoflower Plants
Once your seed has successfully sprouted, the clock is officially ticking. Autoflowers live life in the fast lane, and their rapid growth cycle means they have very little time to recover from stress. The choices you make in these first few weeks will have a huge impact on your final harvest. Unlike photoperiod plants that can be given extra time to bounce back, an autoflower’s schedule is non-negotiable. This means you need to be proactive and gentle, creating an ideal environment that allows the plant to reach its full potential without any setbacks. Here are a few critical pieces of advice to keep in mind as your seedling begins its journey.
Avoid High-Stress Training and Pruning
With traditional cannabis plants, techniques like topping or heavy pruning can encourage bushier growth and bigger yields. However, with autoflowers, these high-stress methods can do more harm than good. Because an autoflower has a short, predetermined lifespan, it doesn’t have the luxury of time to recover from the stress of being cut or damaged. Any period of shock or slowed growth is time that can’t be regained, which often leads to a smaller, less productive plant. Instead of high-stress training, stick to gentle, low-stress training (LST) if you want to shape your plant. This involves carefully bending and tying down branches to expose more bud sites to light, guiding its growth without causing any trauma.
Encourage Strong Roots with Boosters and Fungi
A healthy plant starts with a healthy root system, and this is especially true for fast-growing autoflowers. To give your plant the strongest possible foundation, consider amending your soil with beneficial microbes. Mycorrhizal fungi are a fantastic addition, as they form a symbiotic relationship with the plant's roots. In simple terms, the fungi act as an extension of the root system, reaching further into the soil to absorb water and nutrients that the plant couldn't get on its own. This supercharges the plant’s ability to feed itself, promoting vigorous growth from the very beginning. You can add these beneficials to your soil when you first plant your seed, setting it up for success right from the start.
Consider Using Fabric Pots
The container you choose to grow in plays a surprisingly big role in root health. Traditional plastic pots can cause roots to circle around the bottom, leading to a tangled, root-bound plant. Fabric pots are a simple and effective solution to this problem. The breathable material allows roots to be "air-pruned." When a root tip reaches the edge of the pot and is exposed to air, it naturally stops growing in that direction and instead sends out new feeder roots. This process encourages the development of a dense, fibrous root ball that is much more efficient at absorbing water and nutrients. As a bonus, the porous fabric also helps prevent overwatering by allowing excess moisture to evaporate, protecting your autoflower seeds from root rot.
Your Seedling Has Sprouted! Now What?
Your seeds have sprouted—congratulations! You’ve successfully navigated the first critical step. Now, the goal is to help that tiny taproot and first set of leaves grow into a strong, healthy plant. The seedling stage is short but vital, and giving your new plants the right care from day one sets them up for a successful harvest. This phase is all about providing a stable, gentle environment where your seedlings can establish strong roots and begin their journey.
Your Seedling's First Week: A Care Guide
During their first week, your seedlings are incredibly delicate. They’ve just used a ton of energy to break out of their shell and need a gentle transition. Once they sprout, slowly introduce them to light. Blasting them with intense light right away can cause shock and stunt their growth. Instead, use a low-intensity grow light or place them further from a powerful one. Keep their environment stable with consistent temperatures and high humidity to mimic germination conditions. This careful approach helps your autoflower seeds build the strength they need for vigorous growth later on.
Setting a Consistent Light Schedule
While your seeds needed darkness to sprout, the moment they break through the soil, they need light to start making food through photosynthesis. Darkness signals to the seed that it’s safely underground, but once it emerges, light is its signal to grow. For autoflowers, a consistent light schedule of 18 hours on and 6 hours off is a great standard to follow from the seedling stage all the way to harvest. This gives them plenty of light to grow quickly without the stress of 24-hour light. Your seedlings are still very fragile, so you don't want to overwhelm them. Start with a low-wattage fluorescent light or a dimmable LED placed about 18-24 inches above them. This provides the energy your autoflower seeds need without the risk of light burn.
Strengthening Stems with Gentle Airflow
A little bit of a breeze does a seedling good. Gentle airflow is crucial for developing a strong, sturdy stem that can support the weight of future buds. In nature, a light wind constantly challenges a young plant, forcing it to build up its structural integrity. You can replicate this indoors with a small, oscillating fan. Place the fan a few feet away and set it to its lowest speed. You want to see the leaves gently rustling, not being thrashed around. This subtle movement encourages the stem to thicken and strengthen. Good air circulation also helps regulate temperature and humidity around the plant and prevents stagnant air, which can be a breeding ground for mold. It's a simple step that makes a big difference for your indoor cannabis seeds.
How to Water Your New Seedlings
Overwatering is one of the most common mistakes that can quickly kill seedlings. Their tiny root systems can easily drown or develop rot in soggy soil. The key is to keep the growing medium consistently damp, but never waterlogged. Use a spray bottle to gently mist the soil around the seedling instead of pouring water directly on it. This prevents you from dislodging the fragile plant. You can cover the container with a clear plastic dome to maintain high humidity, which the seedlings love. Check the soil daily with your fingertip; if it feels dry, it’s time for another light misting.
When Should You Start Feeding Your Seedlings?
Your seedlings don’t need a gourmet meal right out of the gate. In fact, the seed itself contains all the nutrients needed to grow its first set of leaves, called cotyledons. If you planted your seeds in a rich, living soil amended with compost or worm castings, you likely won’t need to add any nutrients for the first two to three weeks. The soil provides everything the plant needs. If you’re using a more neutral medium like coco coir, wait until the first set of "true" (serrated) leaves appears. Then, you can introduce a very diluted nutrient solution, starting at about one-quarter of the recommended strength to prevent nutrient burn on your delicate cannabis clones and seedlings.
How to Track Your Seedling's Progress
The seedling stage for autoflowers is a quick but exciting phase, typically lasting two to three weeks. During this time, your main job is to be a careful observer. Watch for the development of the first true leaves, which look like the classic serrated cannabis leaves. This is a sign that your plant is healthy and moving into its vegetative stage. Pay attention to the stem—if it’s long and skinny, your plant might be "stretching" for more light. Yellowing leaves could signal a watering issue. Catching these small signs early allows you to make adjustments before they become bigger problems, ensuring your feminized seeds grow into thriving plants.
Common Germination Myths Debunked
When you're learning a new skill, it’s easy to get tangled up in conflicting advice, and germinating cannabis seeds is no exception. The internet is full of tips and tricks, but some of them are outdated or just plain wrong. It’s time to clear the air. We’re going to look at a few of the most common myths floating around and break down what’s actually happening with your seeds. Understanding the "why" behind the process will help you make better decisions and give your plants the strong, healthy start they deserve.
Myth: Seeds Need Complete Darkness
This one is mostly true, but the reasoning is what’s important. While a mature cannabis plant loves light, its seeds prefer the dark to germinate. Darkness signals to the seed that it’s safely underground, where it can send out its taproot without risk of drying out or being damaged. This is why methods like placing seeds in a dark cupboard or between two plates work so well. You don't need a pitch-black void, just an environment that mimics being buried in soil. This simple signal tells your outdoor marijuana seeds that it's safe to begin their journey to the surface.
Myth: Soaking Seeds Longer Is Always Better
Soaking seeds is a great way to soften their shells, but there’s a point where it does more harm than good. The idea that a longer soak equals a better chance of sprouting is a dangerous misconception. Seeds are living things that need oxygen to respire, even during germination. If you leave them submerged for too long, you’re essentially cutting off their air supply. As a rule, don’t leave them in the water for more than 32 hours, as they can drown. A 12- to 24-hour soak is usually all it takes to give your THCA seeds the jumpstart they need.
The Great Debate: Transplanting Autoflowers
For photoperiod plants, starting in a small pot and transplanting later is standard practice. But with autoflowers, it’s a different story. Because they run on a fixed internal clock, any stress—including the shock of being transplanted—can stunt their growth. They don’t have time to recover like other plants do. Planting directly into the final container is a hands-off approach that is especially good for autoflowers, as they don’t like having their roots disturbed. By skipping the transplant, you ensure they have an uninterrupted path from seedling to harvest, maximizing their potential.
Related Articles
- What are Autoflower Seeds?
- Autoflower Seeds for Beginners: Grow Fast & Easy
- How to Germinate Marijuana Seeds Successfully
- 10 Best Autoflowering Seeds for Fast Harvests
- Auto Cannabis Seeds: The Ultimate Beginner's Guide
Frequently Asked Questions
Should I start my autoflower seed in a small cup or its final pot? For autoflowers, I almost always recommend planting directly into the final pot. Because their lifecycle is so short, they are sensitive to stress, and transplanting can shock their root system. This shock can pause their growth for a few days, and with an autoflower, you just don't have that time to spare. Starting in the final container eliminates that risk and allows the plant to establish its roots without any interruptions.
When should I introduce light to my new seedling? As soon as you see the seedling break through the soil, it's time to introduce a light source. In the beginning, your seedling is very delicate, so you don't want to blast it with an intense, high-powered light. Start with a gentle light source, like a low-wattage fluorescent or LED, or simply place your main grow light much further away than you normally would. This gives the seedling the light it needs for photosynthesis without overwhelming it.
My seed sprouted a taproot, but it's not growing anymore. What happened? This is a common and frustrating problem that usually points to an environmental issue. Most often, the growing medium is either too wet, which suffocates the delicate taproot, or it has dried out, which causes the root to wither. It can also happen if the temperature is too cold or fluctuates wildly, stalling the seed's growth. Check that your medium is consistently damp like a wrung-out sponge and that the temperature is stable.
How can I tell if my old seeds are still good to plant? The best first check is a visual and physical one. A viable seed should be dark in color, feel firm, and not crumble when you apply gentle pressure. If you're still unsure, you can try a float test. Place your seeds in a glass of room-temperature water for a few hours. Healthy, viable seeds will typically absorb water and sink to the bottom, while old or immature seeds often continue to float.
Is it okay to use tap water for germination? While you can use tap water, it's not always the best choice. Tap water often contains chlorine and other minerals that can be harsh on a delicate sprouting seed. For the best results, I recommend using purified or distilled water. If tap water is your only option, you can let it sit out in an open container for 24 hours. This allows much of the chlorine to evaporate, making it a bit gentler for your seeds.